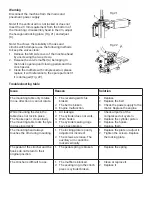
Usage
Assembly and disassembly of large flat tyres is
difficult work. With the help of 056, the arm helps to
mount/dismount the tyre from the tyre clutch and
makes the operation easier. This is a good help for
the tyre changer.
Attaching the tires
Loosen the clamp according to the manual.
Squeeze the tyre from the outside, tighten the
corresponding pedal to open the hooks. Place the
tyre on the mounting table. Press the
corresponding pedal to close the hooks until they
are close to the rim.
Dismantling of tires
1. Normally the tyre is tightly attached to the rim.
Loosen the tyre with tyre weight rollers first, or
use the clinch press. Pull the auxiliary arm
above the tire. Place the tyre weight rollers
above the tyres so that they do not touch them.
Lay down tyre weight rollers to push the tyre
down. Press the pedal that rotates the
assembly table. Loosen the clamp from the tyre
(Fig. 11).
Warning: Lubricate tyre weight rollers (upper) and
clinch before operation.
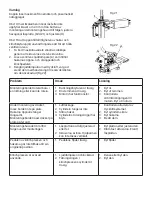
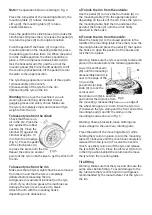
2. Disassembly of the upper clinch.
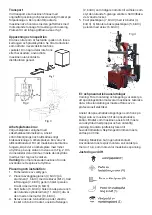
a) Move the mounting head near the edge of the
rim, turn the tyre pressure lever to move the tyre
pressure block above the tire, press the shift lever
to push in the tyre and insert the lift arm in the
space between the tyre and the rim, then hang the
clamp on the mounting head. (Fig. 14, 15)
b) Raise the auxiliary lever, turn the tyre’s printhead
in the opposite direction. Press the tyre with the
shift lever to create enough space.
c) Press the pedal for the mounting table so that
it rotates. With the help of the tyre’s print head, the
upper tyre lock is released.
d) Raise the auxiliary arm to move the tyre press
block to its working position.
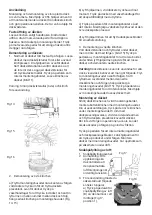
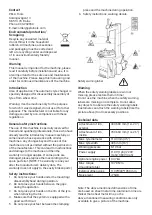
Disassembly of the lower clinch.
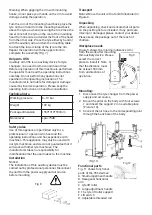
Turn the tyre weight roller and move it under the
tire, but do not touch it with the rim. (Fig. 15) Press
the pedal of the mounting table to rotate the table,
meanwhile gradually lifting the auxiliary arm to
loosen the tyre and disassemble the lower clutch.
Warning
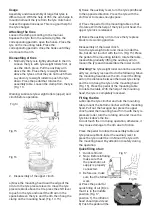
The tyre weight roller cannot be used for
all tyres, some tyres need to do the following: Move
the mounting head above the rim. Insert the lifting
arm in the distance between the lower tyre clamp
and the rim, hang the tyre on the mounting head
(Fig. 15). Press the pedal of the mounting table
to rotate the table. With the help of the mounting
head, the tyre is completely loosened.
Fitting the tire
Lubricate the tyre clincher and turn the mounting
table, mount the bottom clincher with the mounting
head. Pull out the hexagon bar, press the upper
clinch under the mounting head 5 mm with the tyre
pressure roller, turn the rotating arm and move the
tyre block above the tire.
Do not touch the rim during operation, otherwise, it
may cause damage to the rim due to friction.
Press the pedal to rotate the assembly table and
tyre pressure block, lower the auxiliary lever to
press the tyre under the rim. Mount the tyre with
the mounting head. Pay attention to safety during
the operation.
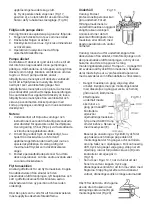
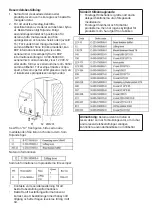
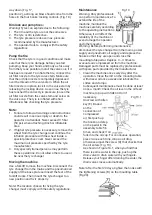
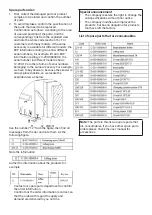
Quick filling of air:
1. Quick refill unit:
2. Note: Before inflating,
make sure that
the pneumatic air
supply is properly
connected.
3. Before use, make
sure that the following devices
work:
a) Press the pedal for
quick filling of air (B) so
that it is in the middle
position (Fig. 17,
position 1), the inflation
head should provide air.
b) Push the pedal all the
Fig 14
Fig 15
Fig 16
Fig 17
Fig 18
Summary of Contents for 507083
Page 1: ...Tyre changer U 6656AT Däckmaskin U 6656AT en hastighet Item No 507083 ...
Page 10: ......
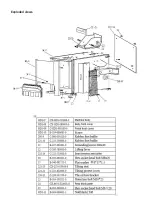
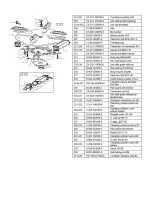
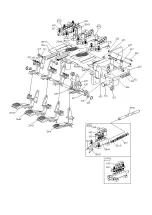
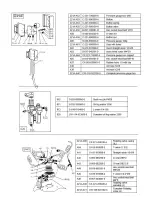
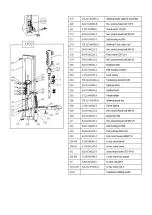
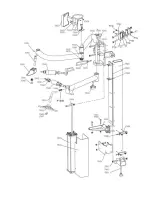
Page 19: ...Exploded views ...
Page 20: ......
Page 21: ......
Page 22: ......
Page 23: ......
Page 24: ......
Page 25: ......
Page 26: ......
Page 27: ......
Page 28: ......
Page 29: ......
Page 30: ......
Page 31: ...Wiring diagram ...
Page 32: ......


