


Status 14.07.09
We reserve the right to make
changes favouring technical
progress.
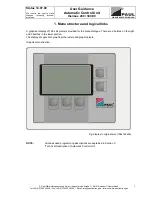
Operating Instructions
thermos 200 / 300 DC
with automatic control unit
®
WÄRMERÜCKGEWINNUNG
© Paul Wärmerückgewinnung GmbH • August-Horch-Straße 7 • 08141 Reinsdorf • Deutschland
Tel: +49(0)375-303505-0 • Fax: +49(0)375-303505-55 • E-Mail: [email protected] • Internet: www.paul-lueftung.de
5
2.9
External room temperature sensor
When using a duct heater or heating circuit, the programmer may have to be installed in a place other than
the reference space. It is then possible to install an external room temperature sensor to be connected to
the programmer according to Appendix 4.1. In such case, the internal sensor of the programmer needs to
be removed.
2.10 Additional
programmer
The MVHR unit can be operated by several (maximum 5) programmers connected in series (e.g. one next
to the MVHR, a second one in the living room). If a duct heater is used, the room temperature is recorded
by the first programmer, i.e. the programmer closest to the control unit. The connection shall be made
according to Appendix 4.1.
3. MVHR Installation
3.1
Installation of the mechanical ventilation heat recovery (MVHR) unit – air duct connections
•
Leave enough space to allow for filter changes and maintenance work.
•
For better maintenance, use flexible hoses for direct air duct connections to the unit. We recommend
1 … 2 metre flexible silencer hoses
∅
160 for proper sound insulation. The air ducts can be
connected to the MVHR unit from the side or rear (see Technical Data). Seal off any openings not
used in your system configuration with blind plugs and adhesive material (e.g. silicone) to create
airtight connections.
•
After each cleaning operation (every 2 years), re-assemble the fan box and the heat exchanger box
(press tightly) and lock them using the (blue) assembly caps.
•
Leave enough space for removing and putting back the blue assembly caps: 500 mm from the right
and 100 mm from the rear of the MVHR unit.
•
The MVHR unit should be raised (approx. 200 mm) from the floor to ensure sufficient slope if the
condensate is discharged over a longer distance.
•
The MVHR unit must be installed in a frost free place!
•
The MVHR unit should be placed on a heavy and solid plate for dampening vibrations and preventing
vibration transmissions to structures. Also, an expanded rubber mat (or similar soft material) can be
inserted between the plate and the MVHR unit. (Refer to Appendix 2 Sound insulation)
•
Check the filters are properly positioned: see arrow
Air ducts shall have heat insulation, no less than 50 mm, in the following cases:
•
Cold air ducting in warm rooms (tape insulation to provide an airtight seal)
•
Warm air ducting in cold rooms
Where appropriate:
•
Frost protection pre-heater
•
Air duct heater for back-up heating
3.2
Power supply / electric control
A 3 metre long control cable connects the thermos 200 / 300 DC MVHR unit with its control unit. A power
cord connects the control unit with a 230 VAC 50 Hz socket outlet to be provided by the user at the place
of installation of the control unit.
Important:
•
Never lay control cables to programmers and sensors next to 230/400 VAC cables (minimum
distance of 20 cm) and never lay out cables in loops.
•
Install the control unit in a way to ensure there is no heat build-up and sufficient space for
service access. Never enclose or “bury” the control unit (e. g. no flush mounting).
•
The internal temperature sensor of the programmer must record the temperature of the room
air.
Summary of Contents for thermos 300 DC
Page 2: ......
Page 46: ......
Page 47: ......
Page 48: ......
Page 52: ......
Page 53: ......
Page 54: ......
Page 55: ......
Page 56: ......
Page 57: ......
Page 58: ......
Page 59: ......
Page 60: ......
Page 61: ......
Page 62: ......
Page 63: ......
Page 64: ......
Page 65: ......
Page 66: ......


