background image

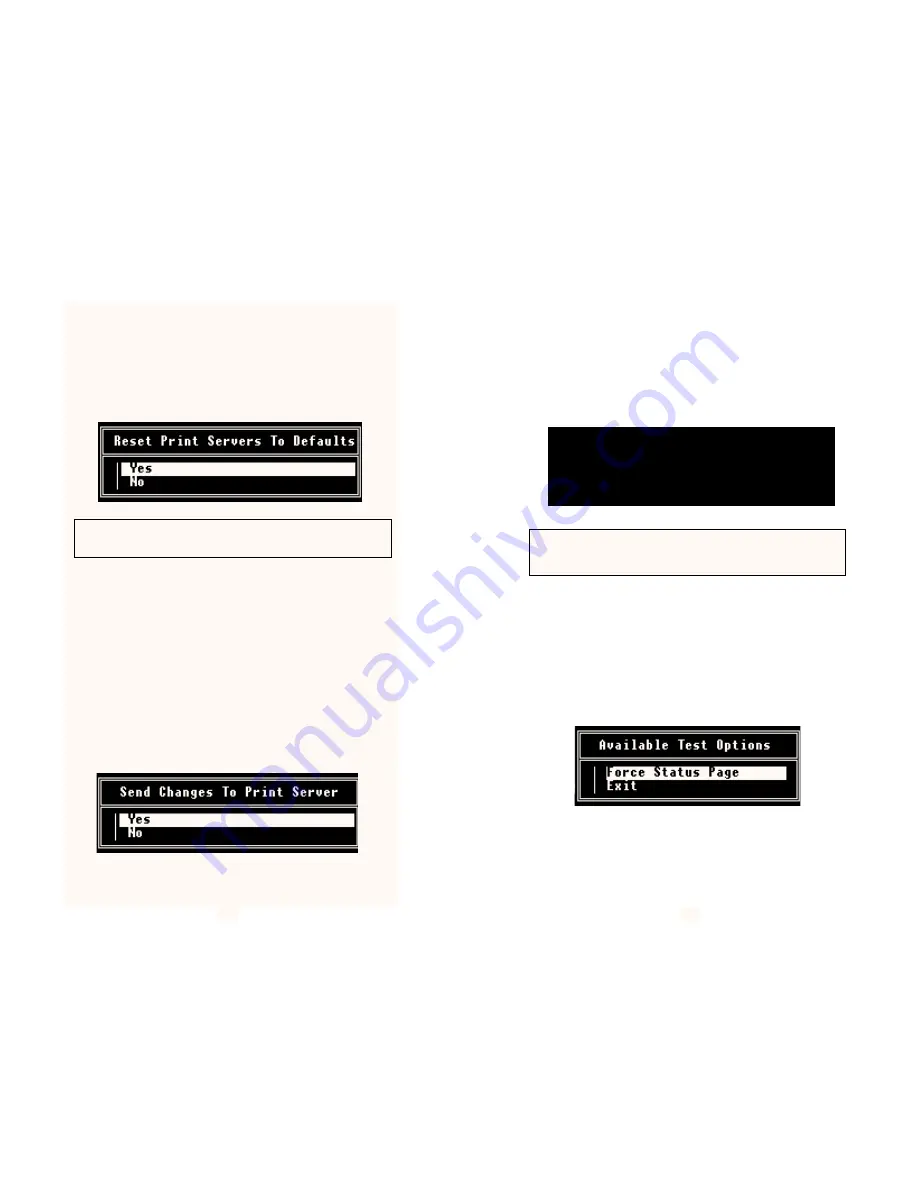
4.2.6  Reset to Factory Defaults

The sixth option on the Available Configuration Options screen

resets the Print Server to all Factory Defaults.  If you select “Yes” on the
Reset Available Configuration Options screen, UCONNECT will reset
the Print Server and return you to the .  If you select “no” on the Reset
screen, UCONNECT will return you immediately to the Available
Configuration Options screen.

4.2.7  Exit

The seventh option on the Available Configuration Options screen

exits to the Main Menu.  However, you will exit directly to the Main
Menu only if you have made no changes to the configuration of the unit.
If you have made changes, you will be sent into the following sequence: 

1) If you select Exit and you have made configuration changes, you will
next see the Send Changes screen.  If you select “No” on this screen,
you will go immediately to the UCONNECT Main Menu and your
changes will not be saved
.  If you select “Yes”, you will receive a
timeout at the bottom of your screen while UCONNECT sends your
configuration changes  to the Print Server.  (Note: the changes you
entered will not take effect until the Print Server is rebooted.) 

17

Warning!  If you select “Yes” you will lose all changes you have
made in the configuration process.

2) After you have sent your configuration changes to the print server
and have seen a timeout at the bottom of your screen, you will then see
the Reboot screen.   Selecting “Yes” on the Reboot screen immediately
reboots the print server and takes you to the DOS prompt.  The
configuration changes you have entered will now be in effect.  Selecting
“No” on the Reboot screen takes you immediately to the UCONNECT
Main Menu.  Your configuration changes will then not take effect until
the next time the Print Server is rebooted.

4.3  Testing  within Novell using UCONNECT

The UCONNECT utility may be used to test the Print Server in a

Novell environment.  To access the Available Test Options screen,
perform the operation described in Section 4.2, choosing Test from the
Main Menu instead of Configure.  When the screen appears, pressing
[ENTER] will cause the Print Server to print a status page, thereby
testing the setup.  Choosing “Exit” will take you back to the DOS
prompt.

18

Reboot Print Server for Changes to Take Effect

Yes

No

Warning!  Do NOT remove power while the timeout message is
displayed!  Only after the timeout message disappears is it safe to
remove power from the Print Server.

Summary of Contents for MODEL 2126

Page 1: ...USER MANUAL MODEL 2126 PeNetTM Miniature 10Base2 to Parallel Print Server SALES OFFICE 301 975 1000 TECHNICAL SUPPORT 301 975 1007 07M2126 A Doc 081021UA Revised 3 07 96...

Page 2: ...warranties expressed or implied and the installation or use of this product shall be deemed an acceptance of these terms by the user 1 1 Radio and TV Interference The Model 2126 generates and uses ra...

Page 3: ...e of power loss the Model 2126 can restore connection to servers that are downed It also supports all the Novell printing and print server features The PeNetTM supports print speeds greater than 60 00...

Page 4: ...er status page b Is your printer set up for Postscript If so this will interfere with the default set up of the Print Server The status page may be garbled or may not print at all See Section 4 8 on G...

Page 5: ...assword are as allocated in PCONSOLE 3 Check that there is a connection available for the Print Server use Monitor on the Server Console 4 If Selective Login is enabled ensure correct File Server name...

Page 6: ...the menus use the arrow keys to scroll up and down between menu items The esc key is a toggle switch used to select and deselect menu items to be edited The ENTER key is used to update the file and m...

Page 7: ...the arrow keys to scroll between lines Use the esc key to select and deselect search methods Press ENTER to update the file with your selections and go to the next screen 11 6 The Start Scan for Prin...

Page 8: ...of Novell compatible network operating systems This section will guide you through the various configuration options 4 2 1 General Configuration The first option on the Available Configuration Options...

Page 9: ...nfigure Use the arrow and esc keys to scroll and select the print server you wish to configure Then press ENTER 15 2 Once you have selected a print server to configure you will receive the Advanced No...

Page 10: ...il the Print Server is rebooted 17 Warning If you select Yes you will lose all changes you have made in the configuration process 2 After you have sent your configuration changes to the print server a...

Page 11: ...understanding of the Novell printing system More information is available from Novell s Concepts and Print Server manuals The PeNetTM Print Server interface fully supports all common Novell print com...

Page 12: ...N This section tells how to use the Print Server with a TCP IP network Functions described include locating the Print Server on the network configuration initialization testing printing and FLASH EPRO...

Page 13: ...nd PESETUP Enter Setup Password PATTON Menu Displays Once connection to the Print Server has been achieved using the Telnet Protocol it is then simply necessary to enter the command PESETUP to enter t...

Page 14: ...use SMIT to add a host with the PeNetTM Print Server s Host Name Add a remote queue and specify Destination Host as above and Queue on Remote Printer Pport1 or other PeNetTM Print Server port Set the...

Page 15: ...based method of FLASH upgrade it is firstly necessary to establish an FTP connection to the Print Server in the same way as that used when printing to the unit via FTP Typically this will be achieved...

Page 16: ...l wall mount 120V AC domestic 220V AC international Temperature Range 2 60 C 37 140 F Altitude 0 10 100 feet Humidity Up to 95 non condensing Dimensions 4 0 x 2 1 x 0 8 Weight 3 oz max 29 APPENDIX B I...

Reviews: