


February 2003
2-3
1010-A2-GN21-00
2. Windows Environment
Step 4
Type a number that corresponds to the application you are
installing, then press <
Enter
>. The window displays your
workstation capacity and informs you of meeting the installation
requirement.
Step 5
Type
q
, then press <
Enter
> to quit. Or press any key to return to
the menu selection window to continue with system check for
other application you are installing.
Installing
JetVision Server
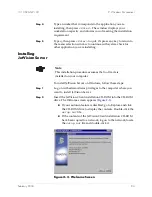
To install JetVision Server on Windows, follow these steps:
Step 1
Log on with administrator privileges to the computer where you
want to install JetVision Server.
Step 2
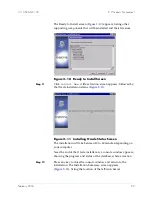
Insert the JetVision Client installation CD-ROM into the CD-ROM
drive. The Welcome screen appears (
Figure 2–3
).
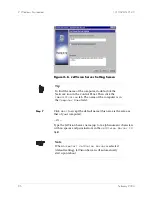
If your autorun feature is disabled, go to Explore and click
the CD-ROM drive to display the contents. Double-click the
setup.bat
file.
If the contents of the JetVision Client installation CD-ROM
have been copied to a network, log on to the network, locate
the
setup.bat
file and double-click it.
Figure 2–3. Welcome Screen
Note
This installation procedure assumes that no Oracle is
installed on your computer.


