


18
To select the desired characters:
Touch the keys multiple times as needed.
Use the
buttons to highlight the keys, and then press
ENTER
,
multiple times as needed.
SYM
= Access the following symbols:
\ / : ; ( ) $ & [ ] . , % ^ + = - | < > { } ! ~
NUM
= Toggles between numeric and letter characters
ABC/abc
= Toggles between upper and lower case letters
= Scroll through your entry to edit as needed
Backspace
= Erases last selected character
Done
= Completes entry
Cancel
= Return to the previous screen without an entry
Note
:
You can also use the remote control buttons as follows:
‘
+
’ = Scroll forward through entry to edit as needed
‘
-
‘ = Scroll back through entry to edit as needed
ROTATE
= Backspace, erases last selected character
ZOOM
= Toggles between SYM / NUM / ABC / abc screens
Set up Wireless Network
Note
: You must have an active wireless network within range of the DPF, and the Pandigital wireless Wi-Fi USB Adapter must be connected to the DPF.
(Wi-Fi adapter sold separately on our website:
http://www.pandigital.net
.
)
1.
Insert the Pandigital wireless USB adapter into the USB Host port on the DPF.
2. On
the
HOME
screen, touch or press
MENU
to display the
Setup Menu
screen.
3. Select
Wi-Fi Network Setup
. The
Network Setup
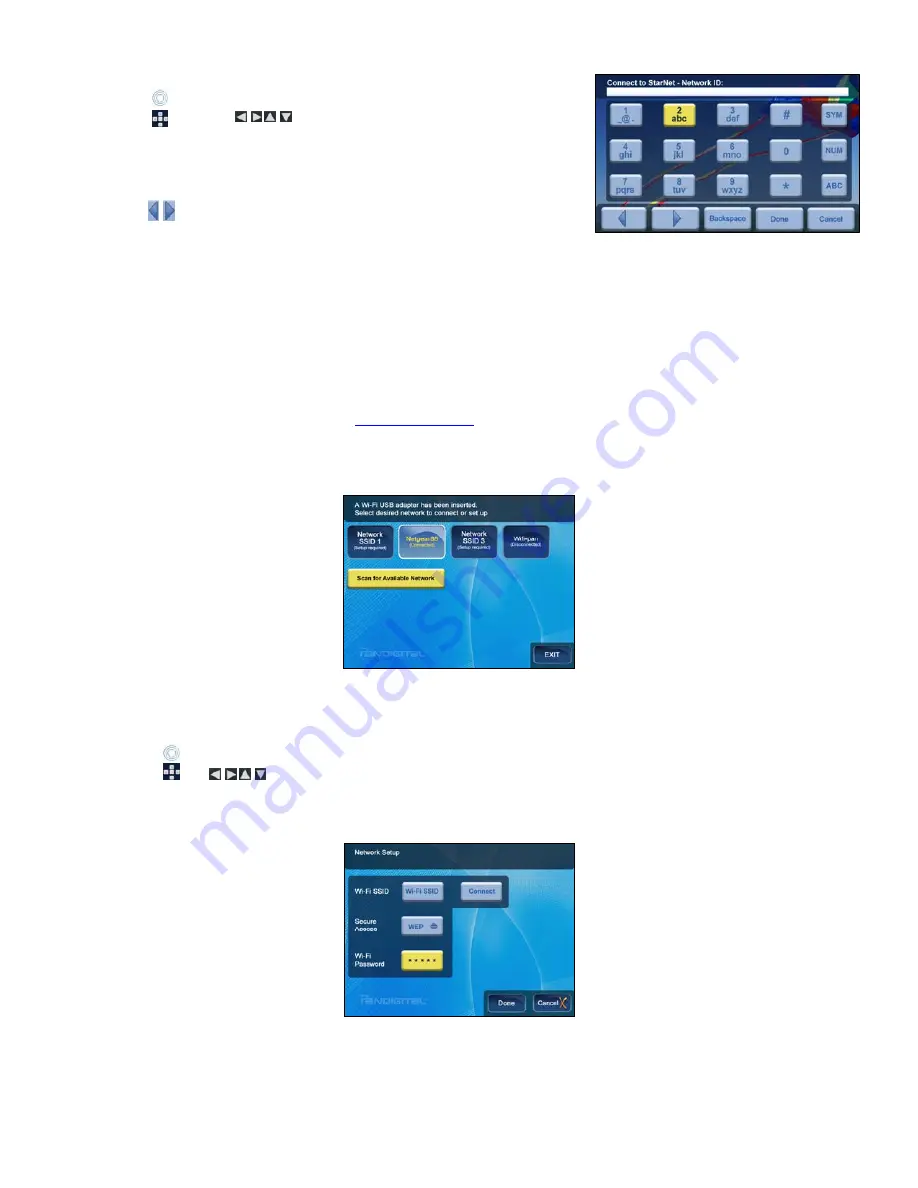
window will be displayed, similar to this example:
4. Select
Scan for Available Network
. The wireless networks within range will be listed.
TIP
: If your wirless network is configured to be ‘hidden’, the scan will not list it as an available network. In this case, select one of the Network SSID
buttons to manually enter the Network ID.
5.
Touch the
down arrow to scroll through the list, and then touch
Done
to select the desired network.
Use
to scroll through the list, and then press
ENTER
to select the desired network.
6.
The virtual keyboard will be displayed; enter your wireless network password, and then select
Done
. (The password is case sensitive; use the
‘ABC/abc’ ‘NUM’ and ‘SYM’ keys as needed for correct characters.)
The
Network Setup
screen will be displayed, similar to this example:
7.
If necessary, change the
Secure Access
type by selecting the
Secure Access
button multiple times.
8. Select
Connect
. Do not touch the screen or press any other keys until the connection completes (20-30 seconds).


