87
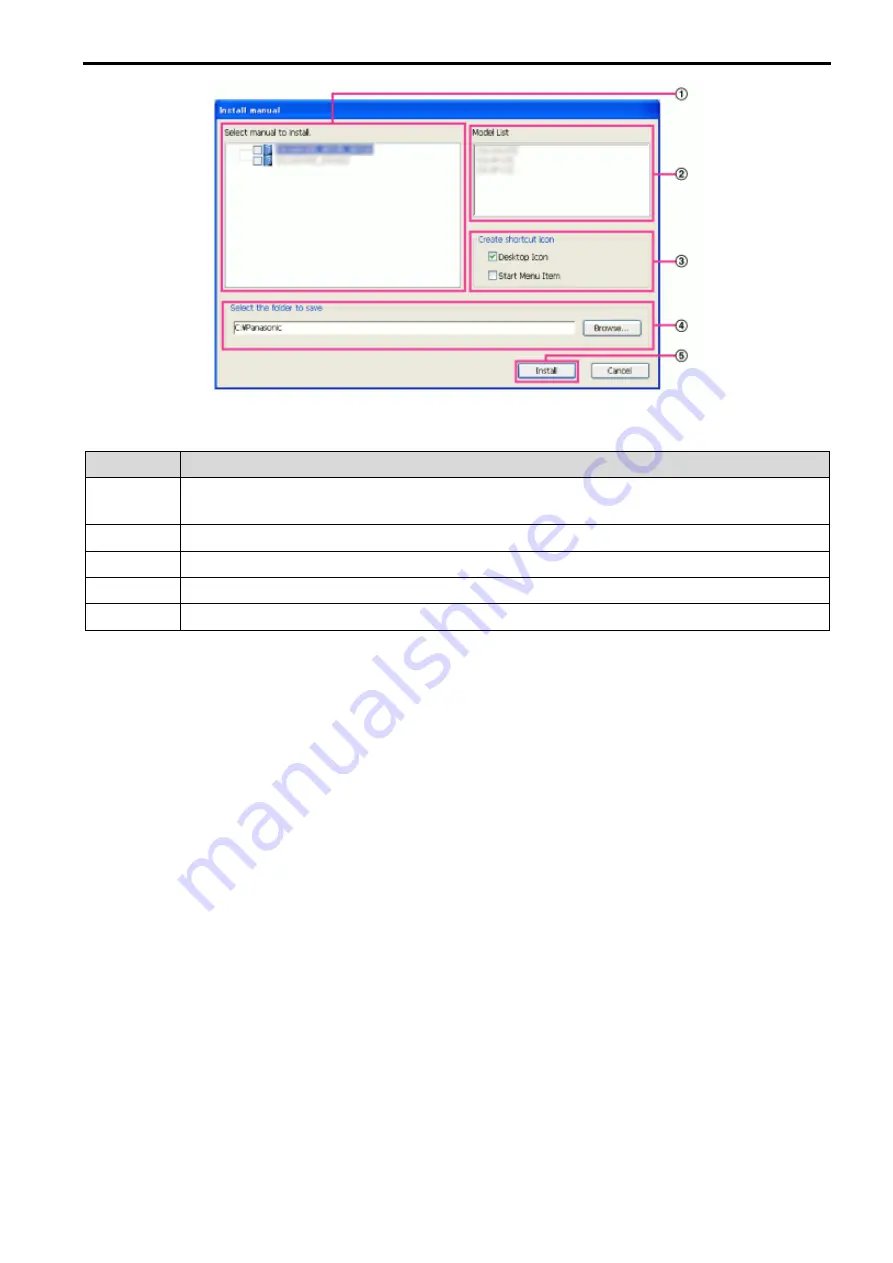
Figure 8-3
Procedure
Contents
1
Select which manuals to install. The camera models that the manuals support are displayed
in “Model List”.
2
The camera models that are supported by the manuals selected in are displayed here.
3
Select where to create the manuals shortcut icon when the manuals are installed.
4
Specify which folder on the PC to install the manuals to.
5
Click the [Install] button to start the installation.
Note
•
To uninstall the manuals delete the shortcut icon from where you specified it to be installed (the default
is on the desktop) during installation and the [Manual] folder from the folder (the default is
C:\Panasonic) you specified during installation.
8.4 Installing the Viewer software
The Viewer software (Plug-in Software) must be installed on the PC in order to display camera images. On
the CD launcher window, click the [Install] button next to [Viewer Software], and follow the instructions
displayed on the window to install the software.
Note
•
To uninstall the Viewer software, follow the steps below depending on the OS used on your PC.
Delete [webrec] folder in [Program Files].
8.5 Configure the network settings of the camera using the Panasonic “IP
Setting Software”
It is possible to perform the network settings of the camera using the “IP Setting Software” on the provided
CD-ROM. When using multiple cameras, it is necessary to configure the network settings of each camera
independently. If the Panasonic “IP Setting Software” does not work, access the “Network” page from the
setup menu of the camera in the browser and perform settings separately. (
→
7.3 Network)
IMPORTANT
•
The “Windows Security Alert” window may be displayed when starting the “IP Setting Software”. In this


