38
Configuration of each setting item in the setup menu should be completed in advance to use this recorder.
The setup menu has the following levels for the setting items. On "Easy Start", the minimum settings required to operate the
recorder will be performed, but other settings will remain default. On the [Basic setup] or [Advanced setup] page, the settings can
be customized in accordance with a variety of operational modes.
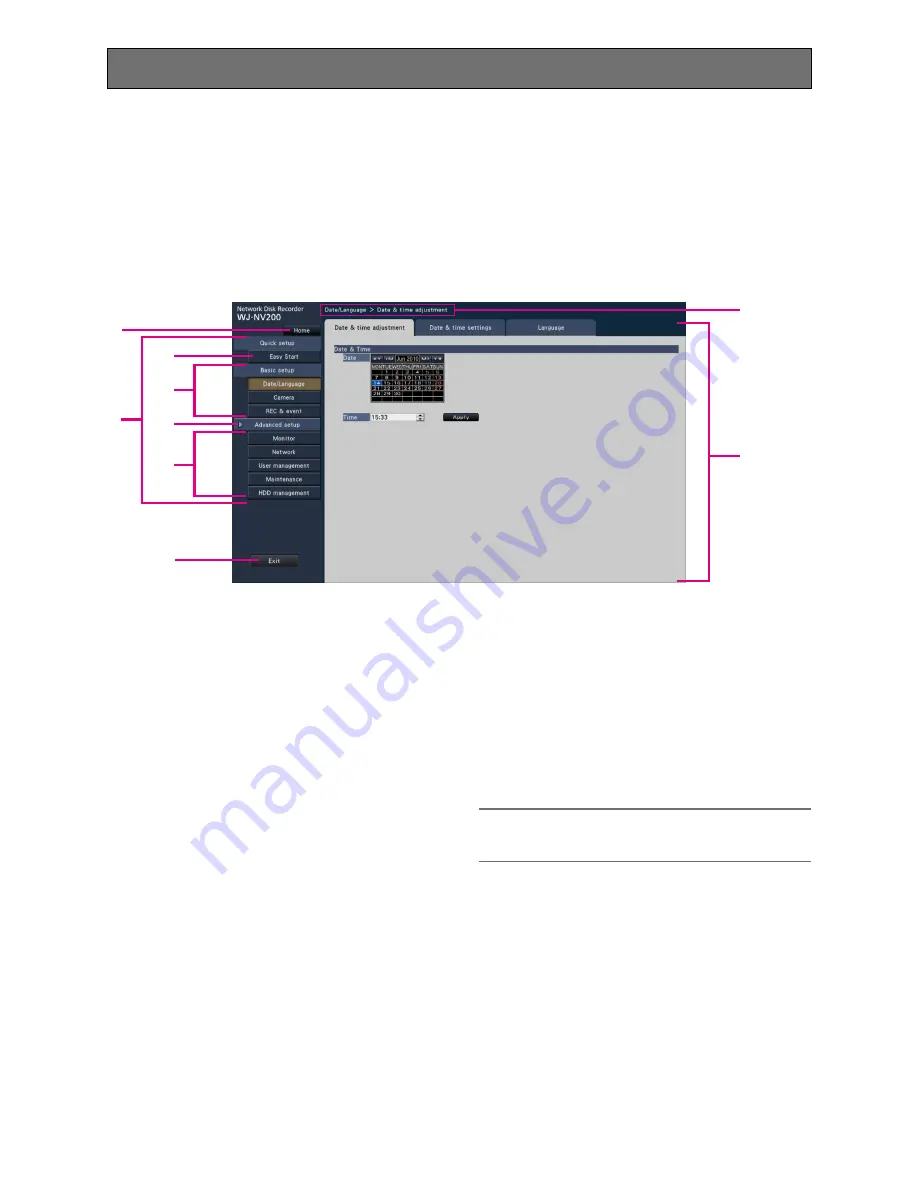
The following is the example of the setup menu that describes the features and operations.
The setup menu will be displayed when clicking the [Setup] button (
☞
page 36) at the upper right corner of the operational
screen on the main monitor.
The buttons of the setup pages will be displayed on the left column of the setup menu.
Setup menu
q
[Home] button
It is possible to return to the top screen (
☞
page 36) of
the setup menu from any setup page.
w
Setup menu panel
Displays buttons of the setup pages.
e
[Easy Start] button
It is possible to configure the minimum settings required
to operate the recorder, such as date & time and camera
registration.
r
[Basic setup] – Setup page buttons
Each "Basic setup" page will be displayed.
t
[Advanced setup] button
The buttons to open the corresponding setup pages of
the "Advanced setup" menu will be displayed. When
clicking this button again, the buttons will be hidden.
y
[Advanced setup] – Setup page buttons
Each "Advanced setup" page will be displayed.
u
Hierarchical display
The name of the current setup page will be displayed in
the hierarchy. The tab name will also be included.
i
Setup page
Displays each setup page. If the current setup page is
composed of two or more tabs, it is possible to change
the page display by clicking the tabs.
o
[Exit] button
Applies the settings to the recorder and closes the setup
menu to return to the operational screen.
Except for some cases, the descriptions of this document
follow the hierarchical display and setup pages.
Important:
• If the settings are applied, all login users will be forcibly
logged out.
q
w
r
e
t
y
i
u
o
Summary of Contents for WJ-NV200K
Page 101: ...101 ...


