81
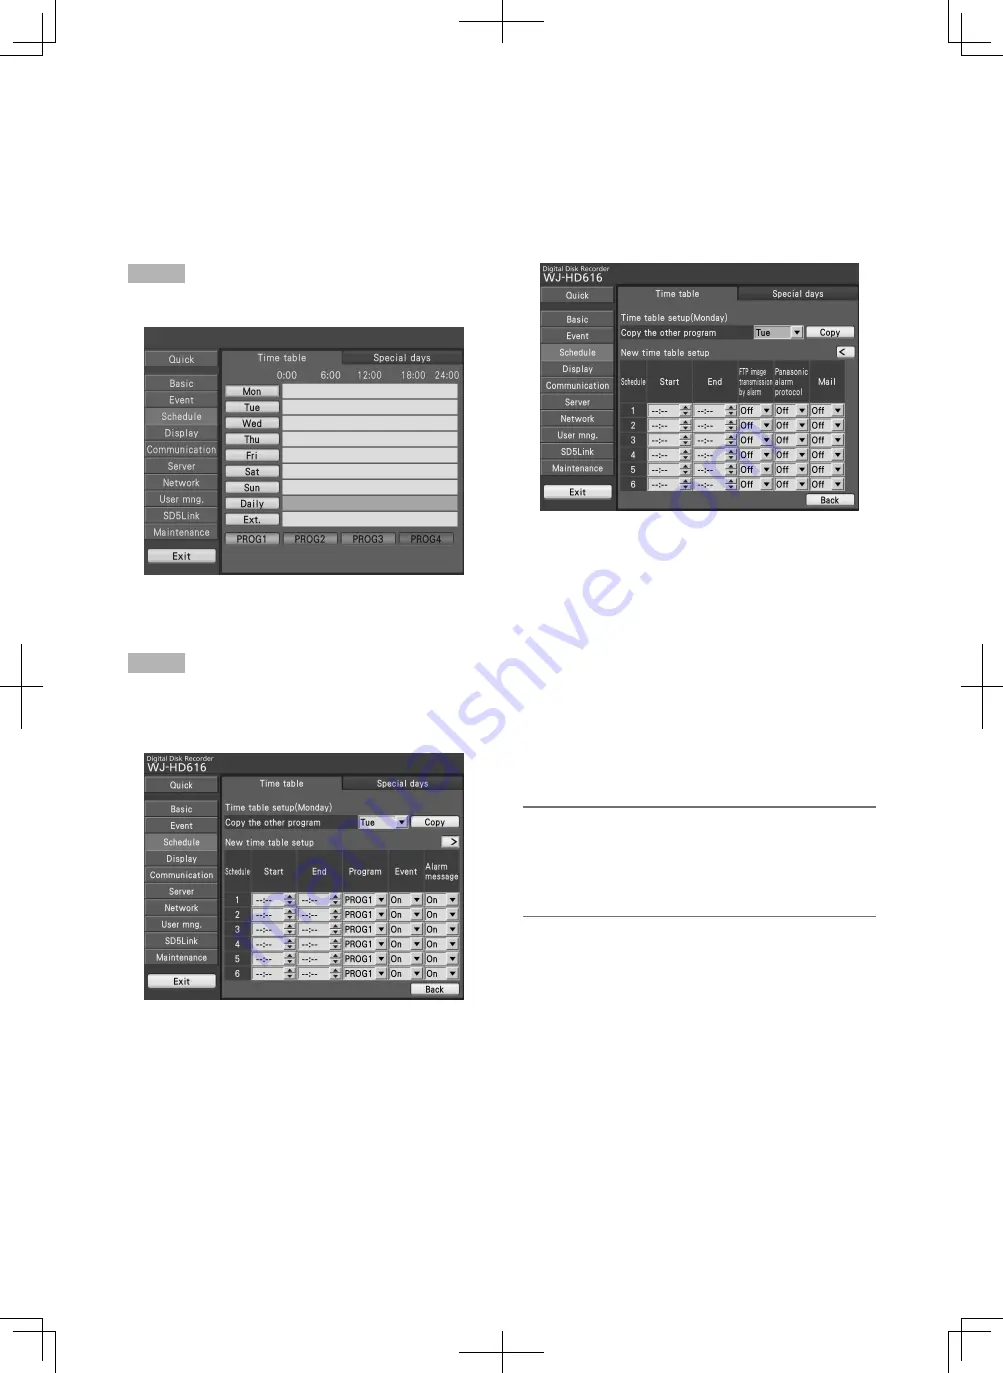
Step 1
Select the desired day of the week.
→
The time table of the selected day of the week will be
displayed.
Step 2
Configure each setting item.
There are 2 setup pages. To move to another page, select
the [
k
] or [
l
] button.
[Copy the other program]
To copy a time table set for another day of the week, select
the day of the week to be copied, and select the [Copy] but-
ton.
■
New time table setup
Configure the settings of the following item for each time
zone.
[Start]
Set the start time of the time zone.
[End]
Set the end time of the time zone.
Note:
• The time can be set in 1-minute increments.
However, the end time should be at least 15 minutes
later than the start time.
• It is impossible to set "23:46" or later for the start time.
• Set "Start" and "End" in the 24-hour time display format.
[Program]
Select the desired program (PROG1 to 4).
[Event]
Select "On" or "Off" to determine whether or not to perform
event actions at an event occurrence.
[Alarm message]
Select "On" or "Off" to determine whether or not to display
the pop-up window that notify of an event occurrence with a
message on the screen of the PC.
[FTP image transmission by alarm]
Select "On" or "Off" to determine whether or not to transmit
the alarm image to the FTP server according to the settings
of "Image transmission by alarm" (
+
page 96) on the
"Server" page - the [FTP] tab.
Assign a program after setting the time zone [Time table]
Select the [Time table] tab on the "Schedule" page. (
+
Page 60)
A time table for program actions can be created for each day of the week, and programs can be assigned to each time table. Up
to 6 time tables can be created for each day of the week.
When a signal is supplied from the ALARM/CONTROL connector (external recording changeover, pin no. 24), the recorder will
work with the set timetable for "Ext." regardless of the days of the week.
At the default, 0:00 to 24:00, PROG1 has been set for "Daily".
Summary of Contents for WJ-HD716K
Page 155: ...155 ...


