54
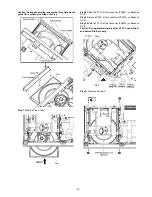
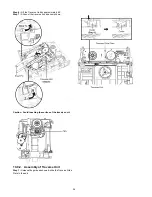
Step 12 Slightly lift up DVD Mechanism Unit (BRS1D).
Step 13 Remove the DVD Mechanism Unit (BRS1D) in the
direction of arrow.
Step 14 Attach a short pin to the 24P FFC of the DVD Mecha-
nism Unit (BRS1D).
Caution: During assembling, ensure that DVD Mechanism
Unit (BRS1D) is properly inserted & fully seated on Bottom
Chasiss before screwing.
10.9. Replacement of Traverse unit
• Refer to “Disassembly of DVD Mechanism Unit
(BRS1D)”.
Caution: Refer to 2.4 “Handling Precaution for Traverse
Unit” to prevent static damage to the Optical Pickup unit.
Note:
1. When the optical pickup unit is defective, the overall
traverse unit needs replacement.
2. Please note that appropriate actions need to be taken to
prevent static damage.
10.9.1.
Disassembly of Traverse unit
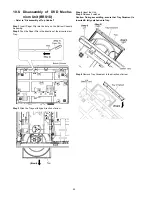
Step 1 : Use a pin to slide the Traverse Slide Plate until it come
to a stop.
Summary of Contents for SA-XH50P
Page 13: ...13 4 1 Others Licences ...
Page 16: ...16 5 4 Speaker Connection ...
Page 17: ...17 5 5 Linked Operations with the TV VIERA LINK HDAVI Control ...
Page 18: ...18 ...
Page 19: ...19 5 6 Connection with an ARC compatible TV ...
Page 21: ...21 5 7 2 File Extension Type Support MP3 JPEG ...
Page 23: ...23 3 Gently pull out the tray 4 Remove disc ...
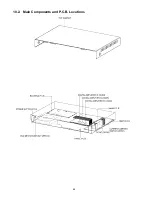
Page 46: ...46 10 2 Main Components and P C B Locations ...
Page 82: ...82 ...
Page 92: ...92 ...
Page 94: ...94 ...

