


49
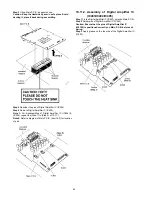
Caution: Do not exert strong force when releasing the tabs.
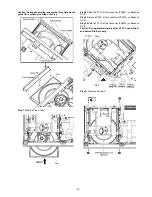
Step 5 Remove Front Panel Assembly.
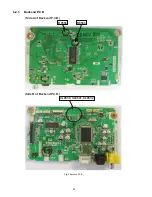
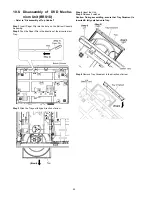
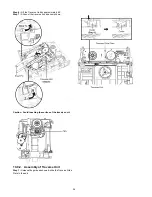
10.6. Disassembly of Panel P.C.B.
• Refer to “Disassembly of Top Cabinet”.
• Refer to “Disassembly of Front Panel Assembly”.
Step 1 Remove 5 screws.
Step 2 Remove 1 screw.
Step 3 Lift up Panel P.C.B..
Caution : During assembling, ensure that Panel P.C.B. is
properly located and fully fixed onto Front Panel.
Step 4 Release 3P wire from wall & ribs of Front Panel.
Caution : During assembling, ensure that 3P wie is prop-
erly dressed in between wall & ribs of Frant Panel as dia-
gram shown.
Step 5 Remove Ground Spring.
Summary of Contents for SA-XH50P
Page 13: ...13 4 1 Others Licences ...
Page 16: ...16 5 4 Speaker Connection ...
Page 17: ...17 5 5 Linked Operations with the TV VIERA LINK HDAVI Control ...
Page 18: ...18 ...
Page 19: ...19 5 6 Connection with an ARC compatible TV ...
Page 21: ...21 5 7 2 File Extension Type Support MP3 JPEG ...
Page 23: ...23 3 Gently pull out the tray 4 Remove disc ...
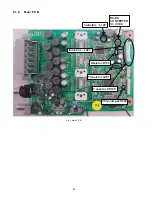
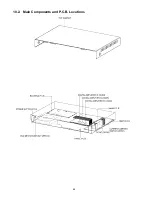
Page 46: ...46 10 2 Main Components and P C B Locations ...
Page 82: ...82 ...
Page 92: ...92 ...
Page 94: ...94 ...