2
3.1. Service Information -------------------------------------- 11
4 Specifications ---------------------------------------------------- 12
4.1. Others (Licences) ---------------------------------------- 13
5 Location of Controls and Components------------------ 14
5.1. Remote Control and Main Unit Key Button
Operations ------------------------------------------------- 14
5.2. Main Unit Key Button Operations -------------------- 15
5.3. Power-Saving Features -------------------------------- 15
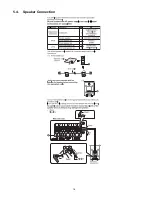
5.4. Speaker Connection ------------------------------------- 16
5.5. Linked Operations with the TV (VIERA LINK
“HDAVI Control™”) -------------------------------------- 17
5.6. Connection with an ARC compatible TV ----------- 19
5.7. Disc Information ------------------------------------------ 20
6 Operating Instructions ---------------------------------------- 22
6.1. Removing of disc during abnomality ---------------- 22
7 Self-Diagnostic and Special Mode Setting ------------- 24
7.1. Cold-Start--------------------------------------------------- 24
7.2. Service Mode Table-------------------------------------- 24
7.3. Self-Diagnostic Mode ----------------------------------- 30
7.4. Self Diagnostic Function-Error Code ---------------- 31
7.5. Sales Demonstration Lock Function ---------------- 33
7.6. Firmware Version-Up Information -------------------- 34
8 Troubleshooting Guide---------------------------------------- 36
8.1. Troubleshooting Guide for F61 and/or F76 -------- 36
8.2. DVD/CD Laser Diode current
measurement.This section will illustrate
proceddures of measuring& deriving DVD/CD
Laser Diode Current. ------------------------------------ 39
8.3. Basic Troubleshooting Guide for Traverse
Unit (Backend P.C.B.) ----------------------------------- 41
8.4. Basic Troubleshooting Guide for HDMI AV
output-------------------------------------------------------- 42
9 Service Fixture & Tools --------------------------------------- 43
9.1. Service Tools and Equipment ------------------------- 43
10 Disassembly and Assembly Instructions --------------- 44
10.1. Disassembly Flow Chart-------------------------------- 45
10.2. Main Components and P.C.B. Locations ----------- 46
10.3. Disassembly of Top Cabinet--------------------------- 47
10.4. Disassembly of Rear Panel---------------------------- 48
10.5. Disassembly of Front Panel Assembly ------------- 48
10.6. Disassembly of Panel P.C.B. -------------------------- 49
10.7. Disassembly of Power Button P.C.B.---------------- 51
10.8. Disassembly of DVD Mechanism Unit
(BRS1D) ---------------------------------------------------- 52
10.9. Replacement of Traverse unit------------------------- 54
10.10. Disassembly of Main P.C.B. --------------------------- 59
10.11. Replacement of Digital Amplifier IC (IC403/
IC404/IC405) ---------------------------------------------- 61
10.12. Disassembly of SMPS P.C.B. ------------------------- 63
10.13. Replacement of Current Limiting Switch
(Q5701) ----------------------------------------------------- 65
10.14. Replacement of Diode (D5706) ---------------------- 66
10.15. Disassembly of Backend P.C.B. ---------------------- 67
11 Service Position ------------------------------------------------- 69
11.1. Checking & Repairing Main P.C.B. (Side B)------- 69
11.2. Checking & Repairing Main P.C.B. (Side A)------- 69
11.3. Checking & Repairing of SMPS P.C.B. ------------- 70
11.4. Checking & Repairing of Panel P.C.B. -------------- 70
11.5. Checking & Repairing of DVD Module P.C.B.----- 70
12 Voltage & Waveform Chart ----------------------------------- 72
12.1. Backend P.C.B. (1/3) ------------------------------------ 72
12.2. Backend P.C.B. (2/3)------------------------------------ 73
12.3. Backend P.C.B. (3/3)------------------------------------ 74
12.4. Main P.C.B. (1/3)----------------------------------------- 75
12.5. Main P.C.B. (2/3)----------------------------------------- 76
12.6. Main P.C.B. (3/3)----------------------------------------- 77
12.7. Panel P.C.B.----------------------------------------------- 78
12.8. SMPS P.C.B.---------------------------------------------- 78
12.9. Waveform Table (1/2) ----------------------------------- 79
12.10. Waveform Table (2/2) ----------------------------------- 80
13 Illustration of ICs, Transistor and Diode ---------------- 81
14 Overall Simplified Block Diagram------------------------- 83
15 Block Diagram --------------------------------------------------- 84
15.1. Backend---------------------------------------------------- 84
15.2. IC Terminal Chart ---------------------------------------- 85
15.3. System Control ------------------------------------------- 86
15.4. Audio & Video -------------------------------------------- 87
15.5. Power Supply --------------------------------------------- 89
16 Wiring Connection Diagram -------------------------------- 91
17 Schematic Diagram -------------------------------------------- 93
17.1. Schematic Diagram Notes ---------------------------- 93
17.2. Backend Circuit ------------------------------------------ 95
17.3. Main Circuit----------------------------------------------- 101
17.4. Panel & Power Button Circuit------------------------ 109
17.5. SMPS Circuit--------------------------------------------- 110
18 Printed Circuit Board----------------------------------------- 112
18.1. Backend P.C.B.------------------------------------------ 112
18.2. Main P.C.B.----------------------------------------------- 113
18.3. Panel & Power Button P.C.B. ------------------------ 115
18.4. SMPS P.C.B.--------------------------------------------- 116
19 Terminal Function of ICs ----------------------------------- 117
19.1. IC200 (RFKWMXH50EB): IC
MICROPROCESSOR --------------------------------- 117
19.2. IC6001 (C0HBB0000057): IC FL Display
Driver ------------------------------------------------------ 118
20 Exploded View and Replacement Parts List---------- 119
20.1. Exploded View and Mechanical Replacement
Parts List -------------------------------------------------- 119
20.2. Electrical Replacement Parts List ------------------ 123
Summary of Contents for SA-XH50P
Page 13: ...13 4 1 Others Licences ...
Page 16: ...16 5 4 Speaker Connection ...
Page 17: ...17 5 5 Linked Operations with the TV VIERA LINK HDAVI Control ...
Page 18: ...18 ...
Page 19: ...19 5 6 Connection with an ARC compatible TV ...
Page 21: ...21 5 7 2 File Extension Type Support MP3 JPEG ...
Page 23: ...23 3 Gently pull out the tray 4 Remove disc ...
Page 46: ...46 10 2 Main Components and P C B Locations ...
Page 82: ...82 ...
Page 92: ...92 ...
Page 94: ...94 ...


