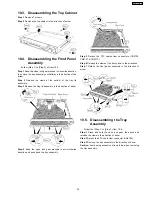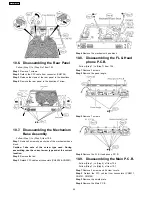
10.6. Disassembling the Rear Panel
·
Follow (Step 1) to (Step 2) of Item 10.3.
Step 1
Remove 7 screws.
Step 2
Detach the FFC cable from connector (CN5704).
Step 3
Release the claws of the rear panel in the directions.
Step 4
Remove the rear panel in the direction of arrow.
10.7. Disassembling the Mechanism
Base Assembly
·
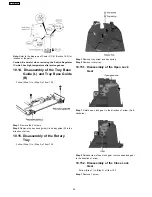
Follow (Step 1) to (Step 3) Item 10.5.
Step 1
Remove 2 screws on each side of the mechanism base
block.
Caution: Take note of the screw type used. During
assembling, use the correct screw type and at the correct
location.
Step 2
Remove the tab.
Step 3
Detach FFC cables at connectors (CN2005 & CN2001).
Step 4
Remove the mechanism base block.
10.8. Disassembling the FL & Head
phone P.C.B.
·
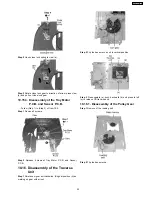
Follow (Step 1) to (Step 7) Item 10.4.
Step 1
Remove 3 screws.
Step 2
Remove the panel angle.
Step 3
Remove 7 screws.
Step 4
Remove the FL & Head phone P.C.B.
10.9. Disassembling the Main P.C.B.
·
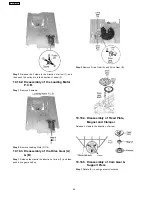
Follow (Step 1) to (Step 4) of Item 10.6.
·
Follow (Step 1) to (Step 4) of Item 10.7.
Step 1
Remove 3 screws and 2 screw covers.
Step 2
Detach the FFC cables from connectors (CN2011,
CN5701, CN5708).
Step 3
Remove the shield plate.
Step 4
Remove the Main P.C.B.
40
SA-HT640WPL
Summary of Contents for SA-HT640WPL
Page 4: ...23 2 Packaging 109 24 Replacement Parts List 110 24 1 Component Parts List 111 4 SA HT640WPL ...
Page 10: ...10 SA HT640WPL ...
Page 16: ...16 SA HT640WPL ...
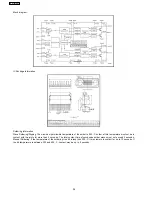
Page 19: ...8 2 Detail Block Diagram Receiver module 19 SA HT640WPL ...
Page 31: ...31 SA HT640WPL ...
Page 37: ...10 1 Disassembly Flow Chart 37 SA HT640WPL ...
Page 38: ...10 2 Main Components and P C B Locations 38 SA HT640WPL ...
Page 46: ...Step 3 Push tray assembly to the direction of arrow shown 46 SA HT640WPL ...
Page 53: ...14 2 Main P C B 53 SA HT640WPL ...
Page 60: ...SA HT640WPL 60 ...
Page 68: ...SA HT640WPL 68 ...
Page 70: ...70 SA HT640WPL ...
Page 80: ...SA HT640WPL 80 ...
Page 86: ...SA HT640WPL 86 ...
Page 88: ...SA HT640WPL 88 ...
Page 97: ...97 SA HT640WPL ...
Page 104: ...21 3 4 2 Receiver Module P C B 104 SA HT640WPL ...
Page 106: ...23 Explode Views 23 1 Cabinet Parts Location 106 SA HT640WPL ...
Page 107: ...107 SA HT640WPL ...
Page 108: ...108 SA HT640WPL ...
Page 109: ...23 2 Packaging 109 SA HT640WPL ...

