Quick Setup, you will set up the basic items. For details about the basic items, refer to "2.3.4 Quick Setup" in
the Feature Guide.
1.
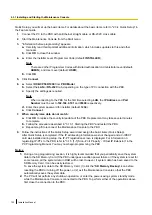
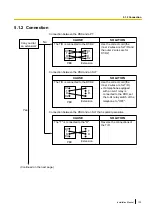
Connect the PC to the PBX with an Ethernet straight cable or RS-232C cross cable.
2.
Start the Maintenance Console from the Start menu.
3.
"Information before programming" appears.
a.
Carefully read this important additional information, which includes updates to this and other
manuals.
b.
Click
OK
to close this window.
4.
a.
Enter the Installer Level Programmer Code (default:
INSTALLER
).
Note
There are 2 other Programmer Codes with limited authorisation: Administrator Level (default:
ADMIN
), and User Level (default:
USER
).
b.
Click
OK
.
5.
Click
Connect
.
6.
a.
Select
KX-NCP500/1000
from
PBX Model
.
b.
Select the
LAN
or
RS-232C
tab, depending on the type of PC connection with the PBX.
c.
Specify the settings as required.
Note
When connecting to the PBX for the first time selecting
LAN
, the
IP Address
and
Port
Number
must be set to
192.168.0.101
and
35300
respectively.
d.
Enter the system password for installer (default:
1234
).
e.
Click
Connect
.
7.
When country/area data do not match:
a.
Click
OK
to replace the country/area data of the PBX. Replacement may take several minutes
to complete.
b.
Follow the procedure described in "3.13.1 Starting the PBX" and restart the PBX.
c.
Repeat step
5
to reconnect the Maintenance Console to the PBX.
8.
Follow the instructions of the Quick Setup wizard and assign the basic items (Quick Setup).
After Quick Setup is completed, if the IP addressing information was not changed and a V-IPEXT
card was installed during setup, the IP-PT registration screen is displayed. For information on
registering IP-PTs to the PBX, refer to "3.15 [1-1] Slot—Port Property - Virtual IP Extension" in the
PC Programming Manual. You may now begin programming the PBX.
Notice
1.
During a long programming session, it is highly recommended that you periodically save the system
data to the SD Memory Card. If the PBX undergoes a sudden power failure or if the system is reset for
some reason, all the system data in RAM will be lost. However, if system data has been saved to the
SD Memory Card, it can be easily restored.
To save the system data to the SD Memory Card, (1) click the "
SD Memory Backup
" icon before
resetting the PBX or turning off the power, or (2) exit the Maintenance Console so that the PBX
automatically saves the system data.
2.
The PC will not perform any shutdown operation, or enter the power-saving system standby mode
while the Maintenance Console is connected to the PBX. To perform either of the operations above,
first close the connection to the PBX.
132
Installation Manual
4.3.1 Installing and Starting the Maintenance Console
Summary of Contents for KX-NCP1000
Page 42: ...42 Installation Manual 2 1 3 Activation Key File ...
Page 134: ...134 Installation Manual 4 3 1 Installing and Starting the Maintenance Console ...
Page 146: ...146 Installation Manual 5 1 5 Troubleshooting by Error Log ...
Page 147: ...Section 6 Appendix Installation Manual 147 ...
Page 151: ...Index Installation Manual 151 ...

