85
Controls and settings from web screen
(continued)
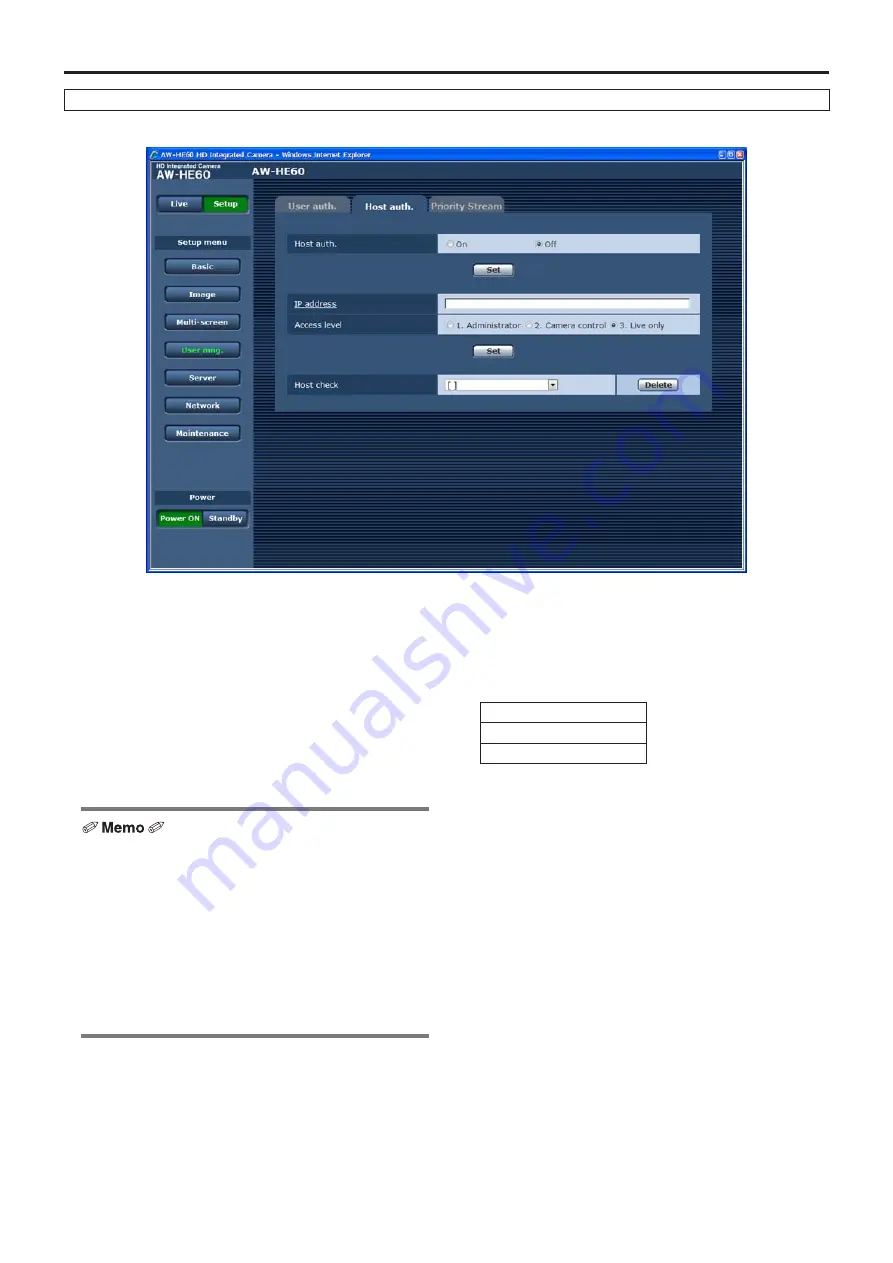
Host auth. screen
Host auth.
<Initial setting: Off>
Host authorization is set to “On” or “Off” here.
IP address
<Initial setting: blank>
The IP address of the personal computer from which
access to the camera is allowed is input here.
The host name cannot be input as the IP address.
p
When the “IP address/subnet mask length” is input, the
personal computers which are allowed to access the
camera can be restricted on a subnet by subnet basis.
If, for instance, “192.168.0.1/24” has been input and
the “2. Camera control” setting has been selected as
the access level setting, the personal computers from
“192.168.0.1” to “192.168.0.254” will be able to access
the camera at the “2. Camera control” access level.
p
When an already registered IP address is input and
the Set button is clicked, the host information will be
overwritten.
Access level
<Initial setting: 3. Live only>
Select one of the following settings as the host access
level.
1. Administrator
2. Camera control
3. Live only
For details on the access level, refer to page 84.
Host check
A pull-down menu can be opened here, and the IP
addresses of the registered hosts checked.
A host is indicated in the form of “Registered IP address
[Access level]”.
(Example: 192.168.0.21 [1])
To delete a registered host (IP address), select the host to
be deleted, and click the Delete button on the right.
Up to 18 addresses can be registered as IP addresses.


