background image

Power tools that are no longer usable should not be disposed of 

with household waste but in an environmentally friendly way. Please 

recycle where facilities exist. Check with your local council authority for 

recycling advice.

Recycling packaging reduces the need for landfill and raw materials. 

Reuse of recycled material decreases pollution in the environment. 

Please recycle packaging where facilities exist. Check with your local 

council authority for recycling advice.

MAINTENANCE

DESCRIPTION OF SYMBOLS

CARING FOR THE ENVIRONMENT

TROUBLESHOOTING

1.  When not in use, the detail sander should be stored in a dry, 

frost free location, keep out of children’s reach.

2.  Keep ventilation slots of the detail sander clean at all times and 

prevent anything from entering.

3.  If the housing of the detail sander requires cleaning, do not use 

solvents. Use of a cloth only is recommended.

4.  Blow out the ventilation slots with compressed air periodically .

Note:

 Ozito Industries will not be responsible for any damage or  

injuries caused by repair of the detail sander by an unauthorised 

person or by mishandling.

Spare parts can be ordered from the Special Orders Desk 

at your local Bunnings Warehouse. 
For further information, or any parts not listed here, visit 
www.ozito.com.au or contact Ozito Customer Service: 
Australia 1800 069 486 
New Zealand 0508 069 486 
E-mail: [email protected]

SPARE PARTS

BATTERY AND CHARGER SAFETY WARNINGS

THIS MANUAL CONTAINS IMPORTANT SAFETY AND OPERATING INSTRUCTIONS FOR YOUR BATTERY 
CHARGER.

1. 

Before using the charger read all instructions and cautionary markings on the charger, battery pack and 

the product using the battery pack.

1. 

This charger is not intended for any uses other than charging rechargeable batteries. Any other use may 

result in risk of fire, electric shock or electrocution.

2. 

Do not place any object on top of the charger or place the charger on a soft surface that may result in 

excessive internal heat. Place the charger in a position away from any heat source.

3. 

To reduce risk of damage to the electric plug and cord, pull by the plug rather than the cord when discon-

necting the charger.

4. 

Make sure the cord is located so that it will not be stepped on, tripped over, or otherwise subjected to 

damage or stress.

5. 

An extension cord should not be used unless absolutely necessary. Use of an improper extension cord could 

result in the risk of fire, electric shock or electrocution.

6. 

Do not operate the charger if it has received a sharp blow, been dropped or otherwise damaged in any 

way. Have it checked by an electrician or power tool repairer.

7. 

Do not disassemble charger. Take it to an electrician or power tool repairer when service or repair is 

required. Incorrect reassembly may result in a risk of electric shock, electrocution or fire.

8. 

To reduce risk of electric shock, unplug the charger from the outlet before attempting any cleaning. 

Removing the battery pack will not reduce this risk.

9. 

Never attempt to connect 2 chargers together.

10. 

DO NOT store or use the tool and battery pack in locations where the temperature may reach or exceed 40ºC 

(such as inside sheds or metal buildings in summer).

11. 

The charger is designed to operate on standard household electrical power (240 volts). Do not attempt to 

use it on any other voltage!

12. 

The battery pack is not fully charged out of the carton. First read the safety instructions and then follow 

the charging notes and procedures.

13. 

The longest life and best performance can be obtained if the battery pack is charged when the air tem-

perature is between 18 - 24ºC. Do not charge the battery pack in an air temperature below 10ºC or above 

40ºC. This is important and will prevent damage to the battery pack.

14. 

Do not incinerate the battery pack even if it is seriously damaged or is completely worn out. The battery can 

explode in a fire.

15. 

Never attempt to open the battery pack for any reason. If the plastic housing of the battery pack breaks or 

cracks, immediately discontinue use and do not recharge.

16. 

During charging, the battery must be placed in a well ventilated area.

Warning 

Read instruction manual

 ø


Diameter


mA


Milliamperes    

Recycle battery 


Do not put in the rubbish

Polarity

Do not incinerate   


Do not get battery wet

Thermal cut-out protection

Transformer Energy

Rating (MEPS)

Double insulated 

/min     

Revolutions or reciprocation per minute

Ah 


Amp hour

Indoor use only

Lithium Ion battery

Do not use or store battery in 

temperatures exceeding 50ºC


Electrical Emissions 

Conformity (EMC)


Nm     

Newton Meters   


n

o      

No load speed


V


Volts


Hz


Hertz

ac/~


Alternating current 


W


Watts


Direct current


dc/

18V Li-ion Battery Pack   

SPCDL018-37

Charging 

Stand 

  SPCDL018-38

Charging 

Adaptor 

  SPCDL5010-34

LED lights do not illuminate on charger

Check the charging adaptor is securely plugged into the wall out let.

Check the battery is firmly connected to the charging cradle. 

Check that the charging jack is securely connected to the charging cradle.

The battery has a short run time

Ensure the battery is properly charged. It will take 4-5 charging cycles 

before the battery reaches optimum charge and run time. On the initial 

charge, the battery requires 5 hours of charging. Subsequent charging 

only requires 3-5 hours. 

Sparking visible through the housing air vents

A small amount of sparking may be visible through the housing vents. 

This is normal and does not indicate a problem.

Sandpaper Selection

Selecting the correct grit of sandpaper is an important step in achieving  

optimum results. Coarse grit will remove the most material. Finer grit will  

produce a smoother finish. The condition of the workpiece will determine the 


grit of the sandpaper to be used. The higher the grit number, the finer the 


grade of sandpaper.
If the surface is rough, start with a coarse grit and sand until the surface is uniform. 

Medium grit may then be used to remove scratches left by the coarser grit. Finer 

grit is then used to finish the surface. Always continue sanding with each grade of 

sandpaper until the surface is uniform.

MATERIAL 

APPROPRIATE GRIT

Coarse Sanding

Fine Sanding

Paintwork


180 

400

Wood

:   Softwood 

60 

240

 Hardwood 

60 

180

 Veneer 

240 

320

Note

: If intermediate sanding is required, choose a grit rating between coarse and 

fine. The above table is intended as a guide only. To ensure a satisfactory result, 

a small, inconspicuous area should first be tested to ensure the grit of sandpaper 

chosen is suitable for the desired finish.

Summary of Contents for CDL-5010

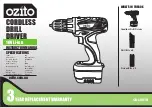
Page 1: ...uck Size 10mm Keyless No Load Speed 0 580 min Torque Setting 17 Max Torque 16Nm Drilling Capacity 15mm Wood 8mm Metal Battery 1 3Ah Li ion Charge time 3 5 hours Weight with Battery 0 95 kg CDL 5010 WHAT S IN THE BOX Cordless Drill Driver ozito com au Drill Bits x 4 Driver Bits x 2 ...

Page 2: ...n 6 18V Battery 7 Forward reverse lever CORDLESS DRILL DRIVER Installing and Removing 2 Insert battery into charger The red and green lights will illuminate when battery is properly connected Slide the battery into the drill base until it clicks into place 1 Plug charging jack into the charger The green light will illuminate when properly connected Charging Hold down the battery release buttons an...

Page 3: ...ever Installing Drill Bit 1 For forward rotation push the lever hard left For reverse rotation push lever to the right Adjusting Torque Removing Drill Bit 1 Hold the back sleeve while turning the front sleeve clockwise to open chuck Caution Do not handle drill bits or other accessories without gloves as they are sharp and can become hot after use this can cause personal injury Turn torque ring to ...

Page 4: ...rt holes without centre punching To accomplish this operate the drill at a low speed until you start the hole When drilling metals use light oil on the drill bit to keep it from overheating The oil will prolong the life of the bit and increase drilling action If the bit jams in the work piece or if the drill stalls stop the tool immediately Remove the bit from the work piece and determine the reas...

Page 5: ...andling Spare parts can be ordered from the Special Orders Desk at your local Bunnings Warehouse For further information or any parts not listed here visit www ozito com au or contact Ozito Customer Service Australia 1800 069 486 New Zealand 0508 069 486 E mail enquires ozito com au SPARE PARTS DRILL DRIVER SAFETY WARNINGS Warning Read instruction manual ø Diameter mA Milliamperes Recycle battery ...

Page 6: ...L5010 34 Available spare parts can be ordered through the Special Orders Desk at any Bunnings Warehouse If you have any further questions please contact Ozito Customer Service on Australia 1800 069 486 New Zealand 0508 069 486 enquiries ozito com au The following is a list of spare parts carried by Ozito Please contact Customer Service for any parts not listed Item No Description Part No ...

Page 7: ...ned b Do not use the power tool if the switch does not turn it on and off Any power tool that cannot be controlled with the switch is dangerous and must be repaired c Disconnect the plug from the power source and or the battery pack from the power tool before making any adjustments changing accessories or storing power tools Such preventive safety measures reduce the risk of starting the power too...

Page 8: ... the goods repaired or replaced if the goods fail to be of acceptable quality and the failure does not amount to a major failure Generally you will be responsible for all costs associated with a claim under this warranty however where you have suffered any additional direct loss as a result of a defective product you may be able to claim such expenses by contacting our customer service helpline ab...

Page 9: ...L SPECIFICATIONS Input 18V No Load Speed 9500 min Pad Size 140 x 140 x 90mm Paper Fitment Hook Loop Battery 1 3Ah Li ion Charge time 3 5 hours Weight with Battery 1 10kg DSL 2000 WHAT S IN THE BOX Cordless Detail Sander ozito com au Sand Paper Dust Bag ...

Page 10: ...tail sander until it clicks into place This charger is recommended for use with a residual current device with a rated residual current of 30mA or less Charging To remove press hold the battery release button and pull the battery out 6 Dust Bag 7 Sanding Paper ACCESSORIES 2 Insert battery into charger The red and green light will illuminate when battery is properly connected 1 Plug charging jack i...

Page 11: ...h on the dust bag facing up push into dust extraction chute until secured Fitting the Dust Bag 2 To turn off push the slide lock on switch backwards to O position 1 To turn on push the slide lock on switch forward to I position On Off Switch 2 To remove pull the dust bag away from the dust extraction chute Note For optimum dust extraction empty dust bag when 1 3 full I 0 ...

Page 12: ...er speed This will slow the removal rate and produce an inferior quality surface CAUTION Excessive pressure will overload the motor causing possible damage to the sander by overheating the motor or damage to the workpiece Be sure to check your workpiece often The sander is capable of removing material rapidly especially with coarse paper The orbital action of your sander allows you to sand with th...

Page 13: ... as inside sheds or metal buildings in summer 11 The charger is designed to operate on standard household electrical power 240 volts Do not attempt to use it on any other voltage 12 The battery pack is not fully charged out of the carton First read the safety instructions and then follow the charging notes and procedures 13 The longest life and best performance can be obtained if the battery pack ...

Page 14: ...L5010 34 Available spare parts can be ordered through the Special Orders Desk at any Bunnings Warehouse If you have any further questions please contact Ozito Customer Service on Australia 1800 069 486 New Zealand 0508 069 486 enquiries ozito com au The following is a list of spare parts carried by Ozito Please contact Customer Service for any parts not listed Item No Description Part No ...

Page 15: ...st collection can reduce dust related hazards 4 Power tool use and care a Do not force the power tool Use the correct power tool for your application The correct power tool will do the job better and safer at the rate for which it was designed b Do not use the power tool if the switch does not turn it on and off Any power tool that cannot be controlled with the switch is dangerous and must be repa...

Page 16: ...oods repaired or replaced if the goods fail to be of acceptable quality and the failure does not amount to a major failure Generally you will be responsible for all costs associated with a claim under this warranty however where you have suffered any additional direct loss as a result of a defective product you may be able to claim such expenses by contacting our customer service helpline above 09...

Page 17: ...on INSTRUCTION MANUAL SPECIFICATIONS Input 18V Light Source LED 1W 60 Lumen Approx Run Time 24 Hours Battery 1 3Ah Li ion Charge time 3 5 hours Weight with Battery 0 50 kg WLL 018 WHAT S IN THE BOX LED Worklight ozito com au ...

Page 18: ...tery reaches optimum charge and run time 1 Rotating Head 2 On off Switch 3 Battery Release Button 4 18V Battery 18V LED WORKLIGHT 2 Insert battery into charger The red and green lights will illuminate when battery is properly connected 1 Plug charging jack into the charger The green light will illuminate when properly connected 3 The red light will extinguish when the battery is fully charged This...

Page 19: ...Adjusting the Head of the Torch Push the battery into the worklight base until it clicks into place Hold down the battery release buttons and pull the battery down away from the tool a b The LED Worklight comes with an adjustable head so you can point the light beam in many directions to increase versatility 1 Gently pull or push the head to the desired angle ...

Page 20: ...WLL 018 4 OPERATION 1 Place the worklight on a flat surface 3 Turn the worklight on 2 Ajust the angle of the head if required ...

Page 21: ...ur local Bunnings Warehouse For further information or any parts not listed here visit www ozito com au or contact Ozito Customer Service Australia 1800 069 486 New Zealand 0508 069 486 E mail enquires ozito com au SPARE PARTS 18V Battery SPCDL018 37 Charging Stand SPCDL018 38 Charging Adaptor SPCDL018 39 Warning Read instruction manual ø Diameter mA Milliamperes Recycle battery Do not put in the ...

Page 22: ...L5010 34 Available spare parts can be ordered through the Special Orders Desk at any Bunnings Warehouse If you have any further questions please contact Ozito Customer Service on Australia 1800 069 486 New Zealand 0508 069 486 enquiries ozito com au The following is a list of spare parts carried by Ozito Please contact Customer Service for any parts not listed Item No Description Part No ...

Page 23: ...ned b Do not use the power tool if the switch does not turn it on and off Any power tool that cannot be controlled with the switch is dangerous and must be repaired c Disconnect the plug from the power source and or the battery pack from the power tool before making any adjustments changing accessories or storing power tools Such preventive safety measures reduce the risk of starting the power too...

Page 24: ...ed or tampered with in any way WARRANTY TO ENSURE A SPEEDY RESPONSE PLEASE HAVE THE MODEL NUMBER AND DATE OF PURCHASE AVAILABLE A CUSTOMER SERVICE REPRESENTATIVE WILL TAKE YOUR CALL AND ANSWER ANY QUESTIONS YOU MAY HAVE RELATING TO THE WARRANTY POLICY OR PROCEDURE OZITO Australia New Zealand Head Office 1 23 Letcon Drive Bangholme Victoria Australia 3175 The benefits provided under this warranty a...

Page 25: ...NUAL SPECIFICATIONS Input 18V No Load Speed 2000 min Blade Diameter 110mm Bore Size 20mm Cutting Capacity 40mm Battery 1 3Ah Li ion Charge time 3 5 hours Weight 1 34kg CSL 4010 WHAT S IN THE BOX Cordless Trim Saw ozito com au Guide Fence Hex Key ...

Page 26: ... Guide Fence ACCESSORIES Installing and Removing To insert push the battery into the base of the trim saw until it clicks into place This charger is recommended for use with a residual current device with a rated residual current of 30mA or less Charging To remove press hold the battery release button and pull the battery out 2 Insert battery into charger The red and green light will illuminate wh...

Page 27: ... THE BLADE STOPS COMPLETELY THIS MAY HELP TO PREVENT SERIOUS INJURY a b 1 Loosen base plate locking knob 2 Lower base plate to desired depth of cut 3 Tighten base plate locking knob to secure depth of cut 1 Insert guide fence through the holes in base plate 2 Set desired width of cut by aligning the scale with notch in base plate 3 Tighten guide fence locking knob to secure Adjusting Depth of Cut ...

Page 28: ...the workpiece Note The tool is recommended for wood cutting only and is not recommended for use with abrasive wheels or masonry diamond cutting wheels Only use 110mm wood cutting blades 3 Fully retract lower blade guard 5 Replace blade Ensure arrows on the blade point in the same direction as the arrow on the upper blade guard 7 Use hex key to tighten blade bolt 4 Slowly push the the saw forward N...

Page 29: ...Any other use may result in risk of fire electric shock or electrocution 3 Do not place any object on top of the charger or place the charger on a soft surface that may result in excessive internal heat Place the charger in a position away from any heat source 4 To reduce risk of damage to the electric plug and cord pull by the plug rather than the cord when disconnecting the charger 5 Make sure t...

Page 30: ...L5010 34 Available spare parts can be ordered through the Special Orders Desk at any Bunnings Warehouse If you have any further questions please contact Ozito Customer Service on Australia 1800 069 486 New Zealand 0508 069 486 enquiries ozito com au The following is a list of spare parts carried by Ozito Please contact Customer Service for any parts not listed Item No Description Part No ...

Page 31: ...ther batery pack b Use power tools only with specifically designated battery packs Use of any other battery packs may create a risk of injury and fire c When battery pack is not in use keep it away from other metal objects like paper clips coins keys nails screws or other small metal objects that can make a connection from one terminal to another Shorting the battery terminals together may cause b...

Page 32: ...manual If the tool is disassembled or tampered with in any way WARRANTY TO ENSURE A SPEEDY RESPONSE PLEASE HAVE THE MODEL NUMBER AND DATE OF PURCHASE AVAILABLE A CUSTOMER SERVICE REPRESENTATIVE WILL TAKE YOUR CALL AND ANSWER ANY QUESTIONS YOU MAY HAVE RELATING TO THE WARRANTY POLICY OR PROCEDURE OZITO Australia New Zealand Head Office 1 23 Letcon Drive Bangholme Victoria Australia 3175 The benefit...

Page 33: ...AL SPECIFICATIONS Input 18V No Load Speed 14 500 min Oscillating Angle 3 4º Fitment Tooled Battery 1 3Ah Li ion Charge time 3 5 hours Weight with Battery 1 3kg MFL 8010 WHAT S IN THE BOX Cordless Multi Function Tool ozito com au Accessories Hex Key ...

Page 34: ... into place This charger is recommended for use with a residual current device with a rated residual current of 30mA or less Charging To remove press hold the battery release button and pull the battery out 7 Sanding Pad 8 Sanding Sheets 9 Scraper 10 20mm Straight Blade 11 65mm Semi Circular Blade 12 Hex Key ACCESSORIES 2 Insert battery into charger The red and green light will illuminate when bat...

Page 35: ...ide of accessory fitting washer on the accessory then insert locking bolt 3 1 Tighten locking bolt with provided hex key 1 1 Loosen locking bolt with hex key 2 Remove bolt and accessory Accessory Removal 2 To turn off slide the switch backwards 1 To turn on slide the on off switch forward On Off Switch Rotating Base The multi function tool comes with a rotating base This can be helpful when trying...

Page 36: ... fabric adhesives or vinyl from materials such as wood plastic metal and painted surfaces 1 Turn multi function tool on 2 Place multi function tool on the workpiece at an angle of approx 10 15 3 Allow the scraper to do the work do not apply heavy pressure to the multi function tool This may cause the multi function tool to overload or cut into the surface of the workpiece 10 15º Sawing When sawing...

Page 37: ...ectrical Emissions Conformity EMC Nm Newton Meters no No load speed V Volts Hz Hertz ac Alternating current W Watts Direct current dc 18V Li ion Battery Pack SPCDL018 37 Charging Stand SPCDL018 38 Charging Adaptor SPCDL5010 34 LED lights do not illuminate on charger Check the charging adaptor is securely plugged into the wall out let Check the battery is firmly connected to the charging cradle Che...

Page 38: ...L5010 34 Available spare parts can be ordered through the Special Orders Desk at any Bunnings Warehouse If you have any further questions please contact Ozito Customer Service on Australia 1800 069 486 New Zealand 0508 069 486 enquiries ozito com au The following is a list of spare parts carried by Ozito Please contact Customer Service for any parts not listed Item No Description Part No ...

Page 39: ...ned b Do not use the power tool if the switch does not turn it on and off Any power tool that cannot be controlled with the switch is dangerous and must be repaired c Disconnect the plug from the power source and or the battery pack from the power tool before making any adjustments changing accessories or storing power tools Such preventive safety measures reduce the risk of starting the power too...

Page 40: ...goods repaired or replaced if the goods fail to be of acceptable quality and the failure does not amount to a major failure Generally you will be responsible for all costs associated with a claim under this warranty however where you have suffered any additional direct loss as a result of a defective product you may be able to claim such expenses by contacting our customer service helpline above 0...

Page 41: ...FICATIONS Input 18V Chuck Size 6 35mm Hex Drive No Load Speed 0 2700 min Impact Rate 0 3300 min Max Torque 90Nm Battery 1 3Ah Li ion Charge time 3 5 hours Weight with Battery 1 20kg IDL 6010 WHAT S IN THE BOX Cordless Impact Driver ozito com au Nut Setter x 2 ...

Page 42: ...y into the impact driver base until it clicks into place This charger is recommended for use with a residual current device with a rated residual current of 30mA or less Charging To remove hold down the battery release button and pull the battery out 7 Nut Setter x 2 ACCESSORIES 2 Insert battery into charger The red and green lights will illuminate when battery is properly connected 1 Plug chargin...

Page 43: ...es without gloves as they are sharp and can become hot after use potentially causing personal injury a b 1 Pull the drive retaining ring forward remove the driving bit and then release the drive retainng ring Installing a Socket Adaptor Not Supplied 1 Pull the drive retaining ring forward 3 Release the drive bit retaining ring a then pull on the socket adaptor b to ensure it is firmly in place 2 I...

Page 44: ... forward reverse lever is on desired setting OPERATION 6 Lightly depress the variable speed trigger to start the driver 7 Slowly increase pressure on trigger to appropriate torque for circumstances until screw or bolt is tightened Note Do not force the driver or apply side pressure to elongate the hole Let the impact driver do the work Variable Speed Trigger Forward Reverse Lever 1 For forward rot...

Page 45: ...ndling Spare parts can be ordered from the Special Orders Desk at your local Bunnings Warehouse For further information or any parts not listed here visit www ozito com au or contact Ozito Customer Service Australia 1800 069 486 New Zealand 0508 069 486 E mail enquires ozito com au SPARE PARTS IMPACT DRIVER SAFETY WARNINGS LED lights do not illuminate on charger Check the charging adaptor is secur...

Page 46: ...L5010 34 Available spare parts can be ordered through the Special Orders Desk at any Bunnings Warehouse If you have any further questions please contact Ozito Customer Service on Australia 1800 069 486 New Zealand 0508 069 486 enquiries ozito com au The following is a list of spare parts carried by Ozito Please contact Customer Service for any parts not listed Item No Description Part No ...

Page 47: ...ned b Do not use the power tool if the switch does not turn it on and off Any power tool that cannot be controlled with the switch is dangerous and must be repaired c Disconnect the plug from the power source and or the battery pack from the power tool before making any adjustments changing accessories or storing power tools Such preventive safety measures reduce the risk of starting the power too...

Page 48: ...the goods repaired or replaced if the goods fail to be of acceptable quality and the failure does not amount to a major failure Generally you will be responsible for all costs associated with a claim under this warranty however where you have suffered any additional direct loss as a result of a defective product you may be able to claim such expenses by contacting our customer service helpline abo...

Page 49: ...ONS Input 18V AM Frequency 522 1620KHz FM Frequency 87 5 108MHz Speaker Output 3W Charge time 3 5 hours Weight with Battery 1 0kg CRL 1000 WHAT S IN THE BOX Cordless Radio ozito com au PRESET M LED BAND TUNE SEEK VOLUME M PRESET M LED BAND TUNE SEEK VOLUME M ...

Page 50: ...charger The red and green light will illuminate when battery is properly connected 1 Plug charging jack into the charger The green light will illuminate when properly connected Hold down the battery release buttons and pull the battery down away from the radio PRESET M LED BAND TUNE SEEK VOLUME M 3 The red light will extinguish when the battery is fully charged This charger is recommended for use ...

Page 51: ...ress the volume button until desired volume is reached 1 Turn the radio off 2 Press the preset button twice The time should appear on the display screen VO TU PRESET M M x2 3 Press the band button The hours number should start flashing VOLUME TUNE SEEK BAND LED PRESET M M 4 Use the tune seek buttons to set the hour 5 Press the band button again The minutes numbers should start flashing VOLUME TUNE...

Page 52: ...02 MEM in the top right 9 Press the preset button again This saves the station to the memory position 2 10 Repeat this process until all 5 memory positions are pre set VOLUME TUNE SEEK BA LE PRESET M M x1 VOLUME TUNE SEEK BAND LED PRESET M M VOLUME TUNE SEEK BA LE PRESET M M x1 PRESET M M x1 1 Turn the radio off 2 Press the preset button once An alarm symbol should appear on the display screen 3 P...

Page 53: ...ur local Bunnings Warehouse For further information or any parts not listed here visit www ozito com au or contact Ozito Customer Service Australia 1800 069 486 New Zealand 0508 069 486 E mail enquires ozito com au SPARE PARTS 18V Battery SPCDL018 37 Charging Stand SPCDL018 38 Charging Adaptor SPCDL018 39 Warning Read instruction manual ø Diameter mA Milliamperes Recycle battery Do not put in the ...

Page 54: ...L5010 34 Available spare parts can be ordered through the Special Orders Desk at any Bunnings Warehouse If you have any further questions please contact Ozito Customer Service on Australia 1800 069 486 New Zealand 0508 069 486 enquiries ozito com au The following is a list of spare parts carried by Ozito Please contact Customer Service for any parts not listed Item No Description Part No ...

Page 55: ...ned b Do not use the power tool if the switch does not turn it on and off Any power tool that cannot be controlled with the switch is dangerous and must be repaired c Disconnect the plug from the power source and or the battery pack from the power tool before making any adjustments changing accessories or storing power tools Such preventive safety measures reduce the risk of starting the power too...

Page 56: ... with in any way WARRANTY TO ENSURE A SPEEDY RESPONSE PLEASE HAVE THE MODEL NUMBER AND DATE OF PURCHASE AVAILABLE A CUSTOMER SERVICE REPRESENTATIVE WILL TAKE YOUR CALL AND ANSWER ANY QUESTIONS YOU MAY HAVE RELATING TO THE WARRANTY POLICY OR PROCEDURE OZITO Australia New Zealand Head Office 1 23 Letcon Drive Bangholme Victoria Australia 3175 The benefits provided under this warranty are in addition...

Page 57: ...d Speed 2000 min Stroke Length 13mm Blade Fitment Universal U shaped only Max Cutting Capacity Wood 20mm Aluminium Sheet 2mm Non Alloy Steel 1mm Battery 1 3Ah Li ion Charge time 3 5 hours Weight 1 1kg CSL 018 WHAT S IN THE BOX Cordless Cut Saw ozito com au Charger Adaptor Blades ...

Page 58: ...ORIES Installing and Removing To insert push the battery into the base of the cut saw until it clicks into place This charger is recommended for use with a residual current device with a rated residual current of 30mA or less Charging To remove press hold the battery release button and pull the battery out 2 Insert battery into charger The red and green light will illuminate when battery is proper...

Page 59: ...mp Ensure the hole in the end of the blade is inserted into the blade clamp OPERATION Turning On Off Installing Blades Caution Do not handle blades without gloves as they are sharp and can become hot after use this can cause personal injury 1 To turn on slide the lock off button down then squeeze the on off trigger 2 To turn off release the on off trigger 4 Carefully pull on the blade to ensure it...

Page 60: ... balde to make contact 1 Secure the work piece if necessary 3 Turn the cut saw on a b Note Do not force the tool Let the tool do the work 4 Ease the blade into workpiece Use a rocking motion to assist the cut saw in cutting the material Keep the base against the workpiece throughout the cut ...

Page 61: ...bject on top of the charger or place the charger on a soft surface that may result in excessive internal heat Place the charger in a position away from any heat source 4 To reduce risk of damage to the electric plug and cord pull by the plug rather than the cord when disconnecting the charger 5 Make sure the cord is located so that it will not be stepped on tripped over or otherwise subjected to d...

Page 62: ...L5010 34 Available spare parts can be ordered through the Special Orders Desk at any Bunnings Warehouse If you have any further questions please contact Ozito Customer Service on Australia 1800 069 486 New Zealand 0508 069 486 enquiries ozito com au The following is a list of spare parts carried by Ozito Please contact Customer Service for any parts not listed Item No Description Part No ...

Page 63: ...anders away while operating a power tool Distractions can cause you to lose control 2 Electrical safety a Power tool plugs must match the outlet Never modify the plug in any way Do not use any adapter plugs with earthed grounded power tools Unmodified plugs and matching outlets will reduce risk of electric shock b Avoid body contact with earthed or grounded surfaces such as pipes radiators ranges ...

Page 64: ...the tool is disassembled or tampered with in any way WARRANTY TO ENSURE A SPEEDY RESPONSE PLEASE HAVE THE MODEL NUMBER AND DATE OF PURCHASE AVAILABLE A CUSTOMER SERVICE REPRESENTATIVE WILL TAKE YOUR CALL AND ANSWER ANY QUESTIONS YOU MAY HAVE RELATING TO THE WARRANTY POLICY OR PROCEDURE OZITO Australia New Zealand Head Office 1 23 Letcon Drive Bangholme Victoria Australia 3175 The benefits provided...

Reviews: