


2 Installation and connection
2-1 Installation
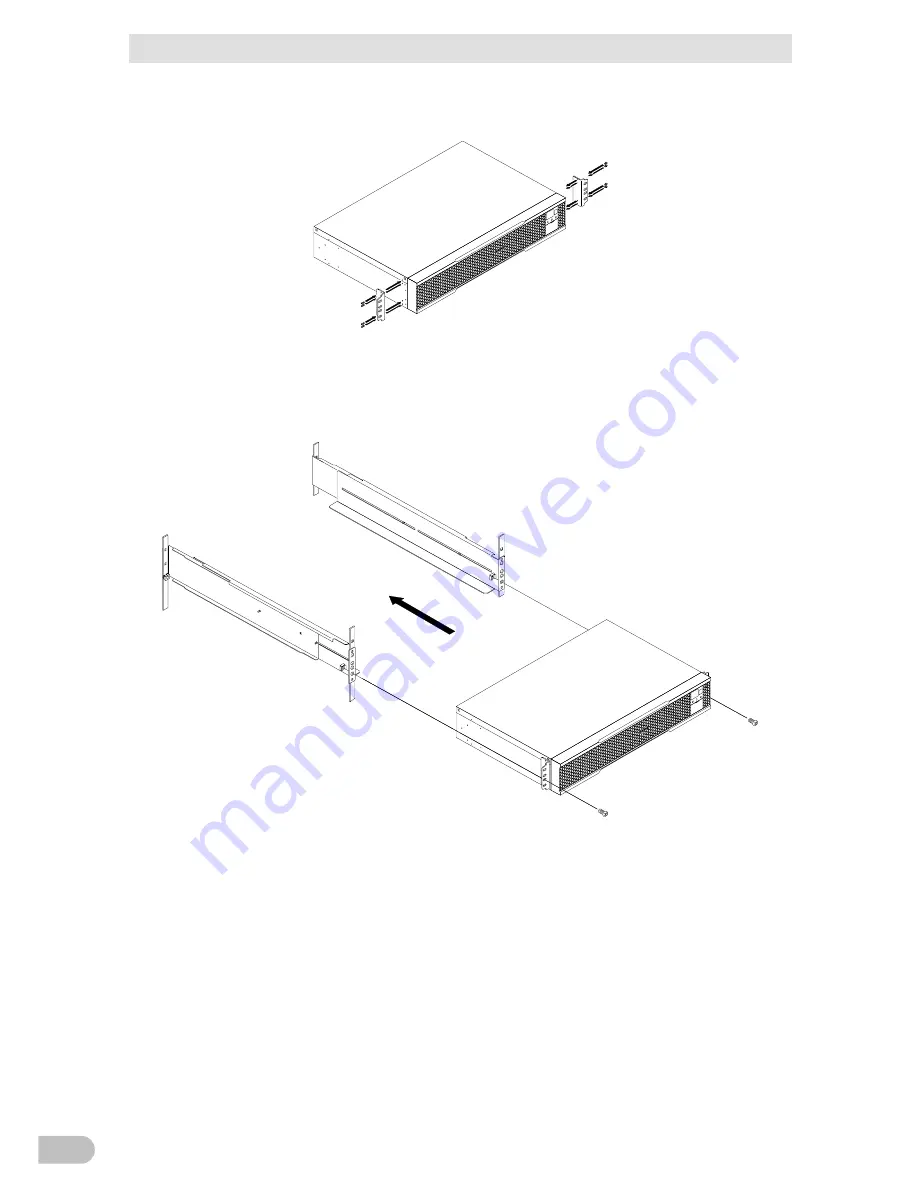
4.
Use the 8 included ear bracket mounting flat-head screws (2 sets of 4 screws) to
securely fasten the ear brackets to the left and right sides of the UPS. (4
4
4
*
The support angles cannot be attached to special EIA/JIS racks.
5.
Place the UPS on the support angles and push it completely into the rack (5, and use
the 2 included EIA/JIS rack fixing screws (M5) to securely fasten the ear brackets to the
server rack. (6
5
Push completely in
6
Use the unit fixing
screws to fasten
*
Be sure to use the support angles.
BA75T/BA100T/BA100R
26
Summary of Contents for BA100R
Page 23: ...2 Installation and connection 2 1 Installation Incorrect Positions BA75T BA100T BA100R 22...
Page 87: ...8 Note of Chinese 8 Note of Chinese UPS UPS 1 UPS FA OA Windows BA75T BA100T BA100R 86...
Page 88: ...8 Note of Chinese 2 FA OA A VCCI A BA75T BA100T 12 5 BA100R 13 BA75T BA100T BA100R 87 8...
Page 90: ...8 Note of Chinese 5cm AC 25 5 30 4 AC AC AC AC BA75T BA100T BA100R 89 8...
Page 91: ...8 Note of Chinese ON OFF AC INPUT PROTECTION 1mA AC UPS AC UPS BA75T BA100T BA100R 90...
Page 92: ...8 Note of Chinese BA75T BA100T BA100R 91 8...
Page 93: ...8 Note of Chinese AC UPS 25 25 6 40 2 AC AC DC250V BA75T BA100T BA100R 92...
Page 99: ...9 References 9 2 Dimensions Upright stand for BA100R BAP100R BA75T BA100T BA100R 98...
Page 100: ...9 References 9 2 Dimensions Rubber feet BA75T BA100T BA100R 99 9...
Page 101: ...9 References 9 2 Dimensions Using Ear brackets BAP100RS BA75T BA100T BA100R 100...
Page 103: ...9 References 9 4 China RoHS Information 9 4 China RoHS Information BA75T BA100T BA100R 102...


