169
12
1
If you are using an IBM compatible
PC/AT without Windows 2000
installed, you must first install the
USB driver.
For more details about how to install the
USB driver, refer to the instructions that
you received with the CAMEDIA Master.
2
Select the memory card that holds
the images you want to read with
the computer. (
➞
121)
Note that you cannot change the card
selection once the camera is connected
the computer. If you wish to change the
card selection, you must first disconnect
the USB cable. (
➞
171)
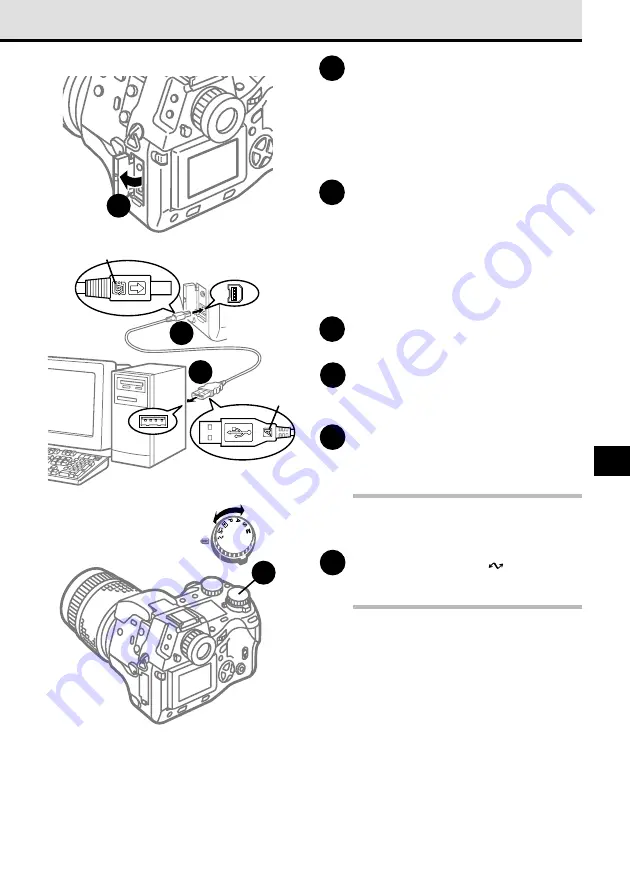
3
Open the connector cover on the
camera.
4
Connect the B connector of the
USB cable (the large connector) to
the camera connection point.
5
Connect the A connector of the
USB cable (the flat connector) to
the computer.
Note
• If your computer has two USB ports, you can
use either port.
6
Set the mode dial to
(setup/
connection mode).
Note
• The computer recognizes the card selected in
the camera as an external disk drive. Normally,
the device is displayed as a “Removable Disk”.
The images on the card can be handled as
files with Windows Explorer.
While copying or moving image files, never
disconnect the USB cable from the camera or
computer.
Switching the card
After changing the card inserted in the camera,
make sure that the drive that names the card
displays the correct information. To confirm that
the display is correct, in Windows Explorer from
the View menu select Refresh.
3
4
5
A
B
ON
OFF
6
To the USB port
of the computer
Summary of Contents for E-10 - 4MP Digital Camera
Page 20: ...18 ...
Page 86: ...84 ...
Page 98: ...96 ...
Page 112: ...110 ...
Page 138: ...136 ...
Page 158: ...156 ...


