3
T
O
CONNECT
THE
TELEPHONE
HANDSET
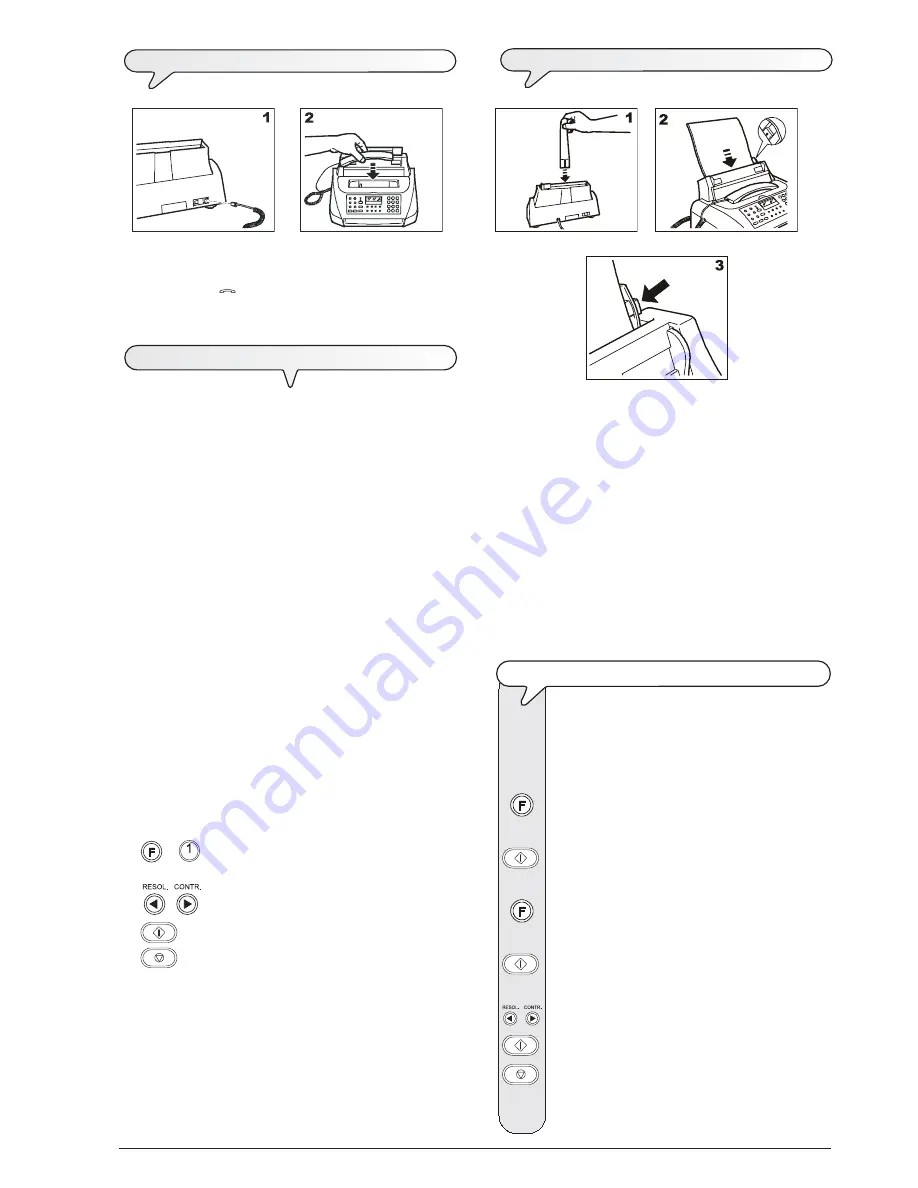
1. Insert the connector of the handset cable into the socket marked
with the symbol
on the fax machine.
2. Place the handset in its seat.
T
O
CONNECT
IT
TO
THE
POWER
SUPPLY
notE
Before
connecting the fax machine
to the mains, you
need to
remove the band that blocks the print head
carriage
by pulling the flap that comes out of the automatic
feeder for original documents.
1. Insert the plug of the power cable into the wall power socket.
The fax machine automatically runs a short test to check that its com-
ponents are working and then the display shows:
AUTOMATIC RX
CHECK PRINT HEAD
NOTE
The fax machine will remain
permanently connected
,
ready to receive and send documents
24 hours
a day.
If you want to
turn it off
,
detach the plug
of the power
cable from the wall socket as the fax machine has no on/off
switch.
notE
If the messages do not appear in the language spoken in
your country, choose the "
LANGUAGE
" from those avail-
able by pressing the following keys in the order indicated:
+
The display shows the language in which the
messages will be displayed.
/
To select the desired language.
To confirm the setting.
To complete the procedure.
T
O
ADD
PAPER
1. Insert the paper support extension in its slit until it clicks into place.
2. Holding the sheets by their upper edge, insert them by letting them
"drop" into the ASF without folding or forcing them.
3. Push the sheets against the left side of the ASF using the adjusting
lever.
notE
If you add sheets to the ASF, make sure you place them
under
and not on top of those already present.
notE
The fax machine has a
memory
that enables it to
receive
up
to
21 pages
even if you do
not add any paper
.
T
O
CHECK
THE
FORMAT
SET
ON
THE
FAX
MACHINE
Once you have manually adjusted the automatic sheet feeder
(ASF), to
ensure that the fax machine works properly
,
check that the
printing format
set on the fax machine
corresponds
to the
size of paper
you intend to use.
Until the display shows:
FAX SET-UP
The display shows:
DATE AND TIME
Until the display shows:
PRINTER PARAMET.
The display shows:
FORMAT:A4
/
Press
|
/
}
until the desired paper format is displayed.
To confirm the setting.
The display shows:
AUTOMATIC RX
CHECK PRINT HEAD


