2PV/2PW-3
1-6-1
1-6 Requirements on PWB Replacement
1-6-1 Upgrading the firmware
Follow the procedure below to upgrade the firmware of main PWB (main controller and scanner), engine
PWB, FAX control PWB*, optional language, optional paper feeder and color table.
Preparation
Extract the file that has the download firmware and put them in the USB Memory.
Procedure
1. Turn ON the main power switch and
confirm if the screen shows “Ready to
copy” then, turn OFF the main power
switch.
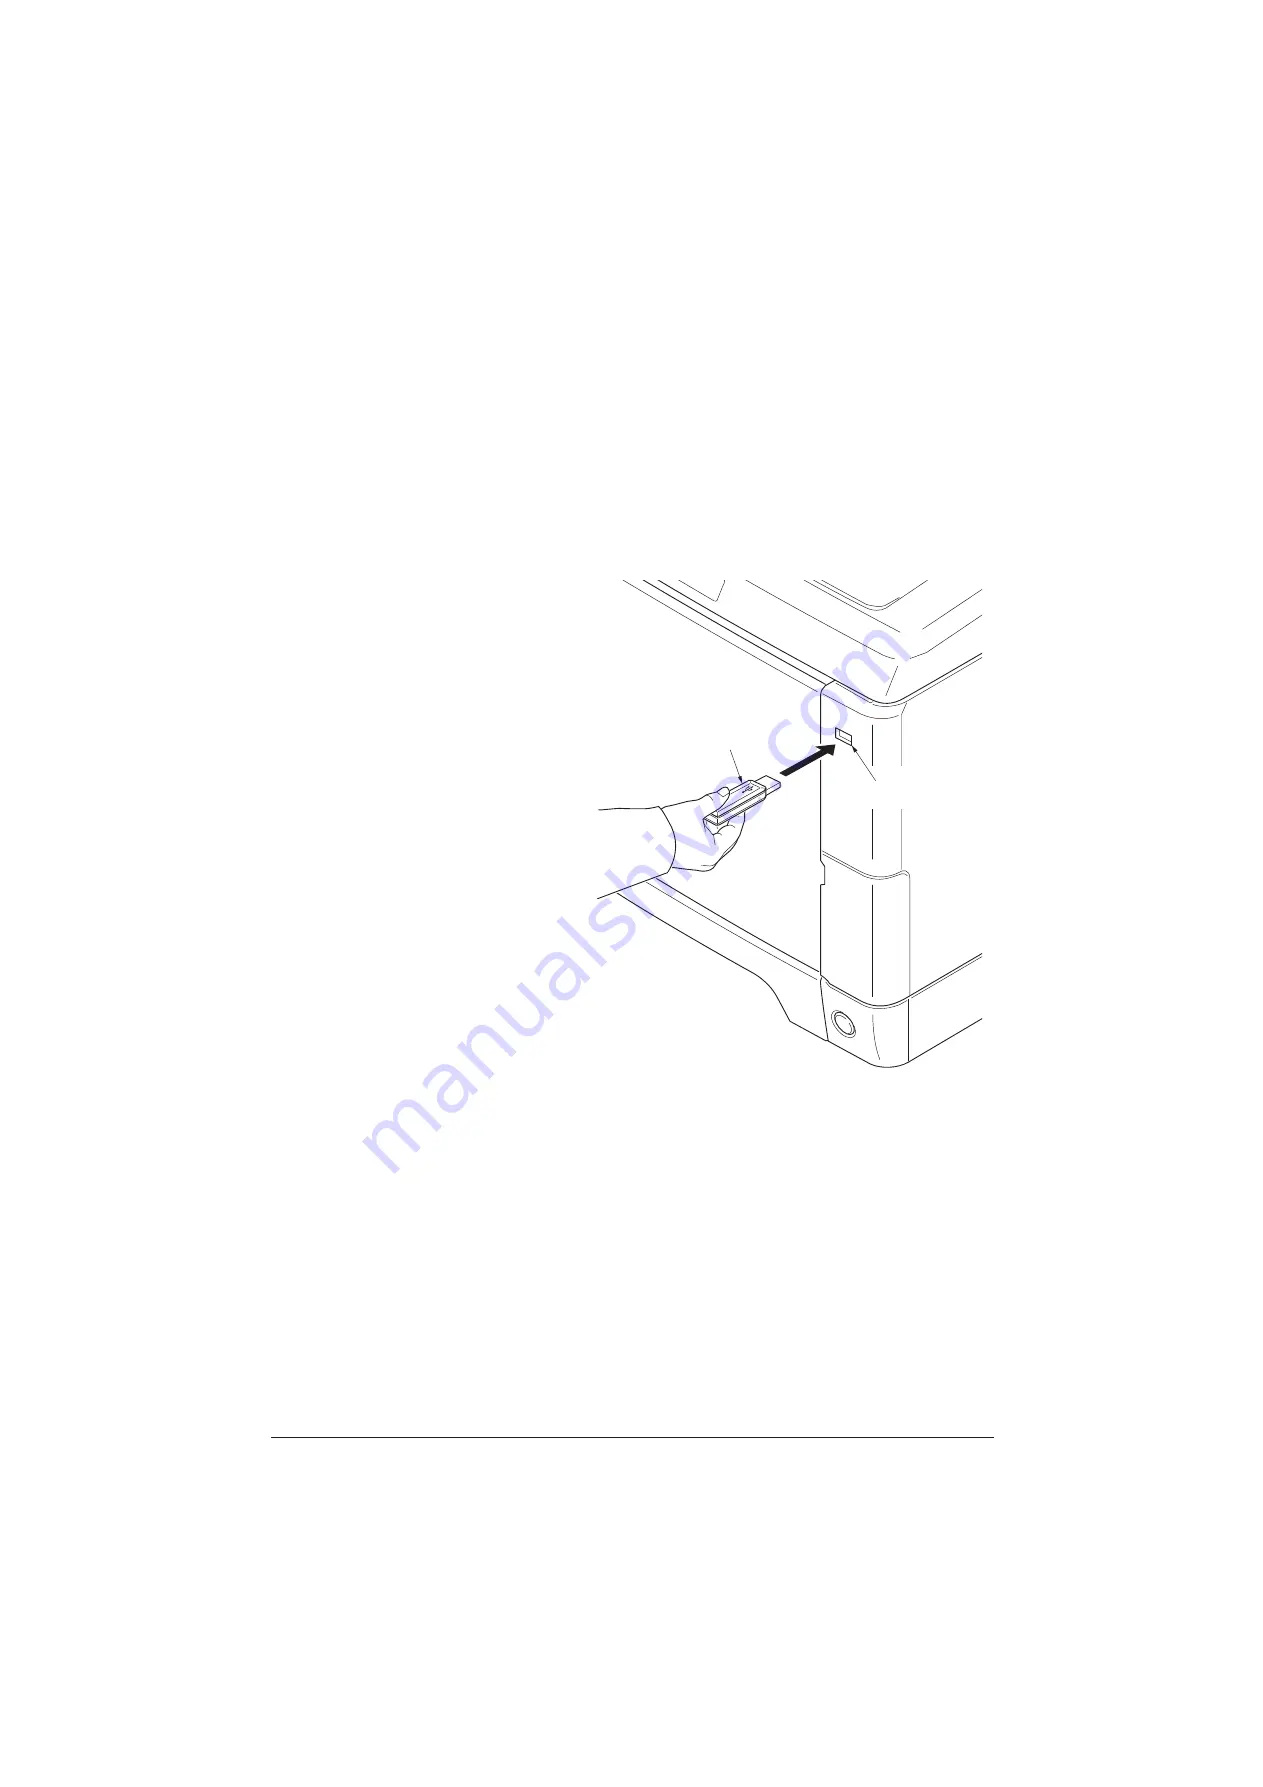
2. Insert USB memory that has the firm-
ware in the USB memory slot.
3. Turn ON the main power switch.
4. About 40 seconds later, “FW-Update”
will be displayed and blinking the
memory indicator (this shows to start
the download).
5. Display the software that now upgrad-
ing.
“FW-Update [CTRL]”
“FW-Update [ENGN]”
“FW-Update [PF1]”
“FW-Update [PF2]”
“FW-Update [SCAN]”
“FW-Update [FAX]” *
“FW-Update [OPT]”
“FW-Update [CLT]”
Caution:
Never turn off the power switch or remove
the USB flash device during upgrading.
6. Display the completion of the upgrade
(Memory indicator is ON condition).
Figure 1-6-1
7. ROM version is confirmed by the con-
tent of the display.
8. Turn OFF the main power switch and
remove the USB memory.
*: 4 in 1 model (with FAX) only.
Safe-UPDATE
If the device is accidentally switched off or the USB memory is disconnected and upgrading was incomplete,
upgrading is retried when turning the main power switch on next time. Insert USB memory and turn the main
power switch on to perform steps 3 to 8 as the above.
USB memory
USB memory slot
Service Manual
Y116650-5
Summary of Contents for d-Color MF2613En
Page 1: ...SERVICE MANUAL Multifuction Digital Copier d Color MF2613En d Color MF2614En Code Y116650 5...
Page 4: ...This page is intentionally left blank...
Page 10: ...This page is intentionally left blank...
Page 38: ...2PV 2PW 1 2 14 This page is intentionally left blank Service Manual Y116650 5...
Page 136: ...2PV 2PW 1 3 98 This page is intentionally left blank Service Manual Y116650 5...
Page 190: ...2PV 2PW 1 4 54 This page is intentionally left blank Service Manual Y116650 5...
Page 241: ...2PV 2PW 1 5 51 9 Remove the scanner unit Figure 1 5 78 Scanner unit Service Manual Y116650 5...
Page 284: ...2PV 2PW 1 5 94 This page is intentionally left blank Service Manual Y116650 5...
Page 288: ...Service Manual Y116650 5 This page is intentionally left blank...
Page 328: ...2PV 2PW 2 2 10 This page is intentionally left blank Service Manual Y116650 5...
Page 354: ...2PV 2PW 2 3 26 This page is intentionally left blank Service Manual Y116650 5...
Page 375: ...UPDATINGSTATUS DATE UPDATEDPAGES PAGES CODE 07 2014 1ST EDITION 375 Y116650 5...


