background image

19

Deutsch

Español

Slovensky

ANLASSEN

PUESTA EN MARCHA

NAŠTARTOVANIE

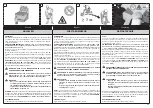
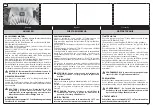
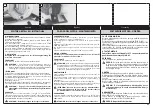
  ACHTUNG: Befolgen Sie die Sicherheitsvorschriften für 

die Handhabung von Treibstoff. Stellen Sie den Motor vor 
dem Tanken unbedingt ab. Füllen Sie niemals Treibstoff 
in eine Maschine mit laufendem oder heißem Motor. 
Entfernen Sie sich mindestens 3 m von der Stelle, an 
der Sie aufgetankt haben, bevor Sie den Motor starten 
(Abb.23). NICHT RAUCHEN!

S ä u b e r n   S i e   d i e   U m g e b u n g   d e s  Ta n k d e c k e l s,   u m 

1. 

Verschmutzungen des Treibstoffs zu vermeiden.
Drehen Sie den Tankdeckel langsam auf.

2. 

Füllen Sie das Treibstoffgemisch vorsichtig in den Tank. 

3. 

Möglichst keinen Treibstoff verschütten.
Säubern und kontrollieren Sie die Dichtung, bevor Sie den 

4. 

Tankdeckel wieder aufsetzen.
Setzen Sie den Tankdeckel sofort wieder auf und drehen Sie 

5. 

ihn von Hand fest zu. Entfernen Sie eventuell verschütteten 
Treibstoff.

HINWEIS: Es ist vollkommen normal, dass der Motor während 
und nach dem ersten Gebrauch etwas raucht.

  ACHTUNG: Kontrollieren Sie, ob Treibstoff austritt; 

Leckstellen vor dem Gebrauch beseitigen. Falls 
erforderlich verständigen Sie bitte Ihren Fachhändler.

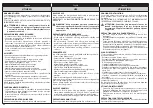
Motor ist ersoffen 
-  Bringen Sie den Ein-/Ausschalter in Stellung STOPP
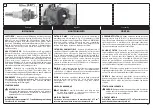
-  Setzen Sie ein geeignetes Werkzeug in die Fassung der Zündkerze 

ein (A, Abb. 25).

-  Hebeln Sie die Zündkerzenfassung ab.
-  Schrauben Sie die Zündkerze heraus und trocknen Sie sie.
-  Ziehen Sie den Gashebel bis zum Anschlag.
-  Ziehen Sie das Anwer fseil mehrmals durch, um die 

Vergaserkammer zu lüften.

-  Setzen Sie die Zündkerze wieder ein und setzen Sie die 

Zündkerzenfassung auf; drücken Sie sie fest nach unten.

-  Bringen Sie den Ein-/Ausschalter in Position I, die Startposition.
-  Bringen Sie den Chokehabel in der Stellung OFFEN, und zwar 

auch bei kaltem Motor.

-  Werfen Sie jetzt den Motor wieder an.

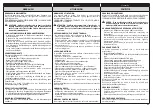
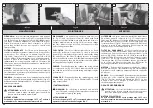
  ATENCIÓN: seguir las instrucciones de seguridad al 

manipular el combustible. Apagar el motor antes del 
llenado. No añadir combustible a una máquina con el 
motor caliente o en funcionamiento. Alejarse 3 m del 
punto de llenado antes de poner el motor en marcha 
(Fig.23). ¡NO FUMAR!

Limpiar la superficie en torno al tapón del combustible para 

1. 

evitar contaminaciones.
Aflojar lentamente el tapón del combustible.

2. 

Verter la mezcla de combustible con cuidado en el depósito. 

3. 

Evitar que el combustible se derrame.
Antes de volver a poner el tapón del combustible, limpiar e 

4. 

inspeccionar la junta.
Colocar inmediatamente el tapón y apretarlo a mano. Eliminar 

5. 

todo eventual residuo de combustible.

NOTA: es normal que un motor nuevo emita humo durante y 
después del primer uso.

  ATENCIÓN: comprobar que no haya fugas de combustible; 

si las hay, eliminarlas antes del uso. Si es necesario, 
contactar con el servicio de asistencia del revendedor.

Motor ahogado 
-  Ajuste el interruptor de activación/desactivación en la posición 

STOP

-  Acople una herramienta adecuada en la funda de la bujía 

(A, Fig. 25).

-  Haga palanca para sacar la funda de la bujía.
-  Desenrosque la bujía y séquela.
-  Abra el acelerador por completo.
-  Tire de la cuerda del motor de arranque varias veces para 

desahogar la cámara de combustión.

-  Vuelva a poner la bujía y conecte su funda; presione firmemente 

hacia abajo.

-  Ajuste el interruptor de activación/desactivación en la posición 

de arranque I.

-  Ponga la palanca de estrangulación en la posición OPEN, aunque 

el motor esté frío.

-  Ahora, arranque el motor.

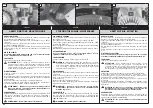
  POZOR: dodržiavajte bezpečnostné predpisy o 

manipulácii s palivom. Pred dopĺňaním paliva vždy 

vypnite motor. Palivo nikdy nedopĺňajte, keď je 

stroj alebo motor v činnosti a kým sú horúce. Pred 

naštartovaním motora sa presuňte aspoň o 3 m od 

miesta, kde ste dopĺňali palivo (obr.23). NEFAJČTE!

Očistite okolie uzáveru paliva, aby ste predišli znečisteniu 

1. 

nádrže.

Uzáver palivovej nádrže uvoľnite pomaly.

2. 

Opatrne nalejte palivovú zmes do nádrže. Zabráňte 

3. 

rozliatiu.

Pred vrátením uzáveru na miesto očistite a skontrolujte 

4. 

tesnenie.

Uzáver palivovej nádrže naskrutkujte na miesto, utiahnite. 

5. 

Poutierajte prípadne rozliate palivo.

Pozn: je normálne, že nový motor počas prvého použitia 

dymí.

  POZOR: skontrolujte, či nedochádza k úniku paliva a, 

ak k nim dochádza, pred používaním ich odstráňte. 

Podľa potreby zavolajte servisné stredisko predajcu.

Motor je zahltený 

-  Prepnite vypínač zapaľovania Zap./Vyp. do polohy 

STOP

-  Vsuňte vhodný nástroj pod koncovku sviečky 

(A, Obr.25)

.

-  Vypáčte koncovku sviečky.

-  Sviečku odskrutkujte a osušte.

-  Plynovú páčku úplne stlačte.

-  Potiahnite štartovacie lanko niekoľkokrát, aby sa 

vyčistila spaľovacia komora.

-  Upevnite sviečku späť a zapojte koncovku sviečky, 

zatlačte koncovku 

pevne

 – zmontujte ostatné časti.

-  Prepnite v ypínač zapaľovania Zap./Vyp. do 

štartovacej polohy 

I

.

-  Páčku sýtiča nastavte do OTVORENEJ polohy – aj keď 

je motor studený.

-  Teraz naštartujte motor.

Summary of Contents for FS 45 TL

Page 1: ...L 147 7 cm3 SC 33 50 2 cm3 I MANUALE DI USO E MANUTENZIONE GB OPERATOR S INSTRUCTION BOOK F MANUEL D UTILISATION ET D ENTRETIEN D BEDIENUNGSANLEITUNG E MANUAL DE INSTRUCCIONES SK NÁVOD NA POUŽITIE A ÚDRŽBU Mod 330000051B Lug 2011 CENTROFFSET Printed in Italy ...

Page 2: ...rding to Country requirements and are subject to change without notice by the manufacturer F INTRODUCTION TRADUCTION DES INSTRUCTIONS ORIGINALES Pour un emploi correct de la motopompe et pour éviter les accidents ne commencez pas le travail sans avoir d abord lu attentivement le manuel Vous trouverez les descriptions du fonctionnement des divers composants et les instructions pour les contrôles né...

Page 3: ...F CONFORMITY ______ 34 MAINTENANCE CHART______________ 36 USING TROUBLE SHOOTING CHART ___ 39 WARRENTY CERTIFICATE ____________ 42 INTRODUCCION ___________________ 2 EXPLICACION SIMBOLOS Y ADVERTENCIÂS DE SEGURIDAD ______ 4 COMPONENTES DE LA MOTOBOMBA __ 5 NORMAS DE SEGURIDAD____________ 8 ANTES DEL USO ___________________ 13 PUESTA EN MARCHA _______________ 15 UTILIZACION______________________ 23...

Page 4: ...or der Inbetriebnahme lesen 1 Immer Helm Schutzbrille und Geräuschschutz tragen 2 Gerät 3 MOTORPUMPEN Garantierter akustischer Schalleistungspegel 4 Seriennummer 5 CE Zeichen 6 Baujahr 7 E Antes de utilizar esta máquina leer el manual de instrucciones 1 Llevar casco gafas y auriculares de protección 2 Tipo de máquina 3 MOTOBOMBA Nivel de potencia acústica garantizado 4 Número de serie 5 Marcha CE ...

Page 5: ...e 10 Bouchon de charge 11 pompe Bouchon de vidange 12 pompe Raccord d aspiration 13 Raccord de 14 refoulement D BAUTEILE DEN MOTORPUMPE Eim Aus Schalter 1 Hitzeschutzgitter 2 Motor 3 Luftfilter 4 Chokehebel 5 Gashebel 6 Kraftstofftank 7 Kraftstofftankdechel 8 Kraftstoffhahn 9 Startergriff 10 Einfüllstopfen Pumpe 11 Ablassstopfen Pumpe 12 Ansauganschluss 13 Auslassanschluss 14 E COMPONENTES DE LA M...

Page 6: ...te con i segnali di pericolo e di 15 sicurezza in perfette condizioni In caso di danneggiamenti o deterioramenti occorre sostituirle tempestivamente Vedi pag 4 Si raccomanda di 16 non avviare mai la macchina senza la girante Ciò può causare danni importanti alle parti del motore e l immediato decadimento della garanzia Non utilizzare la macchina in vicinanza di apparecchiature 17 elettriche e line...

Page 7: ... que par des personnes 2 majeures en bonne condition physique et bien informées de son mode d emploi Ne pas utiliser la motopompe en conditions de fatigue 3 physique ou sous l effet de l alcool ou de drogues Fig 1 Porter les EPI et plus particulièrement des gants une 4 combinaison des lunettes de protection et un casque pour les oreilles pag 10 11 Éviter que des personnes non autorisées ou des ani...

Page 8: ...ndfreiem Zustand befinden Bei Beschädigung oder Unleserlichkeit müssen sie rechtzeitig ersetzt werden siehe Seite 4 Die Maschine 16 nie ohne Laufrad Es können sonst beträchtliche Schäden am Motor enstehen Der Hersteller kann in diesem Falle keine Garantie übernehmen Arbeiten Sie mit der Maschine nicht in der Nähe von 17 elektrischen Geräten oder Stromleitungen Abb 5 Die Laufradflügel sind vor Stöß...

Page 9: ...štátne predpisy Stroj nepoužívajte skôr ako sa oboznámite s jeho obsluhou 1 Začiatočníci by si mali pred prácou obsluhu stroja vyskúšať Stroj smú používať iba dospelé osoby v dobrom fyzickom 2 stave ktoré sú oboznámené s jeho obsluhou Nepoužívajte stroj keď ste unavení alebo pod vplyvom 3 alkoholu alebo omamných látok Obr 1 Vždy noste IOP hlavne rukavice ochranné okuliare a slúchadlá 4 pozrite ods...

Page 10: ...oes not eliminate injury risks but reduces injury effects in case of accident Consult your trusted supplier to choose an adequate equipment The clothing must be proper and not an obstacle Safety shoes or boots having skid proof sole and anti piercing insert Fig 1 2 Use protections against noises for example noise reduction ear guards Fig 3 or earplugs The use of protections for the ear requests mu...

Page 11: ...tos de seguridad no elimina los riesgos de lesiones pero reduce los daños en caso de accidente Consultar con el vendedor de la máquina sobre los indumentos adecuados La ropa debe ser cumplir su función de protección y ser cómoda Utilizar zapatos o botas de seguridad con suela antideslizante y punteras de acero Fig 1 2 Emplear elementos de protección contra el ruido como auriculares Fig 3 o tapones...

Page 12: ... In the case of a non self priming pump the suction A Fig 6 hose should also be completely filled with water taking care that no air remains inside it WARNING Delivery of water should be immediate o takes more 4 minutes for a pump If delivery of water fails to occur as explained above check that all gaskets and connections are tight so as no air leaking is possible and that the pump body is filled...

Page 13: ...rada de impurezas en el cuerpo de la bomba y posibles daños en la turbina MODO DE CEBAR Colocar la bomba lo màs cerca posible del agua Ubicar en modo correcto ver figura 5 Cargar completamente la bomba a travès del tapòn de carga Fig 6 7 En el caso de la bomba centrìfuga no autocebante es necesario cargar tambièn el tubo de aspiraciòn A Fig 6 cuidando que no quede aire ATENCIÓN Si la emisión de un...

Page 14: ... and to keep fuel from escaping around the cap Tighten fuel cap securely after refueling Unit vibration can cause an improperly tightened fuel cap to loosen or come off and spill quantities of fuel Wipe spilled fuel from the unit Move 3 metre away from refueling site before starting engine Fig 16 Never attempt to burn off spilled fuel under any circumstances Store fuel in a cool dry well ventilate...

Page 15: ...s o llamas Apoyar en el suelo parar el motor y dejar enfriar antes del llenado Aflojar el tapón del combustible lentamente para aliviar la presión y evitar fugas de combustible Apretar firmemente el tapón de combustible después del llenado Las vibraciones pueden causar un aflojamiento del tapón y fugas de combustible Secar el combustible de las fugas de la unidad Desplazar la máquina a 3 metros de...

Page 16: ...ortions shown in the table Fig 19 are suitable when using the Oleo Mac PROSINT 2 and EUROSINT 2 Fig 20 or an equivalent high quality engine oil JASO specification FD or ISO specification L EGD When oil specifications are NOT equivalent or unknown use 4 1 25 oil fuel mixing ratio CAUTION DO NOT USE AUTOMOTIVE OIL OR 2 CYCLE OUTBOARD OIL CAUTION Never use a fuel with an alcohol percentage higher tha...

Page 17: ...l prospecto Fig 19 son adecuadas cuando se utiliza aceite para motores Oleo Mac PROSINT 2 y EUROSINT 2 Fig 20 o un aceite para motor de alta calidad equivalente especificaciones JASO FD o ISO L EGD Si las especificaciones del aceite no se conocen o NO son equivalentes utilizar una relación de mezcla aceite combustible del 4 1 25 PRECAUCIÓN NO UTILIZAR ACEITE PARA VEHÍCULOS O ACEITE PARA MOTORES FU...

Page 18: ...n Wipe up any fuel 5 spillage NOTE It is normal for smoke to be emitted from a new engine during and after first use WARNING Check for fuel leaks if any are found correct before use Contact a Servicing Dealer if necessary Engine is Flooded Set the on off switch to STOP Engage a suitable tool in the spark plug boot A Fig 25 Pry off the spark plug boot Unscrew and dry off the spark plug Open the thr...

Page 19: ... que el combustible se derrame Antes de volver a poner el tapón del combustible limpiar e 4 inspeccionar la junta Colocar inmediatamente el tapón y apretarlo a mano Eliminar 5 todo eventual residuo de combustible NOTA es normal que un motor nuevo emita humo durante y después del primer uso ATENCIÓN comprobar que no haya fugas de combustible si las hay eliminarlas antes del uso Si es necesario cont...

Page 20: ...arter handle again till the engine starts After starting warm up the motor before increasing the rpms to the required value During use when a high number of rpms is no longer necessary move the accelerator lever back to the minimum WARNING Do not use the choke 1 Fig 27 when starting a hot engine BREAKING IN THE ENGINE The engine reaches the maximum power after 5 8 hours of activity During this per...

Page 21: ... operacion hasta que el motor arranque Entonces ponga el mando del starter 1 Fig 27 in posicion OPEN y tire el mando del starter de nuevo para arrancar el motor Después de la puesta en marcha calentar el motor antes de aumentar el número de revoluciones hasta el valor requerido cuando durante el uso ya no sea necesario un número de revoluciones alto volver a colocar la palanca del acelerador al mí...

Page 22: ...olvents or diluents of any kind or type Fuels or lubricants of any kind or type GPL or gases of any kind or type Inflammable liquids of any kind or type Liquids containing grains or consistent solids Liquids food both animal and uman Mixture of various non compatible chemical products Liquids with temperatures higher than 40 C Products that do not pertain to the specific use of the machine Liquids...

Page 23: ... terrenos irregulares USOS NO ADMITIDOS Se prohíbe terminantemente utilizar el atomizador con los siguientes productos Pinturas o barnices de cualquier tipo Disolventes o diluyentes para pinturas o barnices de cualquier tipo Combustibles o lubricantes de cualquier tipo GLP o gases de cualquier otro tipo Líquidos inflamables de cualquier tipo Líquidos alimentarios para animales o seres humanos Líqu...

Page 24: ... fastened using straps or belts The machine must be transported with the tank empty also ensuring compliance with transport regulations applicable to such machines MAINTENANCE Always follow the manufacturer s instructions for the maintenance operations Never carry out operations or repairs on your own that are other than routine maintenance Call specialised and authorised workshops only Never use ...

Page 25: ...TRANSPORTE Transportar la máquina con el motor apagado ATENCIÓN Para el transporte de la máquina en un vehículo asegurarse de que esté fijada en el vehículo de modo correcto y firme mediante correas La máquina se debe transportar con el depósito vacío cerciorarse de que se cumplan las normas vigentes en materia de transporte de máquinas MANTENIMIENTO Seguir siempre nuestras instrucciones para las ...

Page 26: ...lammable detergent liquid e g hot soap water then dry A dirty filter can cause difficult starting and lower engine performance ENGINE Periodically clean the cylinder fins using a brush or compressed air Fig 42 If dirt is allowed to build up on the cylinder it could cause overheating and impair engine performance SPARK PLUG Periodically clean the spark plug and check the electrode gap Fig 41 Use a ...

Page 27: ...llar el tornillo A quitar la junta B y extraer el filtro C prestando mucha atención para no provocar dafios Lavar el filtro con un fluido detergente limpio no inflamable por ej agua jabonosa caliente y secarlo Un filtro sucio crea dificultades en el arranque y disminuye las prestaciones del motor MOTOR Limpie regularmente las aletas del cilindro con un cepillo o con aire comprimido Fig 42 La acumu...

Page 28: ...rohibited since is the cause of soil pollution EXTRA MAINTANANCE ADVISABLE It is advisable to inspect the machine by a specialized technician at an authorized service network at the end of season if used intensively and every two years if with normal use WARNING Any maintenance operations not specifically dealt with in this manual must be carried out by an authorised service centre To ensure that ...

Page 29: ...s residuos del lavado en el medio ambiente ya que contaminan las napas de agua MANTENIMIENTO EXTRAORDINARIO Se aconseja hacer revisar el equipo por un técnico especializado del servicio de asistencia todos los años si el uso es intensivo o cada dos años si el uso es normal ATENCIÓN Todas las operaciones de mantenimiento no indicadas en este manual deben ser realizadas por un taller autorizado Para...

Page 30: ...ith the ground away from heat sources and the tanks empty The procedures for returning the machine to service following winter storage are the same as for starting up during everyday use page 14 20 DEMOLITION AND DISPOSAL When the machine has finished it s service life due to service exhaustion wash it with the maximum attention as to remove residual chemical products Most materials used for the m...

Page 31: ...s vacíos en un ambiente seco en lo posible sin contacto con el suelo y lejos de fuentes de calor Para volver a utilizar la máquina después de la pausa invernal es suficiente realizar las mismas operaciones que para la puesta en marcha habitual pág 15 21 DESGUACE Y DESECHO DEL EQUIPO Al final de la vida útil de la máquina lávelo esmeradamente para eliminar todo residuo de producto químico Muchos de...

Page 32: ...DOR KARBURÁTOR A VASCHETTA FLOAT TYPE À CURVE MIT SCHWIMMER DE CUBETA S PLAVÁKOM CARBURANTE FUEL CARBURANT KRAFTSTOFF CARBURANTE POUŽÍVAJTE MISCELA BENZINA OLIO MIXTURE MÉLANGE ESSENCE HUILE IGES GEMISCH MEZCLA GASOLINA ACEITE ZMES OLEJA A BENZÍNU BENZINA GASOLINE ESSENCE BENZIN GASOLINA BENZÍNU CAPACITÀ SERBATOIO FUEL TANK CAPACITY CAPACITÉ DU RÉSERVOIR KRAFTSTOFFTANK INHALT CAPACIDAD DEPÓSITO OB...

Page 33: ...I POTENZA ACUSTICA MISURATO MEASURED SOUND POWER LEVEL NIVEAU DE PUISSANCE ACOUSTIQUE MESURÉ SCHALLLEISTUNGSPEGEL GEMESSEN NIVEL DE POTENCIA ACÚSTICA MEDIDO NAMERANÁ ÚROVEŇ ZVUKOVÉHO VÝKONU dB A 2000 14 EC EN ISO 3744 100 0 100 8 99 9 100 8 99 2 INCERTEZZA UNCERTAINTY INCERTITUDE UNSICHERHEIT INCERTIDUMBRE NEISTOTA dB A 1 0 1 2 1 8 1 2 0 8 LIVELLO POTENZA ACUSTICA GARANTITA GUARANTEED SOUND POWER ...

Page 34: ...declara bajo su responsabilidad que la máquina Vyhlasuje na svoju výhradnú zodpovednosť že stroj 1 Genere motopompa 1 Type motopompe 1 Catégorie water pump 1 Baurt motorpumpen 1 Género motobomba 1 Typ motorové čerpadlo 2 Marca Tipo 2 Trademark Type 2 Marque Type 2 Marke Typ 2 Marca Tipo 2 Ochranná známka Typ 3 identificazione di serie 3 serial identification 3 identification de série 3 Serien Iden...

Page 35: ...wer level Niveau de puissance acoustique mesuré Schallleistungspegel gemessen Nivel de potencia acústica medido Nameraná úroveň zvukového výkonu Livello di potenza acustica garantita Guaranteed sound power level Niveau de puissance acoustique garanti Garantierter akustischer Schalleistungspegel Nivel de potencia acústica garantizado Zaručovaná úroveň zvukového výkonu Fatto a Fait à made at Aufgese...

Page 36: ...zionare danni e usura X Sostituire X Carburatore Controllare il minimo X X Candela Controllare distanza elettrodi X Sostituire X Ogni 6 mesi Guarnizioni Ispezionare e sostituire se necessario X MAINTENANCE CHART Please note that the following maintanance intervals apply for normal operating conditions only If your daily work requires longer than normal or harsh cutting conditions are present the s...

Page 37: ... ralenti X X Bougie Contrôler distance électrodes X Remplacer X Tous les 6 mois Joints Vérifier et remplacer si nécessaire X WARTUNGSTABELLE Bitte beachten Sie dass die folgenden Wartungsintervalle nur für die normalen Einsatzbedingungen gelten Wenn Ihre tägliche Arbeit unter schwierigeren Bedingungen als normal durchgeführt wird müssen die Wartungsintervalle entsprechend verkürzt werden Vor jedem...

Page 38: ...r la distancia de los electrodos X Sustituir X Cada 6 meses Juntas Inspeccionar y sustituir si es necesario X TABUĽKA ÚDRŽBY Upozorňujeme vás že nasledujúce intervaly údržby sa uplatňujú iba pri bežných podmienkach činnosti Ak je vaša každodenná práca namáhavejšia vzhľadom na bežné podmienky treba intervaly údržby primerane skrátiť Pred každým použitím Po každom zastavení kvôli doplneniu paliva Po...

Page 39: ...arsa Profondità di adescamento 1 eccessiva La girante è danneggiata o 2 usurata Filtro di aspirazione 3 ostruito Vedi tabella pag 32 1 Contattare un Centro 2 Assistenza Autorizzato Pulire il filtro di aspirazione 3 USING TROUBLESHOOTING CHART WARNING Always stop unit and disconnect spark plug before performing all of the recommended remedies below except remedies that require operation of the unit...

Page 40: ...CHTUNG Vor Durchführung aller in der untenstehenden Tabelle empfohlenen Prüfungen das Gerät immer abstellen und die Zündkerze trennen es sei denn der Betrieb des Geräts wird ausdrücklich verlangt Wenn alle möglichen Ursachen überprüft wurden die Störung jedoch nicht behoben werden konnte wenden Sie sich bitte an eine autorisierte Kundendienststelle Wenn ein Problem auftritt dass nicht in dieser Ta...

Page 41: ... desgastado Filtro de admisión 3 obstruido Véase la tabla de la pág 32 1 Llamar a un Centro de 2 Asistencia Autorizado para regular el carburador Limpiar el filtro de 3 admisión RIEŠENIE PROBLÉMOV POZOR jednotku vždy zastavte a odpojte sviečku až potom urobte všetky nápravné opatrenia podľa tabuľky dolu samozrejme okrem tých pri ktorých sa vyžaduje aby bola jednotka v chode Ak sa vám nepodarilo pr...

Page 42: ...itable lubricants and fuels have been used non original spare parts and accessories have been fitted work has been done on the machine by unauthorised personnel 5 The warranty does not cover consumables or parts subject to normal wear 6 The warranty does not cover work to update or improve the machine 7 The warranty does not cover any preparation or servicing work required during the warranty peri...

Page 43: ...letar todas sus partes y ha de estar debidamente timbrado por el vendedor 4 La garantía pierde su validez en los siguientes casos Falta evidente de mantenimiento Uso incorrecto o manipulación del producto Uso de lubricantes o combustibles inadecuados Uso de piezas de recambio o accesorios no originales Intervenciones efectuadas por parte de personal no autorizado 5 La garantía no incluye ni los ma...

Page 44: ...compagnare la macchina durante tutta la sua vita GB WARNING This owner s manual must stay with the machine for all its life F ATTENTION Le manuel doit accompagner la machine pour toute sa vie D ACHTUNG Dieses Anweisungsheft muß das Gerät während seiner gesamten Lebensdauer begleiten E ATENCIÓN Este manual debe acompañar a la máquina durante toda su vida útil SK UPOZORNENIE Tento návod musí sprevád...

Reviews: