48
3 About Paper
4.
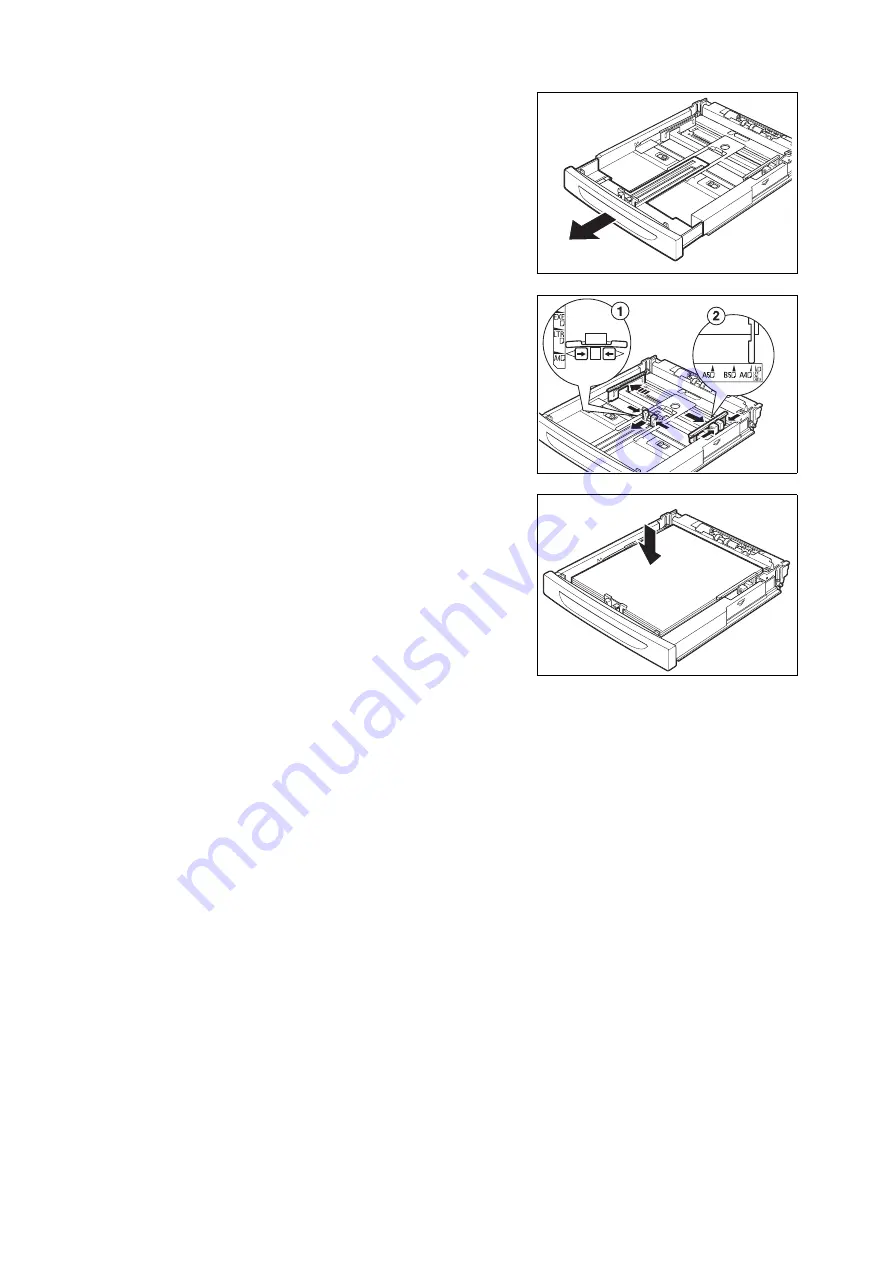
Hold the grip of the paper tray and pull its
extendable part to the front until it reaches
its maximum.
5.
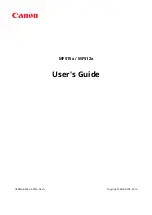
Squeeze the length guide and slide it to the
desired paper size (1). Squeeze the right
width guide and slide it to the desired paper
size (2).
6.
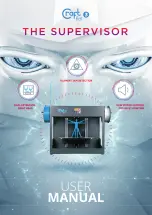
Load the paper with the side to be printed
facing up and with all four corners aligned.
Important
• Do not place paper over the right width guide.
• Do not load paper exceeding the maximum fill line or the maximum capacity allowed.
• Align the right width guide with the paper width correctly. If the right width guide is not in place, the paper
will not be properly fed and this may cause paper jams.
7.
Close the lid of the paper tray and push the tray completely into the printer.
Important
• The lid of the tray must be firmly closed. If not, the paper might become misaligned.
8.
Depending on the types and sizes of the loaded paper, you need to configure settings
on the control panel. Change the paper type when non-plain paper such as recycled
paper, heavyweight paper or transparencies are loaded. Configure the paper size
when custom size paper is loaded.
Refer to
• Paper type and size that can be loaded: “Usable Paper” (P. 43)
• Setting paper size: “3.3 Setting Custom Paper Sizes” (P. 50)
• Setting paper type: “3.4 Setting Paper Types” (P. 51)
Summary of Contents for B6200dn
Page 1: ......
Page 9: ...Contents 5...
Page 89: ...4 3 Menu list 85 Continued from previous page Continued on next page...
Page 90: ...86 4 Settings on the Control Panel Continued from previous page...
Page 91: ...4 3 Menu list 87 From P 85 From P 85...
Page 92: ...88 4 Settings on the Control Panel From P 85...
Page 158: ...154 A Appendix...


