-
17
-
7-2.
Replacing and adjustment of the escaper
When using screws with a different diameter, replace the escaper, the
robot escaper guide, the rail and the passing plate.
Raise the holding plate to replace and adjust the necessary parts. After
replacement, be sure to adjust and check the parts in the area of the
escaper.
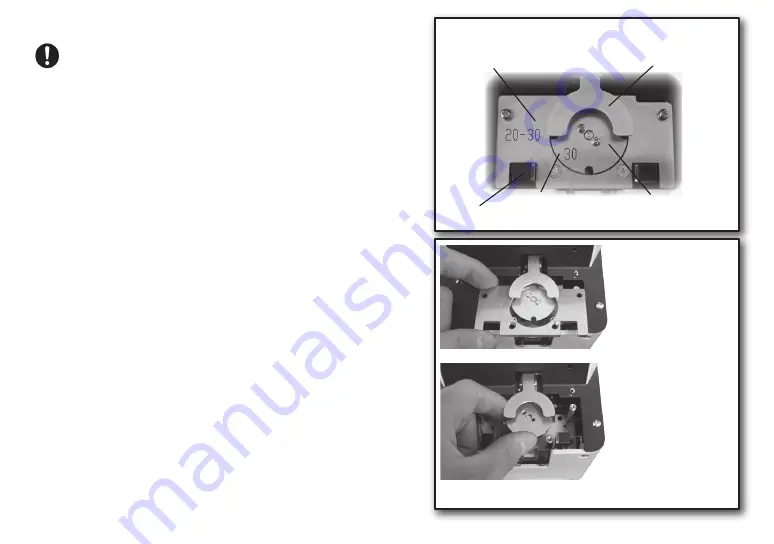
When you remove the escaper attaching screw, please use the driver
specified for M2 (bit No.0).
Holding plate
Escaper
Robot escaper guide
①
Remove the robot escaper guide and the escaper.
Loosen the attaching screws of the robot escaper guide and the escaper
and remove them.
Front sensor
Names of the parts
Turn OFF the power switch before replacing.
Turn ON the power switch when adjustments are necessary.
Before replacing, remove all the screws from the hopper, the
rail, and the escaper.
Remove the
Robot escaper guide.
Remove the escaper.
②
Attach the robot escaper guide and the escaper that corresponds
with the screw's nominal diameter.
Assemble the escaper loosely as it will need adjusting later.
Note that the stopper should not be on top of the escaper.
The stopper should be laying flat against the escaper guide-left.
If it is not laying flat, bend it gently by hand to adjust it.


