29
Connecting to a Smart Device (SnapBridge)
Connecting the Camera and a Smart Device
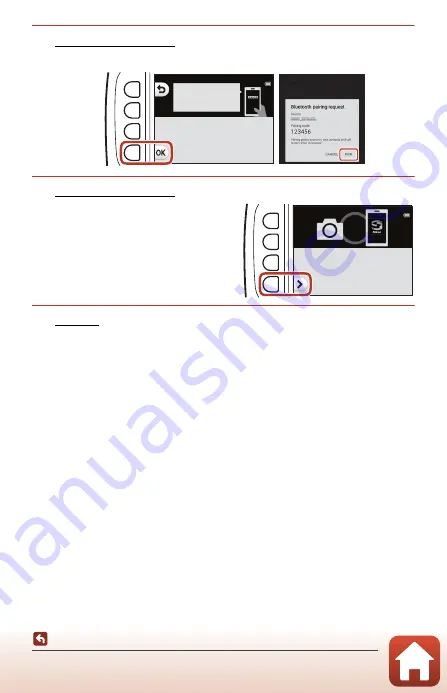
7
Camera/smart device: Press flexible button 4 (
O
) on the
camera and
PAIR
in the SnapBridge app.
8
Camera/smart device: Finish the connection settings.
Camera: Press flexible button 4 (
A
) when
the dialog on the right is displayed.
Smart device: Tap
OK
when the dialog
indicating that pairing is complete is
displayed.
9
Camera: Follow the on-screen instructions to complete the
setup process.
•
To record location data with photographs, select flexible button 3 (
R
Yes
) when
prompted and enable the location data features. Enable location data features on
the smart device, and in the
A
tab of the SnapBridge app
M
Auto link options
M
enable
Synchronize location data
.
•
You can synchronize the camera clock to the time reported by the smart device by
selecting flexible button 3 (
R
Yes
) when prompted. In the
A
tab of the
SnapBridge app
M
Auto link options
M
enable
Synchronize clocks
.
•
A dialog prompting you to select a background design is displayed when you turn
on the camera for the first time. Proceed to step 7 (
16) in “Camera Setup” in such
a case.
Connecting the camera and smart device is complete.
Still images captured with the camera are automatically uploaded to the
smart device.
Auth. code
123456
Confirm that the same
authentication code is
displayed on the smar t
device and press OK.
Your camera and smar t device are
connected!
SnapBridge will send your photos to
your smar t device as they are taken.


