


4-10
Upgrading Your System
DIMMs
The system board contains four DIMM sockets labeled 1 through 4. Each socket
can hold a single 72-bit DIMM module with 64MB, 128MB, 256MB or 512MB
of memory. When all four sockets are populated, the system board supports a
maximum of 2GB of memory with 512MB DIMMs. A DIMM will always be
installed in the first socket. When you install additional DIMMs, you must start
with the first empty socket to the left of DIMMs already installed. When you
remove DIMMs, you must start with the first DIMM socket closest to the left
edge of the system board.
Installing DIMMs
1.
Power off the system and remove the left side panel as described earlier in
this chapter.
CAUTION
Observe static precautions. Use an antistatic wrist strap.
Hold DIMMs only by their edges.
2.
Holding the DIMM module only by the edges, remove it from its antistatic
package.
3.
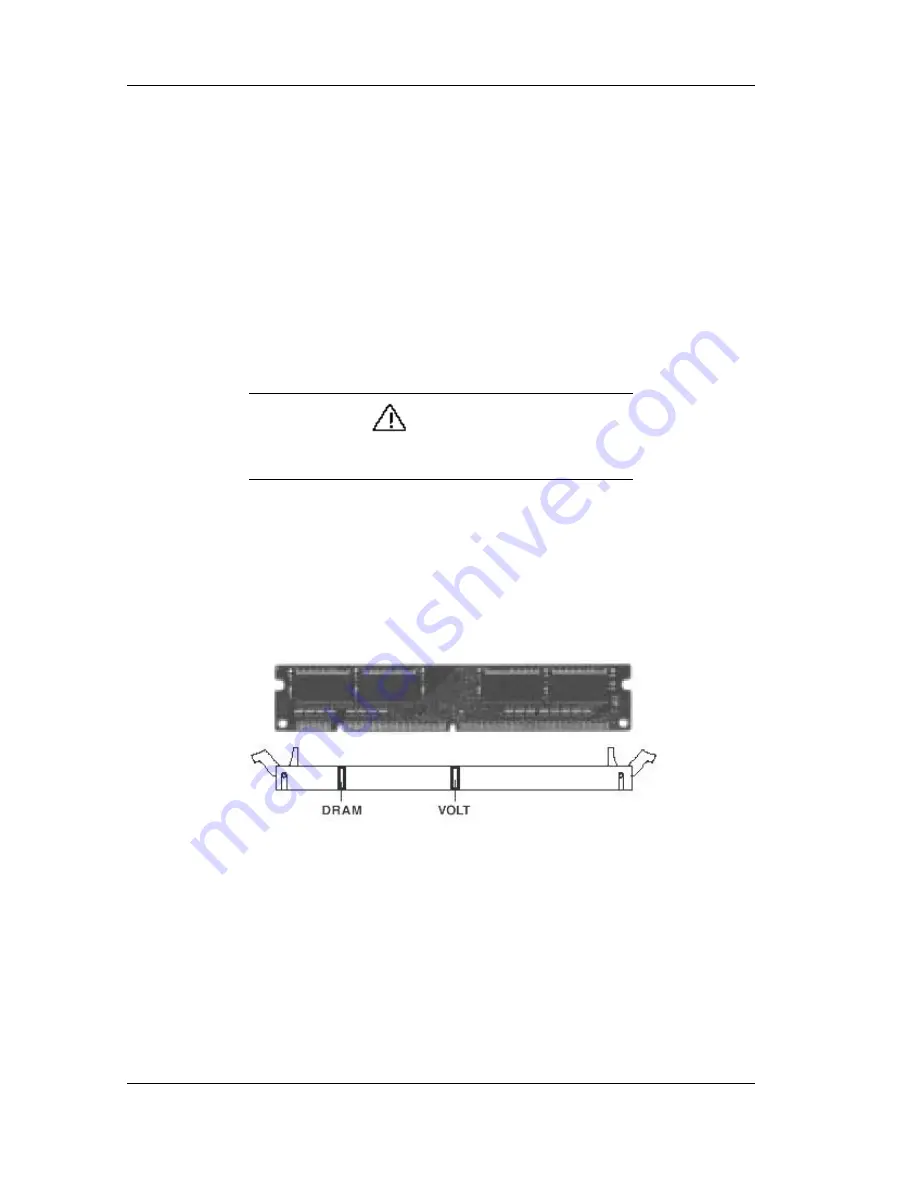
The DIMM slot has 2 Notch Keys “VOLT and DRAM”, so the DIMM
memory module can only fit in one direction. Position the DIMM so that the
two notches in the bottom edge of the DIMM align with the keyed socket.
Inserting Memory DIMMs
3.
Insert the bottom edge of the DIMM into the socket, and press down firmly
on the DIMM until it seats correctly.
4.
Gently push the plastic ejector levers on the socket ends to the upright
position.
5.
Repeat the steps to install each DIMM.
6.
Replace the left side panel and turn on the system.
Summary of Contents for TM1200
Page 1: ... U s e r s G u i d e Server TM1200 U s e r s G u i d e ...
Page 2: ......
Page 4: ......
Page 24: ...1 12 System Overview ...
Page 74: ...3 38 Configuring Your System ...
Page 86: ...4 12 Upgrading Your System ...
Page 100: ...4 26 Upgrading Your System ...
Page 134: ... ...


