12
SuperScript 1800 — Network User’s Guide
C
ONFIGURING
THE
NIC
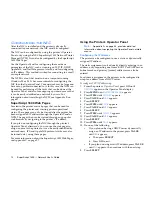
After the NIC is installed and the printer is physically
connected to your network, the NIC must be configured.
The NIC can be configured by using the printer’s Operator
Panel, or by using the NEC SuperScript 1800 Network Printer
Manager (NPM). It can also be configured by the SuperScript
1800 Web Pages.
Use the Operator Panel for configuring the most basic
parameters of the NIC, such as turning on TCP\IP, DHCP,
AppleTalk, and NetWare protocol stacks, and for configuring
an IP address. This method is suited for connecting to a small
or simple network.
The NPM is a tool that must run on a computer running
Windows 95 or 98. It has more controls for configuring the
NIC than the Operator Panel. Your network may be large and
have many printers connected to it. In this case, the NPM can
be used for performing all the tasks that can be done at the
Operator Panel, and also for assigning a printer name so that
it can be easily identified on a network by users. For
information about installing the NPM, see Appendix B on
page 47.
SuperScript 1800 Web Pages
Located in the printer are web pages that can be used for
configuring the printer and viewing printer operational
status. These pages can only be viewed after the printer has
been assigned an IP address through the Operator Panel or
NPM. The pages then can be viewed through any popular
web browser by navigating to the printer’s IP address.
If you plan on configuring the NIC through the printer’s
Operator Panel, afterwards, you can use the web pages to
assign a name to the printer, so it can be easily identified by
network users. IPX and AppleTalk protocol stacks may also
be turned on by using these pages.
For more information about the SuperScript 1800 Web Pages,
see Appendix C on page 57.
Using the Printer’s Operator Panel
Note:
Appendix A, on page 43, provides detailed
information about navigating the Operator Panel network
menus.
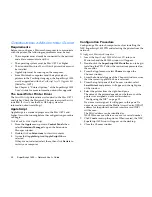
Configuring the IP Address
The printer can be configured to use a static or dynamically
assigned IP address.
The static assignment can be done by directly entering in an
address, or by requesting one from a BOOTP or RARP server.
Subnet mask and gateway (router) addresses can also be
entered.
For dynamic assignment, the printer can be configured to
accept an address from a DHCP server.
To configure TCP\IP addressing:
1.
From the printer’s
Operator Panel
, press
GO
until
OFFLINE
appears in the Operator Panel display.
2.
Press
MENU
until
NETWORK MENU
appears.
3.
Press
ITEM
until
CFG NET
appears.
4.
Press
VALUE
until
YES
appears.
5.
Press
SELECT
.
6.
Press
ITEM
until
TCP\IP
appears.
7.
Press
VALUE
until
YES
appears.
8.
Press
SELECT
.
9.
Press
ITEM
until
CFG TCP
appears.
10. Press
VALUE
until
YES
appears.
11. Press
SELECT
.
12. Press
ITEM
until
DHCP
appears.
13. Do one of the following.
•
If you plan on having a DHCP server dynamically
assign an IP address to the printer, press
VALUE
until
YES
appears.
a.
Then press
SELECT
.
b. Press
GO
to exit.
•
If you plan on using a static IP address, press
VALUE
until
NO
appears, then continue with the next step.
3.
Press
SELECT
.
Summary of Contents for SuperScript 1800
Page 1: ...S U P E R S C R I P T 1 8 0 0 NETWORK USER S GUIDE July 1999 808 878291 011A...
Page 6: ...vi SuperScript 1800 Network User s Guide...
Page 10: ...4 SuperScript 1800 Network User s Guide...
Page 14: ...8 SuperScript 1800 Network User s Guide...
Page 28: ...22 SuperScript 1800 Network User s Guide...
Page 52: ...46 SuperScript 1800 Network User s Guide...
Page 62: ...56 SuperScript 1800 Network User s Guide...


