


Option Installation 3-13
When upgrading the processor, you must first remove the processor currently installed in
the system (see “Processor Removal”).
Once removed, you can then install the upgrade processor, see “Processor Installation.”
Processor Removal
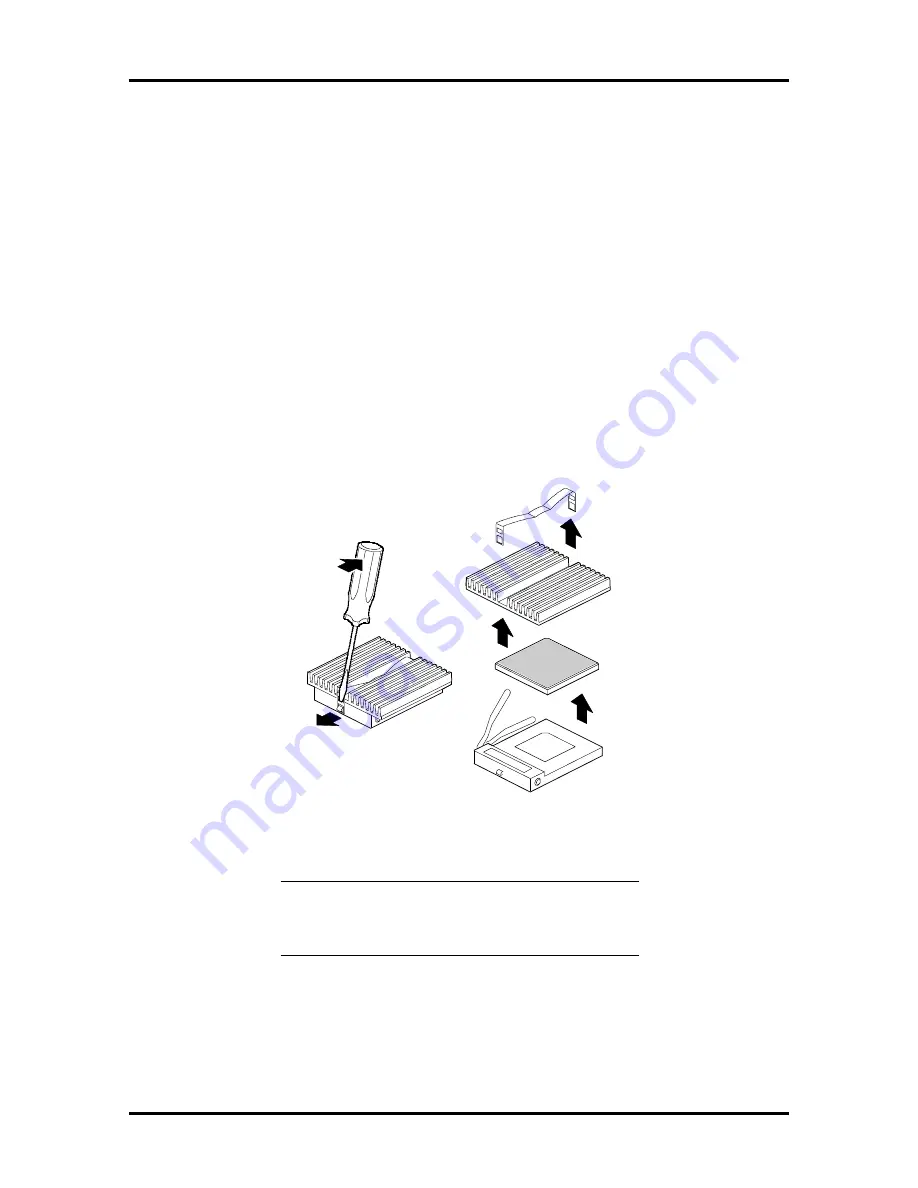
To remove the installed processor on the system board, proceed as follows.
1.
Remove the system unit side panel (see “Removing the Side Panel”).
2.
Locate the processor socket (see Figure 3-2).
3.
Release the heatsink clip from the tabs on the socket.
4.
Release the processor by pulling the lever on the socket away from the socket and
as far back as it goes.
Figure 3-8 Releasing the processor
CAUTION:
Before picking up the processor,
reduce static discharge by touching the metal
frame of the system unit.
5.
Lift the processor out of the socket.
6.
Install the new upgrade processor (see the following procedure “Processor
Installation”).
Summary of Contents for POWERMATE PRO150
Page 152: ...A 16 Connector Pin Assignments ...
Page 160: ...B 8 System Board Settings ...


