4-4
Upgrading Your System
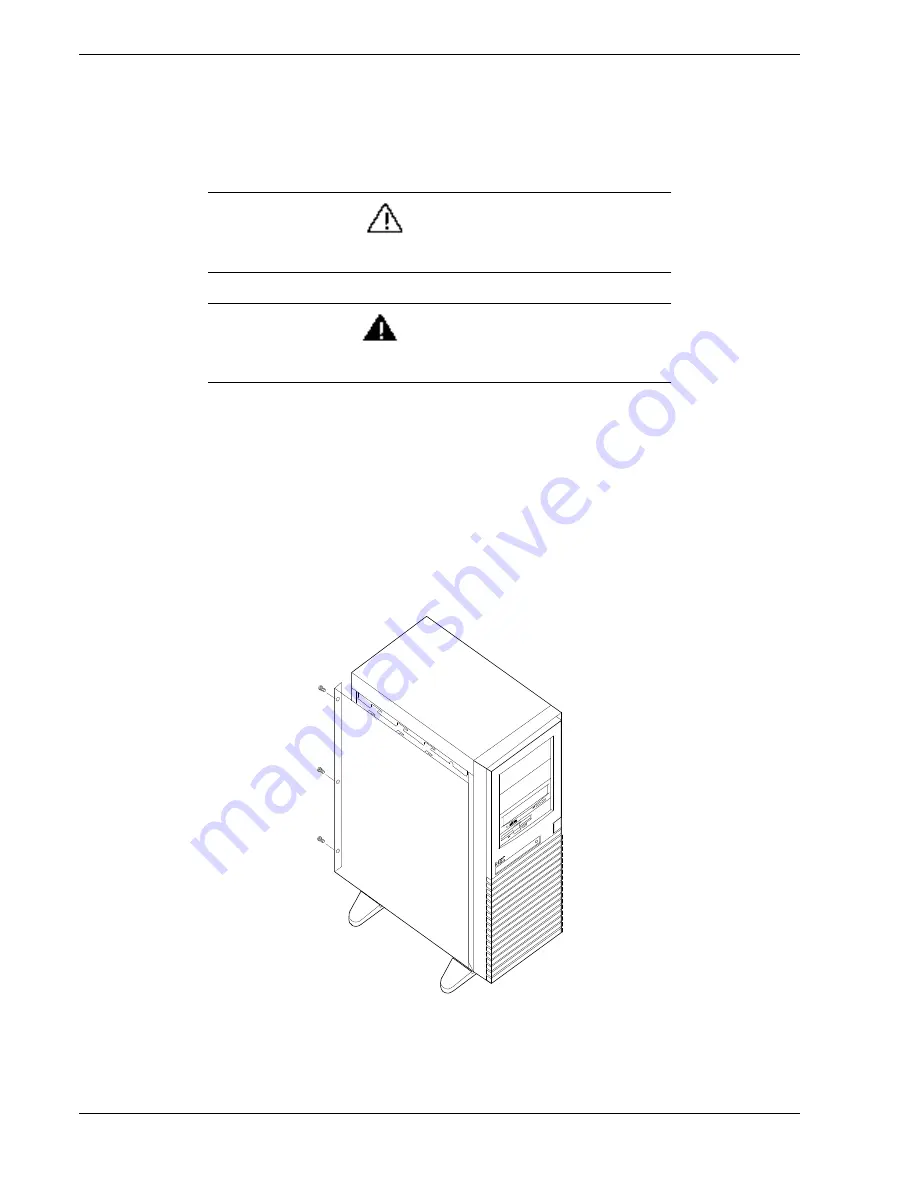
Removing a Side Panel
To install options in your system, you must remove the side panel on the left side of the system (as
viewed from the front). The side panel on the right side of the system (as viewed from the front)
only has to be removed when adding removable media devices. The right side panel removes in
the same manner as the left side panel.
CAUTION
For proper cooling and airflow, do not operate the system with the side panels
removed. Always replace the panels before powering on the system.
WARNING
If you are removing the side panel after the system is set up, you must first power off
the system and all external devices.
Unplug
the system power cord
To remove a side panel:
1.
Power off the system and ensure it is disconnected from the ac wall outlet.
2.
The side panel is secured to the chassis with three screws. Remove the screws securing the side
panel. Save the screws for reattaching the side panel.
3.
Slide the side panel toward the rear of the chassis. This unlocks the locking fingers behind the
side panel.
4.
Pull the side panel up and away from the chassis.
Removing a System Side Panel
Summary of Contents for NEC Express5800 Series
Page 1: ...EXPRESS5800 ES1400 SERIES ONLINE SERVICE GUIDE ...
Page 8: ...Using This Guide xv ...
Page 21: ......
Page 33: ...2 12 Setting Up the System ...
Page 60: ...Configuring Your System 3 27 ...
Page 130: ...Problem Solving 5 21 ...
Page 131: ......
Page 132: ......
Page 142: ...6 10 Illustrated Parts Breakdown ...
Page 149: ...System Cabling A 7 WIDE SCSI CABLE 68 pins IDE CABLE 40 pins Standard System Cable Routing ...
Page 160: ...System Setup Utility B 9 Adding and Removing ISA Cards Window ...
Page 163: ...B 12 System Setup Utility System Resource Usage Window ...


