background image


7>


Boot

デバイスを選択し

<Enter>

を押してください。


Boot

デバイスは必ず

LUN0

の含まれたデバイスを選択してください。


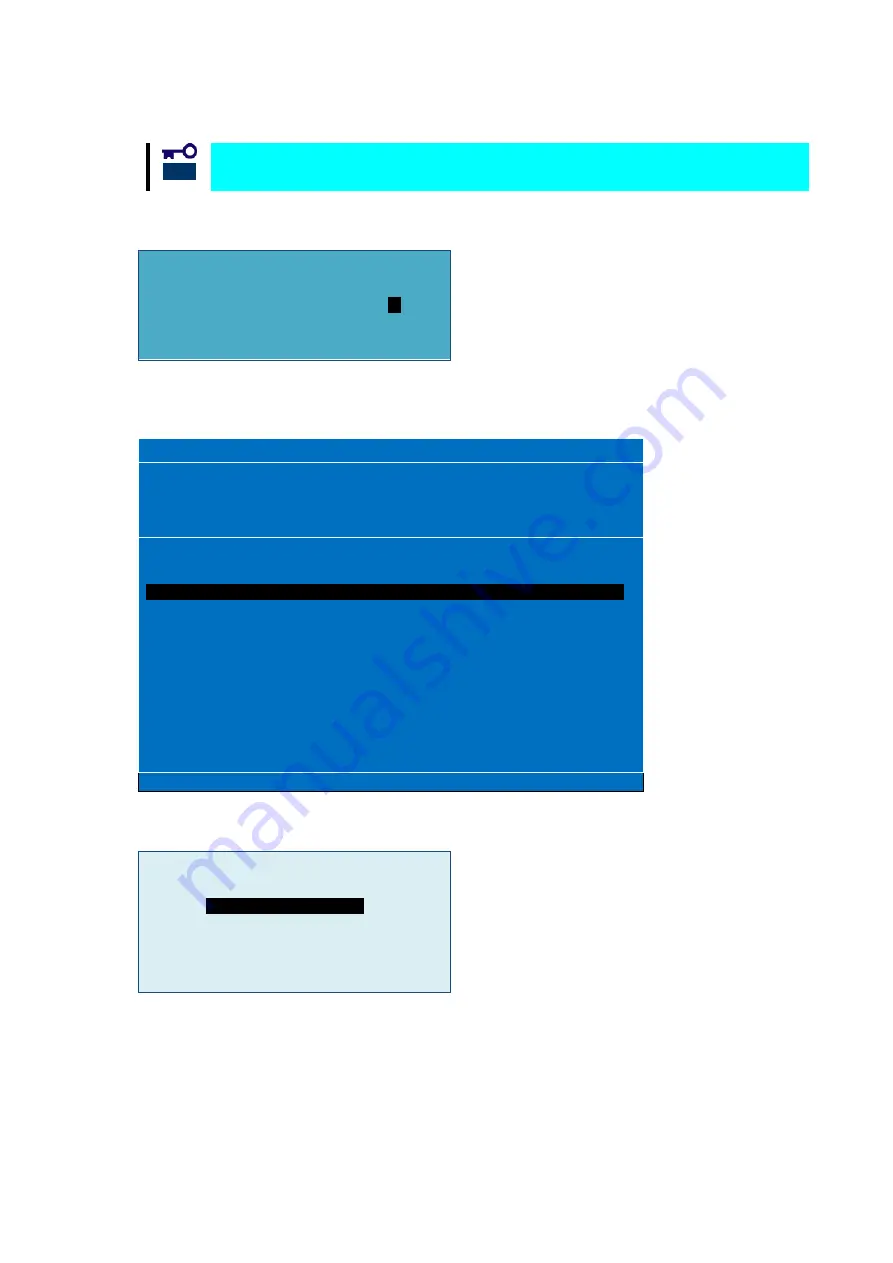
次の様にデバイスの

LUN

の開始番号入力画面が表示されます。


ALPA:B3(7D) WWPN:21000016 97122446 


Enter two digits of starting LUN (Hex):    00 


<ESC> to Previous Menu 


8>


LUN

開始番号は

00(LUN0

の意味

)

を入力してください。入力するとデバイスの

LUN

選択画面が表示されま

す。


Emulex LightPulse FC BIOS Utility. KA6.01a12


01:    LPe16002B-M6-N                        Bus#: 02 Dev#: 00 Func#: 01 
Mem Base:   FE700000  Firmware Version  1.1.35.0        BIOS: Disabled 
Port Name:     10000090FA21129              Node Name:  20000090FA21129 
                                            Link Status:   Link UP 

 
  ALPA:B3 SelectedID:7D    WWPN:


21000016 97122446 

 
  01.       LUN:00               NEC      DISK ARRAY      1000                  
  02.       LUN:01               NEC      DISK ARRAY      1000 


Enter <Esc> to exit  <PageDn> to Next Page 

<

/

> to Highlight, <Enter> to Select 

Copyright (c) 1997-2012 Emulex. All rights reserved.


9>


01(LUN00)

を選択して

<Enter>

を押してください。デバイスの指定方法選択画面が表示されます。


DID:0000B3 WWPN:21000016 97122446  LUN:00 


Boot this device via WWPN       

Boot this device via DID 


<ESC> to Previous Menu 

<

/

> to Highlight, <Enter> to Select


重要


- 33 -


Summary of Contents for N8190-7158

Page 1: ... you very much for purchasing the N8190 7158 Fibre Channel Controller 2ch This is a guide to the safe and proper use of the N8190 7158 Fibre Channel Controller 2ch hereafter this product Be sure to read this guide before handling this product Please refer to this document if there is something that you do not understand or a problem occurs while using this product Store this guide close to this pr...

Page 2: ...e owners and should be treated as such ご注意 1 本書の内容の一部または全部を無断転載することは禁止されています 2 本書の内容に関しては将来予告なしに変更することがあります 3 NECの許可なく複製 改変などを行うことはできません 4 本書は内容について万全を期して作成いたしましたが 万一ご不審な点や誤り 記載もれなどお気づきのことがありました ら お買い求めの販売店にご連絡ください 5 運用した結果の影響については 4 項にかかわらず責任を負いかねますのでご了承ください Note 1 No part of this document may be reproduced without consent 2 The content of this document may be changed without prior notice 3 No pa...

Page 3: ...告 と 注意 という用語を使用しています それぞれの用語は 次のような意味を持つものとして定義されています 人が死亡する または重傷を負うおそれがあることを示します 火傷や怪我などを負うおそれや物的損害を負うおそれがあることを示します 表示は次の3種類の記号を使って表します それぞれの記号は次のような意味を持つものものとして定義 されています 注意の喚起 この記号は危険が発生するおそれがあることを表します 記号の 中の絵表示は危険の内容を図案化したものです 例 感電注意 行為の禁止 この記号は行為の禁止を表します 記号の中や近くの絵表示は してはならない行為の内容を図案化したものです 例 分解禁止 行為の強制 この記号は行為の強制を表します 記号の中の絵表示は しなけ ればならない行為の内容を図案化したものです 危険を避けるた めにはこの行為が必要です 例 コードを抜く 注意 警告 1 ...

Page 4: ...装置を分解 修理 改造しないでください 感電や火災のおそれがあります ぬれた手で触らないでください 感電するおそれがあります 行為の強制 特定しない一般的な使用者の行為を指示します 説明に従った操作をしてください 本装置の電源コードをコンセントから抜いてください 火災や感電のおそれがあります 特定しない一般的な注意 警告を示します 高温による傷害を負うおそれがあることを示します 感電のおそれがあることを示します 発煙または発火のおそれがあることを示します 2 ...

Page 5: ...ださい 装置が 正常に動作しなくなるばかりでなく 感電や火災の危険があります 故障の際はお買い求めの販売店 または保守サービス会社にご連絡ください 電源プラグを差し込んだまま取り扱わない 本製品の取り付け 取り外しは 本体装置の電源を OFF にして 電源プラグをコンセントから抜いて行 ってください たとえ電源を OFF にしても 電源コードを接続したまま装置内の部品やケーブル コネク タに触ると感電したり ショートにより火災を起こしたりすることがあります また ぬれた手で本装置の 取り付け 取り外しを行わないでください 故障するばかりでなく 感電するおそれがあります 煙や異臭 異音がしたまま使用しない 万一 煙 異臭 異音などが生じた場合は ただちに電源を OFF にして電源コードをコンセントから抜い てください その後 お買い求めの販売店または保守サービス会社にご連絡ください そのまま...

Page 6: ...定以外のケーブルを使用したり 接続先を誤ったりすると ショートにより感電や火災を起こ すことがあります インタフェースケーブルの取り扱いや接続について次の注意をお守りください 破損したケーブルを使用しない ケーブルを踏まない ケーブルの上にものを載せない ケーブルを改造 加工 修復しない また Fibre Channel ケーブルを取り外すときは ラッチを押さえて コネクタ部分を持って真っ直ぐに引 き抜いてください Fibre Channel ケーブルは 当社指定のものを使用し 接続先をよく確認した上で接続してください Fibre Channel コネクタにカバーせず使用しない 常に Fibre Channel コネクタは付属の防塵カバーもしくは Fibre Channel ケーブルを接続した 状態で使用してください 異常故障が発生した場合にレーザ光で目や皮膚を傷めることがあ ります 腐食...

Page 7: ...e the terms used here to express the level of danger These terms mean the following Indicates a hazard that can lead to death or serious injury Indicates a hazard that can lead to burning injury or damage to property Precautions and notices against hazards are presented with one of the following 3 symbols The individual symbols are defined as follows Attention This symbol indicates the presence of...

Page 8: ...c shock Indicates a hazard that can lead to fire Prohibited Action Indicates a general prohibition Indicates prohibition of disassembly or modification Do not touch with wet hand Otherwise an electric shock may be caused Mandatory Action Indicates general instruction for users Indicates that you must unplug from the electrical outlet 6 ...

Page 9: ...ectric shock or fire as well as malfunctions of this product Do not handle this product during an electrical storm When installing this product in the computer please read the user s guide of the computer and unplug the power plug from the electrical outlet Do not insert or remove the power plug with wet hands Doing so can lead to faults or electric shock Do not pull on the lead when unplugging th...

Page 10: ...able Do not place any object on the cable Do not alter modify or repair the cable When disconnecting a cable push the latch hold the connector and pull it out straight Use only the Fibre Channel cable authorized by NEC and connects it to the proper connector Ignoring these instructions may cause a short circuit resulting in a fire electric shock or malfunction Do not use this product without Fibre...

Page 11: ...the following This product is sensitive to static electricity Please discharge any static electricity by touching a metal object such as the metal frame of the computer before handling the product Moreover do not touch the contacts of the product or place the product on a desk Turn off the cellular phone or pager Radio interference may cause malfunctions of this product Do not drop or hit the prod...

Page 12: ...uired to correct the interference at his own expense CE Statement Warning This is a Class A product In a domestic environment this product may cause radio interference in which case the user may be required to take adequate measures BSMI Statement for Taiwan KC Statement for South Korea A 급 기기 업무용 방송통신기자재 이 기기는 업무용 A 급 전자파적합기기로서 판매자 또는 사용자는 이 점을 주의하시기 바라며 가정외의 지역에서 사용하는 것을 목적으로 합니다 Registration No...

Page 13: ...before using the product and keep the guide in a safe place after reading it If the product is transferred to a third party please transfer this guide along with it This guide is written for users with sufficient knowledge in the general handling of operating systems such as Windows a keyboard and mouse and general I O devices Symbols Used in This Guide The following three symbols are used in this...

Page 14: ...社へご相談ください 第三者への譲渡について 本製品を第三者に譲渡 または売却 する時には 必ず本書を含む全ての添付品をあわせて譲渡 または売却 して ください ソフトウェアに関しては 譲渡した側は一切の複製物を所有しないでください また インストールした装置から削除し た後 譲渡してください 輸送について 本製品を輸送する際は 構成品表を参考に本体装置から本製品を取り出し 本製品とすべての添付品を購入時の 梱包箱に入れてください データの保管について オペレータの操作ミス 衝撃や温度変化等による装置の故障によってデータが失われる可能性があります 万一に 備えて ハードディスクドライブに保存されている大切なデータは 定期的にバックアップを行ってください 廃棄について 本製品の廃棄については 各自治体の廃棄ルールに従って分別廃棄して下さい 詳しくは 各自治体にお問い合わ せ下さい ハードディス...

Page 15: ...oftware must be deleted before this product is transferred or sold Transportation When transporting this product please refer to the packing list to remove this product from the basic processing unit and repack it and all of its accessories into the original packing box Storing Data Data may be lost through a device malfunction due to human error physical shock temperature change or other means To...

Page 16: ...て 12 データの保管について 12 廃棄について 12 1 本製品について 16 1 1 仕様 16 1 2 本製品の特徴 16 2 構成品 17 3 各部の名称と機能 17 4 セットアップ手順 19 4 1 ブラケットの選択 取り付け 20 4 2 WWPN アドレス Port 0 Port 1 の確認 22 4 3 本製品の取り付け 23 4 4 Fibre Channel 機器の接続 25 4 5 ドライバのインストール 26 5 困ったときの処理 27 5 1 困ったときの処理 27 付録 A Fibre Channel ストレージ装置からの起動 29 事前準備 29 BIOS 設定変更 30 付録 B 本製品実装後の WWPN アドレス確認 37 本体装置起動時の確認 37 14 ...

Page 17: ...ut This Product 39 1 1 Specifications 39 1 2 Features 39 2 Components 40 3 Names and Functions 40 4 Setup 42 4 1 Selection and Installation of Bracket 43 4 2 Confirm WWPN addresses Port 0 Port 1 45 4 3 Install the Card 46 4 4 Connecting Fibre Channel Devices 48 4 5 Installing the Driver 49 5 Troubleshooting 50 5 1 Troubleshooting 50 Appendix A Boot from Fibre Channel device 52 Preparations 52 Chan...

Page 18: ...0 湿度 5 95 1 2 本製品の特徴 N8190 7158Fibre Channel コントローラ 2ch は Express5800 シリーズ専用のコントローラボードです 本製 品は Fibre Channel インターフェースを 2 つ持つ Fibre Channel 機器を制御する拡張オプションスロットカード です 弊社が指定する本体装置及び Fibre Channel 機器以外は接続しないでください 指定以 外の本体装置及び Fibre Channel 機器に接続できたとしても本製品及び接続した Fibre Channel 機器が正常に動作しないばかりか 故障するおそれがあります 接続可能な本体装置及び Fibre Channel 機器については 本製品を購入された販売店ま たは保守サービス会社にお問い合わせください 本製品は高速データ転送を行うように設計されています PCI ...

Page 19: ...ています 添付の構成品表を参照し 全てそろっているこ とを確認してください 万一 足りないものや破損しているものがありましたら 販売店にご連絡ください 3 各部の名称と機能 1 PCI Express コネクタ 2 ブラケット 5 Fibre Channel コネクタ Port0 6 IEEE アドレス 4 LED Port0 橙色 緑色 3 SFP モジュール 4 LED Port1 橙色 緑色 5 Fibre Channel コネクタ Port1 17 ...

Page 20: ...参照してください 緑色 LED 橙色 LED 状態 消灯 消灯 ボード故障 起動失敗 消灯 点灯 POST 電源投入時の自己診断 中にボード故障を検出 消灯 遅い点滅 1Hz POST 後に異常を検出 消灯 不規則な点滅 POST プロセスが進行中 点灯 消灯 動作中に異常を検出 点灯 点灯 動作中に異常を検出 点灯 点滅 3回 通常状態 8Gbps 接続で動作中 点灯 点滅 4回 通常状態 16Gbps 接続で動作中 遅い点滅 1Hz 消灯 通常状態 リンクダウン POST 実行中に異常を検出した場合は 次のことを再度ご確認ください コントローラボードはしっかり差し込まれていますか Fibre Channel 機器の接続は確実に行なわれていますか 5 Fibre Channel コネクタ Port0 Port1 本製品と Fibre Channel 機器間の接続ケーブルを接続するコネクタ...

Page 21: ...選択 取り付け 20ページ 本製品に使用するブラケットを選択します WWPN アドレス Port 0 Port 1 の確認 22ページ 本製品の WWPN アドレス Port 0 Port 1 を確認します 本製品の取り付け 23ページ 本体装置に本製品を取り付けます Fibre Channel 機器の接続 25ページ 本製品に Fibre Channel 機器を接続します ドライバのインストール 本体装置に添付のユーザーズガイドを参 照 使用するオペレーティングシステム用のドライバをインストールします 19 ...

Page 22: ...ロープロファイルに対応した PCI スロットに本製品 を取り付ける場合は 添付されているロープロファイルブラケットに交換する必要があります 以下の手順に従って本製品のブラケットを交換します ブラケットの交換は 固定ネジのサイズに合ったプラスドライバーを使用します 1 SFP モジュール 2式 をいったん取り外します 防塵カバーを外して レバーを手前に押し下げ そのままレバーを持って SFP モ ジュールを引き出します 2 ネジ 2本 を取り外し ブラケットを外します ヒント ヒント 20 ...

Page 23: ... 2本 で固定します 4 1 で取り外した SFP モジュールを取り付けます SFP モジュールを取り付けるときは レバーを閉じた状態まで戻してから カチッと SFP モジュールが固定されるまでしっかり押し込んでください SFP モジュール実装後は再度防塵カバーを取り付けてください ロープロファイルブラケットから標準のフルハイトブラケットに取り替える時も同じ 手順です 取り外したブラケットは無くさないように大切に保管してください ヒント 重要 重要 21 ...

Page 24: ...ort0 の先頭に 1000 を加えた値がPort0のWWPNアドレスになります Port0のWWPNアドレスの値 16進数 に1を足した値がPort1のWWPNアドレスになります 例 IEEE 0090FA01347A Port0 WWPN 1000 0090 FA01 347A Port1 WWPN 1000 0090 FA01 347B WWPN アドレスは iStorage のアクセスコントロールなどを設定するときに必要とな る場合があります ヒント IEEE アドレス Port 0 22 ...

Page 25: ...ります 高温に注意する 本体装置の電源を OFF にした直後は 装置内の部品が高温になっています 十分に冷めたことを確認 してから取り付け 取り外しを行ってください 確実に接続する 本体装置に取り付ける際は確実に接続してください 中途半端に取り付けると接触不良を起こし 発煙 や発火の原因となるおそれがあります 1 本体装置の電源が OFF POWER ランプ消灯 になっていることを確認し 電源プラグをコンセントから 引き抜きます 本体装置の電源が ON POWER ランプ点灯 になっている場合は 各オペレーティン グシステムの電源 OFF の処理を行った後 本体装置の電源を OFF にしてください 2 本体装置のユーザーズガイドに従って本体装置のカバーや部品を取り外します 3 本製品の SFP モジュール 2式 をいったん取り外します 防塵カバーを外して レバーを手前に押し下げそのままレバ...

Page 26: ...があり ますので注意してください 5 3 で取り外した外した SFP モジュール 2式 を取り付けます SFP モジュールを取り付けるときは レバーを閉じた状態まで戻してから カチッと SFP モジュールが固定されるまでしっかり押し込んでください SFP モジュールが取り付けにくいときは いったん本製品を取り外してから取り付け なおしてください 過度の力を加えると破損するおそれがありますので注意してくだ さい SFP モジュール実装後は再度防塵カバーを取り付けてください 6 SFP モジュールと干渉しないことを確認しながら 2 で取り外した本体装置のカバーや部品を取り 付けます SFP モジュールと本体装置のカバーが干渉するときは いったん本製品を PCI ス ロットから取り外して 再度取り付けなおしてください 7 本体装置の電源コードをコンセントに接続します ヒント チェック 重要 24...

Page 27: ...高温に注意する 本体装置の電源を OFF にした直後は 装置内の部品が高温になっています 十分に冷めたことを確認 してから取り付け 取り外しを行ってください 確実に接続する 本体装置に取り付ける際は確実に接続してください 中途半端に取り付けると接触不良を起こし 発煙 や発火の原因となるおそれがあります 1 本体装置の電源が OFF POWER ランプ消灯 になっていることを確認し 電源プラグをコンセントから 引き抜きます 本体装置の電源が ON POWER ランプ点灯 になっている場合は 各オペレーティン グシステムの電源 OFF の処理を行った後 本体装置の電源を OFF にしてください 2 本製品の SFP モジュールから防塵カバーを取り外してください 取り外した防塵カバーは大切に保管してください 3 接続する Fibre Channel ケーブルのコネクタ部の光接点部分が汚れていたり...

Page 28: ...el 機器が正常に動作しないばかり か 故障するおそれがあります 接続可能な Fibre Channel ケーブルおよび Fibre Channel 機器については 本製品 を購入された販売店または保守サービス会社にお問い合わせください Fibre Channel ケーブルはケーブルに指定された Fibre Channel リンク速度 使用条 件 パッチパネル接続等 に従って接続してください Fibre Cannel ケーブルの詳細 については ケーブルもしくは本製品を購入された販売店または保守サービス会社 にお問い合わせください Fibre Channel設定方法についてはFibre Channel機器のユーザーズガイドをご参照 ください 6 Fibre Channel 機器の電源ケーブルを接続します Fibre Channel 機器のユーザーズガイドを参照の上 正常に動作していることを...

Page 29: ...装置を購入された販売店または 保守サービス会社にご連絡ください 本製品が正常に動作しないとき 本製品を取り付けた後 OS やアプリケーションが正常に動作しなかったときは 次の点について確認および対 処をしてください また 本体装置に添付のユーザーズガイドもあわせて参照してください Fibre Channel ドライバをお使いになっている本体装置にインストールしていますか また 正しくセットアップしましたか 本体装置に添付のユーザーズガイドを参照してください 本製品やケーブル SFP モジュールはしっかり接続されていますか もう一度しっかりと接続し直してください WWPN アドレスを利用する Fibre Channel 装置を接続している場合 間違った WWPN アドレスを設定してい ませんか 付録 本製品実装後の WWPN アドレス確認 を参照して確認してください Fibre Channe...

Page 30: ...の場合 管理ツール コンピュータの管理 デバイスマネージャ を選択し ディスクドライブ 等の配下に Fibre Channel 機器が表示されていますか 表示されていない場合は 以下の2通りの対処方法が考えられます 1 コンピュータの管理 ディスクの管理 を起動して 正常に Fibre Channel 機器のデバイスに割 り付けたドライブ文字が認識できるようであれば コンピュータの管理を終了後 再度アクセスを行っ てください 2 本体装置をリブート可能であれば リブート後アクセスを行ってください 各 OS 共通 接続する Fibre Channel 機器は正常に動作 起動していますか 各機器に添付されたユーザーズガイドを参照の上 正常に動作 起動している事を確認してくださ い 以上の確認を行っても Fibre Channel 機器が認識できない場合は 本製品を購入された 販売店または保守サ...

Page 31: ...ービス会社にお問い合わせく ださい 事前準備 本製品を取り付ける本体装置 インストールを行う Fibre Channel ストレージ装置に対して以下の準備をお こなってください 本体装置 Fibre Channel ストレージ装置から起動を行う本体装置に対して内蔵ディスクが接続されていないことを確 認してください 内蔵ディスクが接続されているとデバイスの認識順番によりシステムが起動しない等のト ラブルが発生することがあります Fibre Channel ストレージ装置 事前にインストールを行う Fibre Channel ストレージ装置に LUN 0 のディスク領域を構成し 本製品から認 識できる状態にしておいてください OS をインストールする LUN Logical Unit Number は 0 である必要があります 本製品のコネクタとインストールをおこなう Fibre Channe...

Page 32: ... FC x86 BIOS Version 6 01a12 Copyright c 1997 2012 Emulex All rights reserved Press Alt E or Ctrl E to enter Emulex BIOS configuration utility Press s to skip Emulex BIOS 本製品が実装された PCI スロットの Option Rom が Enable でないと上記メッセージが表示 されません Option Rom を Enable にする方法は 本体装置に付属するユーザーズガイド を参照してください 本製品の BIOS メニューを表示させるとメモリを使用します 従って お使いの環境によっ ては 上記メッセージが表示されない場合や設定が行えない場合があります この場合 は本体装置で不要な Option Rom を Disab...

Page 33: ...012 Emulex All rights reserved 上記のメニューが表示されずに先に進んでしまった場合は Alt と Ctrl と Del を同時に押して 本体装置を再起動させてやり直してください Function の値 00 が Port0 側を 01 が Port1 側を示します 表示内容は一例であり 本体装置や構成によって一部異なる可能性があります 4 メニューが表示された後 Fibre Channel ストレージ装置を接続したポートをカーソルキーの上下で選択し Enter を押して情報画面を表示させてください Emulex LightPulse FC BIOS Utility KA6 01a12 01 LPe16002B M6 N Bus 02 Dev 00 Func 01 Mem Base FE700000 Firmware Version 1 1 35 0 BIOS ...

Page 34: ...used DID 000000 WWPN 00000000 00000000 LUN 00 8 Unused DID 000000 WWPN 00000000 00000000 LUN 00 to Highlight Enter to Select Copyright c 1997 2012 Emulex All rights reserved Boot デバイスが選択したポートから認識できない場合は This Adapter is not ready try again と表示されます 選択したポートが正しいか確認してください 選択したポート が正しい場合は各 Fibre Channel 装置の接続 設定を確認の上 本体装置を再起動して 最初からやり直してください 6 Boot デバイスを登録するエントリの番号を選択し Enter を押して デバイス選択画面を表示させてくださ い Emu...

Page 35: ...ase FE700000 Firmware Version 1 1 35 0 BIOS Disabled Port Name 10000090FA21129 Node Name 20000090FA21129 Link Status Link UP ALPA B3 SelectedID 7D WWPN 21000016 97122446 01 LUN 00 NEC DISK ARRAY 1000 02 LUN 01 NEC DISK ARRAY 1000 Enter Esc to exit PageDn to Next Page to Highlight Enter to Select Copyright c 1997 2012 Emulex All rights reserved 9 01 LUN00 を選択して Enter を押してください デバイスの指定方法選択画面が表示されます D...

Page 36: ...0 LUN 00 5 Unused DID 000000 WWPN 00000000 00000000 LUN 00 6 Unused DID 000000 WWPN 00000000 00000000 LUN 00 7 Unused DID 000000 WWPN 00000000 00000000 LUN 00 8 Unused DID 000000 WWPN 00000000 00000000 LUN 00 to Highlight Enter to Select Copyright c 1997 2012 Emulex All rights reserved 11 ESC を押して 下記のメニューまで戻ってください Emulex LightPulse FC BIOS Utility KA6 01a12 01 LPe16002B M6 N Bus 02 Dev 00 Func 01 ...

Page 37: ...ous Menu to Highlight Enter to Select Copyright c 1997 2012 Emulex All rights reserved 初期設定では Boot BIOS is Disabled と表示されています 13 Enable を選択して Boot BIOS is Enabled と表示されたことを確認してください Emulex LightPulse FC BIOS Utility KA6 01a12 01 LPe16002B M6 N Bus 02 Dev 00 Func 01 Mem Base FE700000 Firmware Version 1 1 35 0 BIOS Enabled Port Name 10000090FA21129 Node Name 20000090FA21129 Link Status Link UP Boot B...

Page 38: ...e effect Emulex FC Ports in the System 1 LPe16002B M6 N Bus 02 Dev 00 Func 01 WWPN 10000090FA211129 2 LPe16002B M6 N Bus 02 Dev 00 Func 00 WWPN 10000090FA211128 Enter Esc to exit PageDn to Next Page to Highlight Enter to Select Copyright c 1997 2012 Emulex All rights reserved 15 これで Fibre Channel ストレージ装置へ OS をインストール開始する準備が整いました ESC を押して 下 記の確認メッセージに対して Y を押して本体装置を再起動し OS のインストールを実施してください Your chan...

Page 39: ...OS Version 6 01a12 Copyright c 1997 2012 Emulex All rights reserved Press Alt E or Ctrl E to enter Emulex BIOS configuration utility Press s to skip Emulex BIOS 本製品が実装された PCI スロットの Option Rom が Enable でないと上記メッセージが表示 されません Option Rom を Enable にする方法は 本体装置に付属するユーザーズガイド を参照してください 本製品の BIOS メニューを表示させるとメモリを使用します 従って お使いの環境によっ ては 上記メッセージが表示されない場合や設定が行えない場合があります この場合 は本体装置で不要な Option Rom を Disable にするなどの処...

Page 40: ...2 LPe16002B M6 N Bus 02 Dev 00 Func 00 WWPN 10000090FA211128 Enter Esc to exit PageDn to Next Page to Highlight Enter to Select Copyright c 1997 2012 Emulex All rights reserved 上記のメニューが表示されずに先に進んでしまった場合は Alt と Ctrl と Del を同時に押して 本体装置を再起動させてやり直してください Function の値 00 が Port0 側を 01 が Port1 側を示します 表示内容は一例であり 本体装置や構成によって一部異なる可能性があります 4 メニューに本体装置に実装された本製品のポート一覧が表示されます 一覧の右側にそのポートの WWPN が表示されています 5 全ての本製品...

Page 41: ...Fibre Channel host bus adapter card This product has two Fibre Channel interface connectors Do not connect this product to a computer or Fibre Channel device that is not recommended by NEC Corporation If the product is connected to a computer or Fibre Channel device that is not recommended by NEC Corporation the product may malfunction or fail Please contact the retailer or service center for the ...

Page 42: ...find any of them are missing or damaged please contact the retailer you bought the product from 3 Names and Functions 1 PCI Express connector 2 Bracket 3 SFP Module 5 Fibre Channel Connector Port0 6 IEEE address 5 Fibre Channel Connector Port1 4 LED Port0 Yellow Green 4 LED Port0 Yellow Green 40 ...

Page 43: ...ram activity Green LED Yellow LED State Off Off Boot Failure Dead Board Off On POST Failure Dead Board Off Slow Blink Boot Failure after POST Off Flashing POST Processing in Progress On Off Failure While Functioning On On Failure While Functioning On Blink 3 beat 8Gbps Link Rate Normal link up On Blink 4 beat 16Gbps Link Rate Normal link up Slow Blink Off Normal Link Down If the product fails at P...

Page 44: ...this product Confirm WWPN addresses Port 0 Port 1 Page 45 Confirm WWPN addresses of this product for each FC port Install the card Page 46 Install this product in the computer Connecting Fibre Channel Devices Page 48 Connect Fibre Channel Devices to this product Install the driver Please refer to User s Guide attached to the server Install the driver for your operating system 42 ...

Page 45: ... the attached low profile one The procedure is as follows Exchange of a bracket uses the minus screwdriver suitable for the size of a screw 1 Remove the two SFP modules temporarily Remove the dust cover and pull down the lever of the SFP module to release the lock and then pull the SFP module to remove 2 Remove the two screws and remove the bracket from this product Tips Tips 1 2 1 2 43 ...

Page 46: ...rn the lever of the SFP module to the home position and then insert the SFP module until you hear it click After insert all SFP modules put dust covers to them Follow the same procedure when the low profile bracket is replaced with the standard bracket Make sure to keep the removed bracket carefully Tips 1 2 2 1 Notice Notice 44 ...

Page 47: ... get the WWPN address of port0 The WWPN address of Port1 is the next successive number of the Port 0 Example IEEE 0090FA01347A Port0 WWPN 1000 0090 FA01 347A Port1 WWPN 1000 0090 FA01 347B The WWPN address may be required to use an additional function of Fibre Channel device Tips IEEE address Port 0 45 ...

Page 48: ... off its internal components such as hard disks are very hot Leave the computer until its internal components fully cool down before installing removing any component Connect firmly Please connect the product to the computer firmly A loose connection can cause a contact failure and can lead to smoke or fire 1 Confirm the power to the computer is off power lamp off then unplug the power cord from t...

Page 49: ...amage 5 Replace the two SFP modules removed in item 3 Return its lever to the home position and then insert SFP module until you hear it click If the SFP module is not correctly inserted to this product remove the product and connect it again Using excessive force can lead to damage After insert all SFP modules put dust covers to them 6 Replace the cover and components removed in item 2 Take care ...

Page 50: ...ons Immediately after the computer is powered off its internal components such as hard disks are very hot Leave the computer until its internal components fully cool down before installing removing any component Connect firmly Please connect the product to the computer firmly A loose connection can cause a contact failure and can lead to smoke or fire 1 Confirm the power to the computer is off pow...

Page 51: ...ation If the product is connected to Fibre Channel device by Fibre Channel cable that is not recommended by NEC Corporation the product may malfunction or fail Use Fibre Channel cables under conditions that conform to the cable specification length between device Fibre Channel data rate and so on Please contact the retailer or service center for the information on recommended computers Fibre Chann...

Page 52: ... and please refer to the User s Guide of the server Is the driver for the Fibre Channel Controller installed Is the product installed in the computer correctly Please refer to User s Guide attached to the server Are all Fibre Channel cables SFP modules and power cords connected correctly Please connect correctly this product again Is the WWPN address setting correct if you have connected this prod...

Page 53: ... see the Fibre Channel device under Disk Drive If you cannot see it try either of the followings 1 Select Computer Management Disk Management If you can see the drive letter assigned to the Fibre Channel device close the Computer Management and try to access again 2 Reboot Computer if possible and try to access again For All OS Is the Fibre Channel where this product is connected working properly ...

Page 54: ...parations for the computer where this product is attached and the Fibre Channel device where the OS is installed the computer Confirm that no built in disk is connected to the computer which will be started from the Fibre Channel device If a built in disk is connected the system may not start or you may encounter other errors because of device detection sequence Fibre Channel device Configure in a...

Page 55: ...om of PCI slot This product s BIOS menu consumes a lot of memories Therefore depending on your environment for example an expansion board is consuming a lot of memories this menu may not be displayed or you may not be able to change the settings In such a case disable the Option ROM unnecessary on the computer or take other countermeasures Refer to the computer s User s Guide for how to disable th...

Page 56: ... the menu is displayed select the port connected to the Fibre Channel device Then you see the information window Emulex LightPulse FC BIOS Utility KA6 01a12 01 LPe16002B M6 N Bus 02 Dev 00 Func 01 Mem Base FE700000 Firmware Version 1 1 35 0 BIOS Disabled Port Name 10000090FA21129 Node Name 20000090FA21129 Link Status Link UP Enable Disable Boot from SAN Scan for Target Devices Reset Adapter Defaul...

Page 57: ...rights reserved If no Boot device can be detected from this product you selected above you will see a message This Adapter is not ready try again If you selected a wrong number in the above step press ESC key to return to the previous window and select the correct one If you have selected the correct figure confirm that the Fibre Channel device is properly connected and its settings are all correc...

Page 58: ...A6 01a12 01 LPe16002B M6 N Bus 02 Dev 00 Func 01 Mem Base FE700000 Firmware Version 1 1 35 0 BIOS Disabled Port Name 10000090FA21129 Node Name 20000090FA21129 Link Status Link UP ALPA B3 SelectedID 7D WWPN 21000016 97122446 01 LUN 00 NEC DISK ARRAY 1000 02 LUN 01 NEC DISK ARRAY 1000 Enter Esc to exit PageDn to Next Page to Highlight Enter to Select Copyright c 1997 2012 Emulex All rights reserved ...

Page 59: ...0 5 Unused DID 000000 WWPN 00000000 00000000 LUN 00 6 Unused DID 000000 WWPN 00000000 00000000 LUN 00 7 Unused DID 000000 WWPN 00000000 00000000 LUN 00 8 Unused DID 000000 WWPN 00000000 00000000 LUN 00 to Highlight Enter to Select Copyright c 1997 2012 Emulex All rights reserved 11 Press ESC key to return to the menu like Emulex LightPulse FC BIOS Utility KA6 01a12 01 LPe16002B M6 N Bus 02 Dev 00 ...

Page 60: ...Menu to Highlight Enter to Select Copyright c 1997 2012 Emulex All rights reserved Default message is The BIOS is Disabled 13 Select Enable and confirm that Boot BIOS is Enabled is displayed Emulex LightPulse FC BIOS Utility KA6 01a12 01 LPe16002B M6 N Bus 02 Dev 00 Func 01 Mem Base FE700000 Firmware Version 1 1 35 0 BIOS Enabled Port Name 10000090FA21129 Node Name 20000090FA21129 Link Status Link...

Page 61: ...m 1 LPe16002B M6 N Bus 02 Dev 00 Func 01 WWPN 10000090FA211129 2 LPe16002B M6 N Bus 02 Dev 00 Func 00 WWPN 10000090FA211128 Enter Esc to exit PageDn to Next Page to Highlight Enter to Select Copyright c 1997 2012 Emulex All rights reserved 15 Now you have made settings to start installing an operating system on your Fibre Channel device Press ESC key to exit the menu Then press y when this message...

Page 62: ...right c 1997 2012 Emulex All rights reserved Press Alt E or Ctrl E to enter Emulex BIOS configuration utility Press s to skip Emulex BIOS Without enable the Option Rom of PCI slot which installed this product this message is not displayed Refer to the computer s User s Guide for how to enable the Option Rom of PCI slot This product s BIOS menu consumes a lot of memories Therefore depending on your...

Page 63: ...r to Select Copyright c 1997 2012 Emulex All rights reserved If the above menu is not displayed and the window has gone to the next one press Alt Ctrl and Del keys simultaneously to reboot the computer Then start the steps from the beginning The LPe16002B of Function 00 is Port0 and Function 01 is Port1 The above message sample is just for your reference Some of them may be different depending on ...

Page 64: ...用しています This manual is made with recycled paper N8190 7158 Fibre Channel コントロ ラ 2ch ユーザーズガイド Fiber Channel Controller 2ch User s Guide 856 180502 001 A 2014 年 6 月 初版 June 2014 First Edition 日本電気株式会社 東京都港区芝五丁目 7 番1号 TEL 03 3454 1111 大代表 856 180502 001 AK 62 ...

Reviews: