5-36 Chapter 5: Crisis Recovery
4.
Press the Enter key.
5.
Select the Boot menu into the Phoenix BIOS Setup Utility. And pull down
the Hard Drive item.
Pheonix BIOS Setup Utility
Main Advanced Security Power Boot Exit
Diskette
Drive
-Hard Drive
M-system DiskOnChip
SanDisk SDCFB-48-(PM)
Bootable Add-in Cards
Boot Manager PXE
Item Specific Help
Key Assign
6.
The crisis Recovery is done to the first hard drive. In case of the above
picutre, the crisis Recovery is done to “M-System DiskOnChip”. If you
execue the Crisis Recovery with the different hard drive, you can change
the boot ordr by using Up, Down, plusz(+) or Minus(-) key.
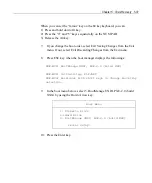
Note:
When you can set the “plus” key on the 80 key keyboard, you can
1) Press and hold down Alt key.
2) Press the “4” and “3” keys sequencially on the NUM PAD.
3) Release the Alt key.
Summary of Contents for 7448 Workstation
Page 1: ...NCR 7448 Workstation Release 1 4 Hardware User s Guide B005 0000 1202 Issue F...
Page 6: ......
Page 15: ...xiii...
Page 16: ......
Page 45: ...Chapter 2 Workstation Hardware Installation 2 7...
Page 48: ...2 10 Chapter 2 Workstation Hardware Installation...
Page 64: ...3 16 Chapter 3 Installing Optional Hardware Features 14 Connect the cable connectors...
Page 65: ...Chapter 3 Installing Optional Hardware Features 3 17 15 Attach the Hard Disk on the AC bracket...
Page 72: ...3 24 Chapter 3 Installing Optional Hardware Features...
Page 122: ...4 50 Chapter 4 Setup How to Perform MSR Test...
Page 152: ...4 80 Chapter 4 Setup...
Page 158: ...5 6 Chapter 5 Crisis Recovery 3 Click Next 4 Click Install...
Page 202: ...5 50 Chapter 5 Crisis Recovery...
Page 213: ...Appendix A BIOS A 11...
Page 232: ......


