background image

02

11

Common Operations

30

06

Tuner

During radio status, you can press      

ST


button on the remote control 

MONO


mode or 

STEREO


to select 

mode.

Stereo reception is charged when

STEREO

appears. 
It is switched to 

MONO

 mode when

MONO

appears. 

MO/ST Selector


It is only valid on remote control.


It is only valid in FM tuning.

6

Switch to MONO compulsively to improve 
the listening quality when week signal.

Note:

*

*

*

Number Buttons

During radio status,


Number Buttons 

(from 1 to 6) 


can help you 

yo-

ur favorite station. You can follow the 
as below:

store 

steps 

Press and hold      

AMS

 button to receive 

stations automatically, and store them in 
1 to 6 number respectively.

23

During radio status, press 

Number Buttons 

to receive the stored stations. 

4

When receiving a station,press and hold
any one of the 

Number Buttons 

(from 1 to 6) 

until the number app-

ears on the 

LCD

, which indicates that 

station is already stored in the corresp-
onding number button.

Press and hold another number button 
more than 2 seconds when listening in 
a station in one number button s, the
station will be stored in that number 
button.

1

2

3


Clicking          on the screen performs the same

  function.

Note:

*

5

Goto FREQ

2

Press      GOTO, and the monitor shows: 
FREQ, then press the Number to input the 
valid frequency, then the TV program will 
be played.

Note:

* It is only valid on remote control.

Scanning/Memorizing Stations 

Automatically

During radio status, briefly press      AMS 
button on the remote control to scan each 
stored 

 seconds respectively wh-

ich 

Number Buttons (from 1 

to  . You can press 

responding N-

umber Buttons or 

ton when your 

desired station is 

And it starts pl-

aying that station.

station 6

stored in      

6)

the cor

AMS but

charged. 

23

4

When press and hold      

AMS 

automatically memory storing 

The radio automatically selects 

and has it stored in any one of 

Number Buttons (from1 to 6)

.

button it 

will activate 
function. a 
station the


Note: 


The unit can be stored up to 6 stations for

     each band. 

4

23

*

*


Clicking "AMS"on the screen performs the 

  same function.

Reset the Unit

Operating the unit for the first time or after 
replacing the car battery, you must reset 
the unit.

      Note: 
  *  

When  ome errors occur on the 
also press 

RESET 


it will


s

display, you can 


button to resume to normal, 

and 

 erase the clock setting and some 

      memorized functions.
  *   This function can only be operated by the 
      main unit.

Press 

RESET


button in the panel w

object (such as a ball

the unit to initial status.

ith a 

pointed point 

pen),

to set 

   Press      

VOL+

 button to increase 

sou-

   nd level and press     

VOL- 

button to decr-

   ease 

sound level.

the 

the 

Volume Control

 *  Pressing VOL +/- on the main unit also 
     performs the same function.

14

14

Note: 

Turning the Unit On/Off

Briefly press      

PWR


button to turn on the 

unit in 

waiting status, and then press and 

hold it to turn off.

the 

1

  *   Pressing PWR button on the main unit also 
       performs the same function.

Note: 

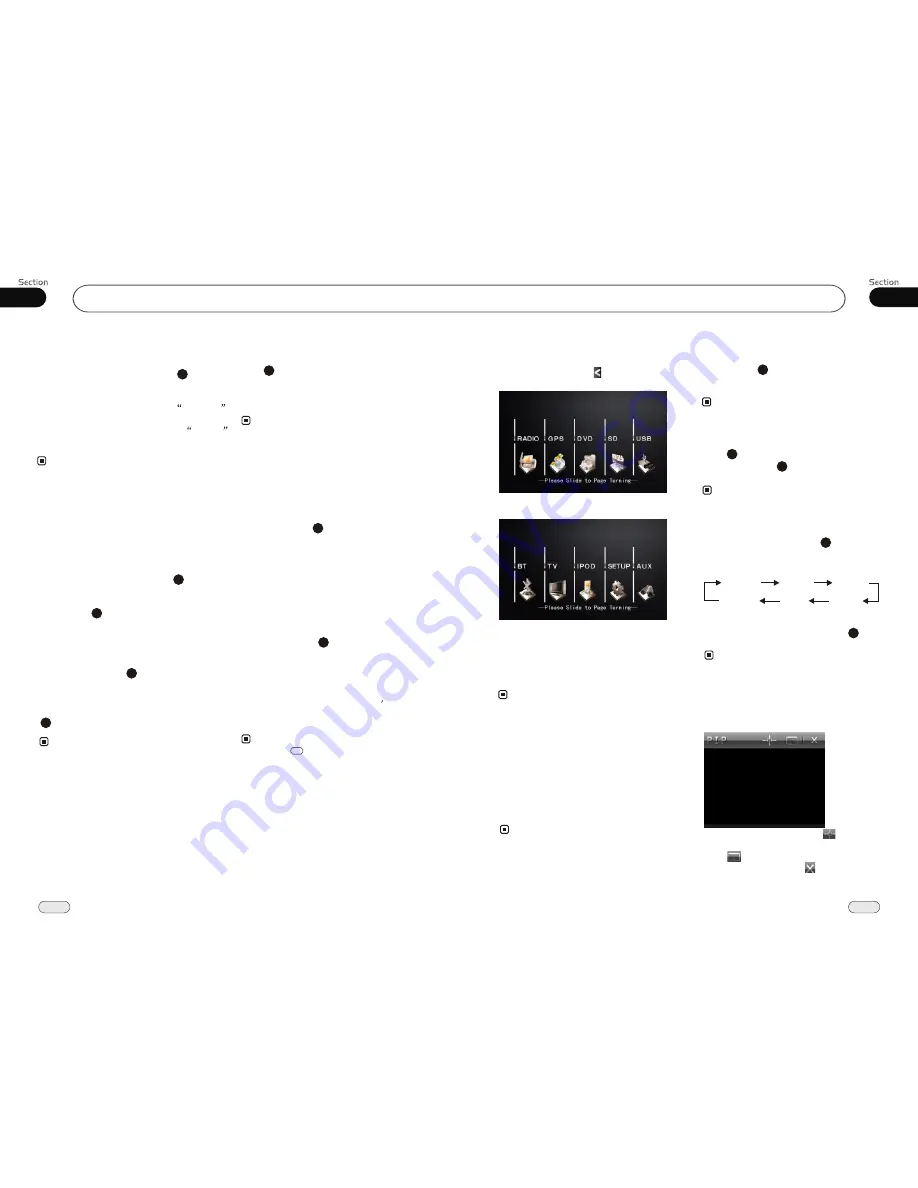
To Select Source by Menu 

In any mode, touching     on the screen shows 
the menu as follow:

Click your desired item to enter corresponding
mode, and click SETUP to enter into the 
setting menu.
If you want to navigate, click the GPS icon; 
if it did not enter into, that means the unit 
does not include the function.


*  If the font displays in grey, that means this 

      function is null.

Note:


Sliding horizontally on the screen turns over  
the menu as the figure below:

Setting the Sound Characteristics

 
Repeatedly and briefly press      

SEL

 button 

to select the 

mode in the following 

order:

desired 

14


After selecting the desired mode, you
adjust the current level by pressing     

.

 can 

VOL


buttons

Note: 

14

TRE  

BAL

BAS  

VOL

FAD

WOO

 *  Rotating VOL on the main unit also performs
     the same function.

Picture in Picture

In except DVD, SD, USB, TV, AUX state,
Press and hold DISP on the unit to adjust
picture - in - picture function as follows: 

In the above interface, press        to display 
four picture - in - picture interfaces in turns, 
press       to zoom display picture - in - 
picture interfaces, press       to close the 
interface. During the  picture - in - picture 
mode, press and hold DISP to switch the 
video source of picture - in - picture. 

Summary of Contents for NPL-TV 7874 DIGITAL

Page 1: ...serial number RES AV IN NAVI RADIO SRC MUTE PWR NPL TV 7874 DIGITAL...

Page 2: ...ting Tracks Fast 16 Number Buttons 16 Pause the Playback 16 Stop the Playback 16 Play tracks at Random 17 Repeat Playing 17 Skip backward forward F F F REW the Playback 17 System Switch 17 Slow Motion...

Page 3: ...nu 37 TV 10 IPOD Play Selecting Tracks Fast Playing Track F F F REW Repeat Playing Playing Tracks at Random Pause the Playback 35 35 35 35 35 35 File Selector 36 Eject IPOD 36 9 IPOD 11 38 Additional...

Page 4: ...buttons provided for the main unit To nstall the unit in an apt pl ace lest the driver distrack his attention from please i Using the unit after starting the engine otherwise the electric energy of b...

Page 5: ...ave a sticky residue while beginning to peel off Shown as the picture Clean the discs with an optional clean ing cloth Wipe each disc from the center out Shown as the picture PRECAUTIONS This unit can...

Page 6: ...ward or fast rewind Press it again or press ENTER to resume to play normally Playing Track F F F REW 20 Repeat Playing During playback press Press it again to cancel this function RPT to track repeat...

Page 7: ...lay To select music fast press to play the previous track press to play the next one Pause play press to pause play Stop play press to stop play and press the PLAYto play the current track again 21 17...

Page 8: ...th Connection and Disconnection When established bluetooth connection between this unit and the cellphone bluetooth icon on the display appears in red Press PAIR to turn off bluetooth con nection and...

Page 9: ...ace 28 2 Dail lastphone answeraphone 3 Hangup refuseaphone 4 NumberShow PAIR 5 6 ACH audiochange C clear 8 POWER 7 Press it to turn on or turn off the bluetooth function 1 To input the phone number Nu...

Page 10: ...ull screen Click it to enter front AUX IN Click it to enter VIDEO setup menu Display Click it to enter SOURCE menu Click it to enter rear AUX IN AUX IN IPOD USB MAIN SOCKET Wiring Connection FAN A B 1...

Page 11: ...up to 6 stations for each band 4 23 Clicking AMS on the screen performs the same function Reset the Unit Operating the unit for the first time or after replacing the car battery you must reset the un...

Page 12: ...MHz 87 50 MHz 107 12 MHz 3 FM2 AM2 AM1 FM3 FM1 FM4 Russia Mode Selector Briefly pressing SRC on the main unit also performs the same function Note Repeatedly briefly press SOURCE button to select the...

Page 13: ...to the default setting Click to go back to the SOURCE menu to go back to the previous menu click During CD status press OSD button the display shows Single elapsed Single remain Note This function is...

Page 14: ...ng navigate mode when set OFF heard during any mode when set ON If GPS voice reported incomplete please adjust the volume of the map Note Selecting Track 2 This function is operated by using the remot...

Page 15: ...e below Click VERSION to display the information of current version different models show different data at different times Pressing RESET will be prompted to reset pressing CONFIRM can be reset to fa...

Page 16: ...9 9 7 7 8 8 3 3 4 4 5 5 6 6 2 2 1 1 7 7 8 8 9 9 10 10 10 10 Full screen Number keys Click it to go back to root menu Click it to enter DVD setup menu Click it to enter VIDEO setup menu Fast reverse Fa...

Page 17: ...to PAL or NTSC or AUTO system System Switch NTSC PAL AUTO Note On Screen Display During DVD status press OSD button the display shows 8 Title Elapsed Chapter Elapsed Chapter Remain Title Remain Displ...

Page 18: ...io recordings The number in the mark on a DVD s package indicates the number of recorded languages audio systems 2 Note 6 Changing the subtitle language Multi subtitle With DVDs featuring multi subtit...

Page 19: ...ion is only valid on remote control Note 27 Press CLEAR to clear the mistake input 22 Playing PBC Menu During VCD status first press TITLE PBC playback starts and the menu of entire disc appears on th...

Page 20: ...Press SETUP on remote control or MENU on the main unit or in the monitor main menu and sub menu will appear on TFT pressing on the remote control to select your desired items then press ENTER The sel...

Reviews: