6.4 Transferring data
Data entry was finished in the previous section. Now you will transfer data to the positioning unit.
After data is transferred to the positioning unit, you can check if transferred data works normally by conducting a
trial operation at LOCAL mode that will be explained in the next section.
1. Open the dialog box to download to unit.
There are the following 3 ways to open the dialog box to download to unit.
■
Press [Ctrl] + [F6] keys.
■
Click button on the toolbar.
■
Select [Online]
Î
[Download to unit…].
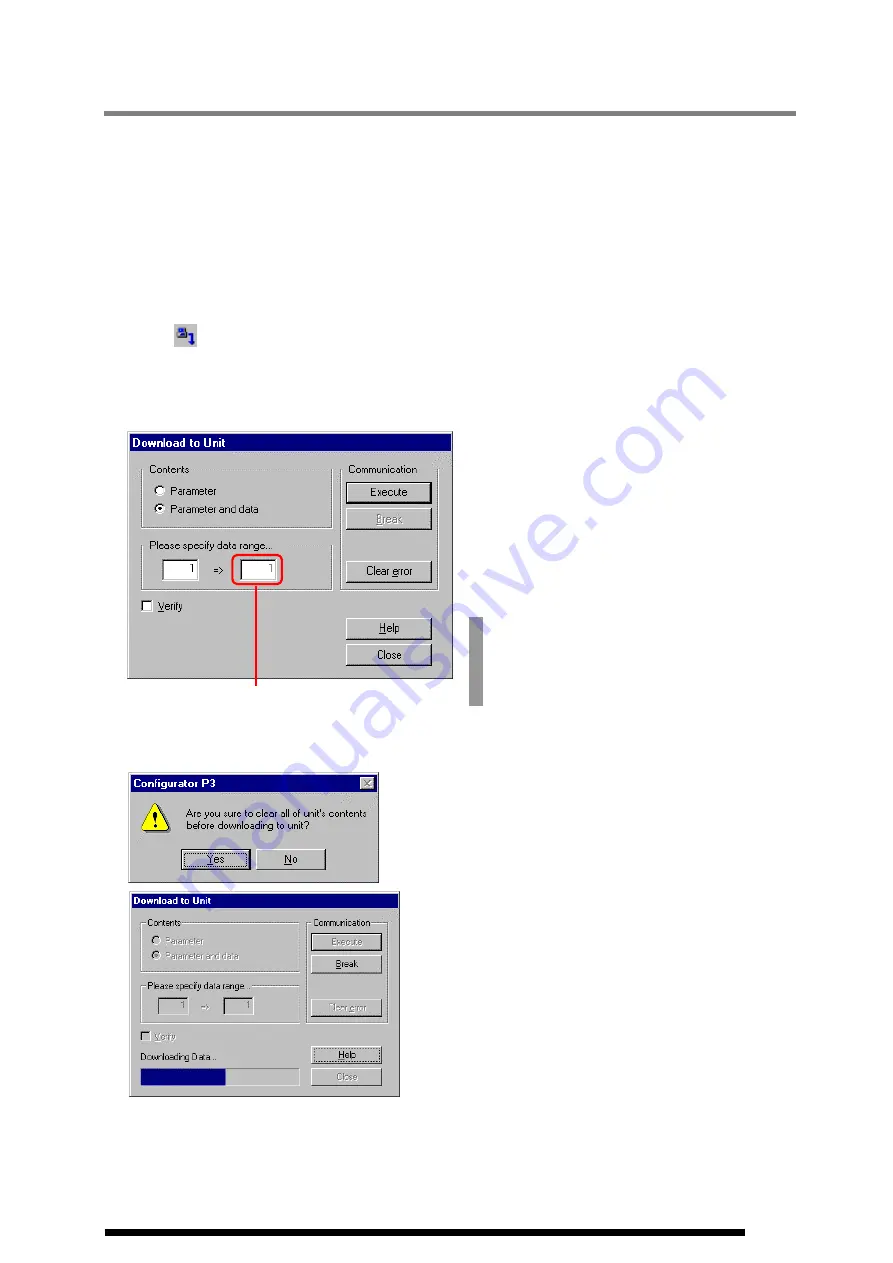
2. Select data to download into the positioning unit.
Click [Parameter and data] inside group box of
[
Contents
], so that you can set a data number
range.
Edit here
Earlier, Teaching was performed to data No.1 only,
so the data number range here has to be 1 to 1.
At the initial state, however, the data number range is
set to 1 through 400, so re-enter "1" in the part
surrounded by square in the left illustration.
3. Download to the unit.
Click [
Execute
] button, so parameters and data will be
transferred to the positioning unit.
When the left dialog box appears, click [
Yes
] button.
And then, parameters and data is downloaded as shown in
the left dialog box.
6-7
Summary of Contents for AFP3431
Page 4: ...ii...
Page 8: ...vi...
Page 18: ...1 10...
Page 24: ...2 6...
Page 25: ...Chapter 3 Name of each part 3 1 Screen and menus 3 2...
Page 38: ...5 6...
Page 48: ...6 10...
Page 49: ...Chapter 7 RUN mode 7 1 Setting mode to RUN 7 2...
Page 51: ...Chapter 8 Saving a file 8 1 Saving a file 8 2...
Page 56: ......
Page 57: ...Record of changes Manual No Date Desceiption of changes ARCT1F338E Sep 2001 First Edition...
Page 58: ......


