


2200M4JE-HO-iS2-N_2014.04.
Chapter 5 Maintenance and Inspection
Screw Compressor i-series
5.5 Disassembly and Inspection
5-13
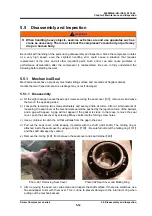
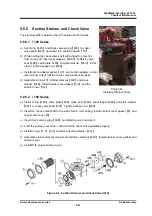
g) Loosen the set screws
【
111
】
of the seal collar
【
109
】
by turning them approximately three times
(Photo 003).
Do not remove the set screws completely, but leave them so that their ends are below the surface of
the seal collar. These screws are located in two places 90 degrees apart from each other.
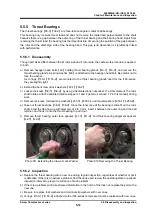
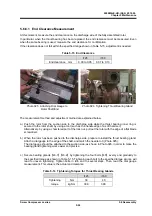
Photo 003 Loosening the Seal Collar Set Screws
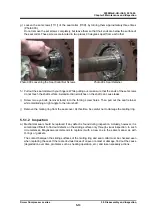
Photo 004 Seal Retainer
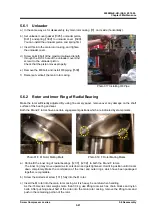
h) Pull out the seal collar with your fingers. While pulling out, make sure that the ends of the set screws
do not touch the shaft surface. Axial-direction scratches on the shaft can cause leaks.
i) Screw two eye bolts (removal tools) into the forcing screw holes. Then pull out the seal retainer
while maintaining a right angle to the rotor shaft.
j) Remove the mating ring from the seal cover. At this time, be careful not to damage the mating ring.
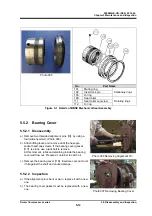
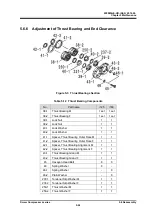
5.5.1.2 Inspection
a) Mechanical seal should be replaced if any defect is found during inspection. Actually, however, it is
sometimes difficult to find out defects on the sliding surface only through visual inspection. In such
circumstances, Mayekawa recommends to replace it with a new one in the same manner as with
O-rings or gaskets.
The contact between the sliding surfaces of the mating ring and seal collar must be checked even
when replacing the seal. If there are obvious traces of uneven contact or damage, find out the cause
(degradation over time, problems such as heating operation, etc.) and take necessary actions.


