Test Print 5: Adjust Head 87
When “Adjust Head 2 Custom” is selected
Standard or Custom Adjustment Methods
1.
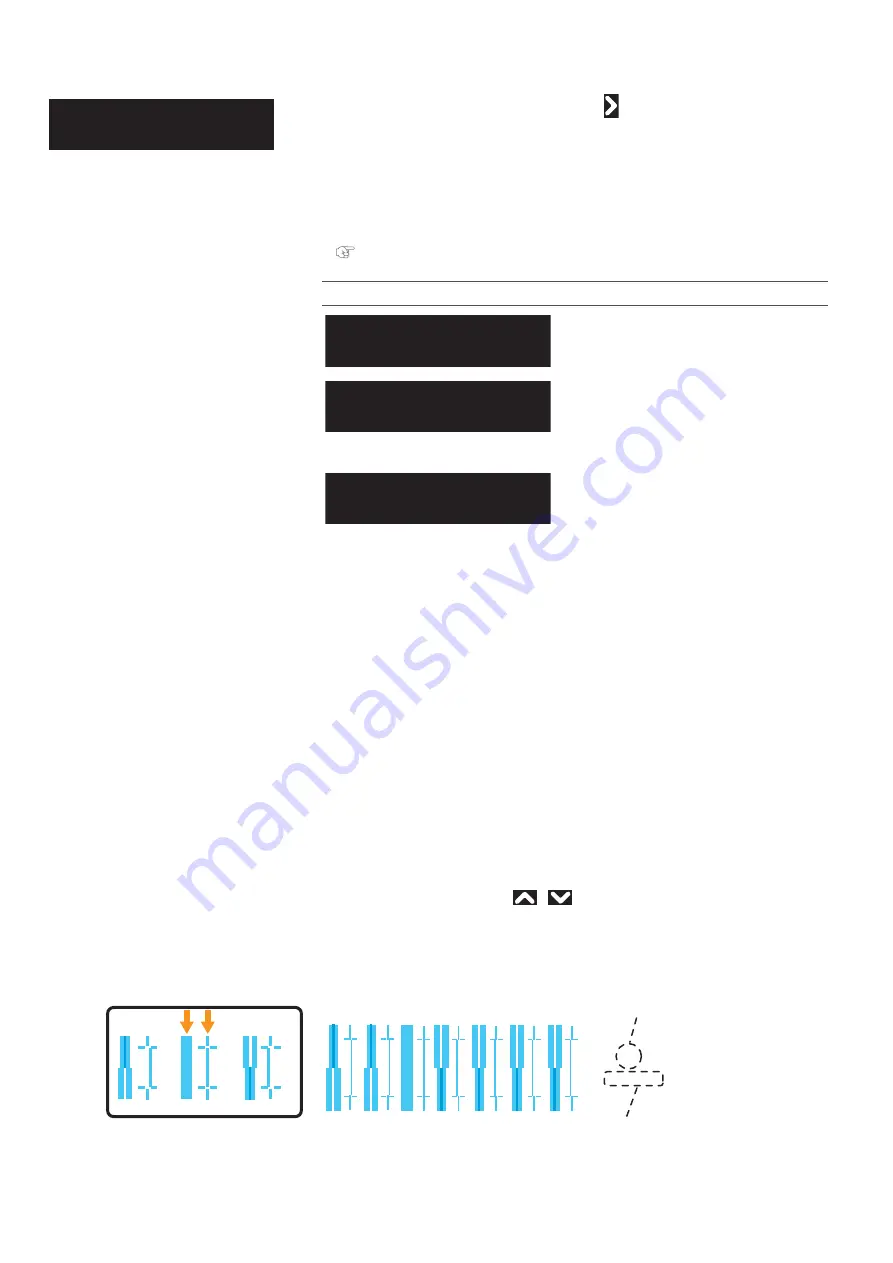
Print the Head adjustment pattern and look for a place in the pattern that has least white lines or overlapping
images.
•
If you selected “Adjust Head 2: Custom”, select “ALL” or “A” to “F”.
•
The number printed under the pattern without alignment errors is the adjustment value.
2.
Enter the adjustment value.
Head adjustment pattern
• Press the [Enter] key to carry out printing. For the Head adjustment pattern, the same patterns will be printed on both sides
and center of the media.
• Check the print results and select the number that looks most aligned between 1 and 7.
• Pattern names such as “Pattern B: 4” are shown on the display. Use the
/
key to enter the number of the best-
adjusted pattern, and press the [Enter] key.
• In the case of the picture below, enter “5”, so that the display reads “Pattern B: 5”.
• If you selected “Head Adj. 2: Custom” and “Fine Pattern ALL”, enter the adjustment value for A to F.
You can select the adjustment method.Tap
to open the submenu.
When selecting “Fine Pattern X (A to F)”, select the option that corresponds to the
print mode used for printing.
If the resolution, pass and the printing direction of the RIP print mode differ from
the print mode for the User Type, select the fine pattern that is suitable for the
RIP.
"Adjustment patterns for each print mode" P. 59
Submenus
Adjusts all the patterns.
For printing an adjust pattern selected
from A to F.
Adjust Head 2
Custom
Custom 1
Fine
Pattern
ALL
・
・
・
Custom 2
Fine
Pattern
A
Custom 7
Fine
Pattern
F
1
2
3
4
5
6
7
4
5
6
Q3/Q4/G1/G2
B
Pattern Name
Current Print Mode
(If you carried out the adjustment with Custom settings,
the head height and the printing information will also be printed.)
Summary of Contents for XPJ-1682WR
Page 8: ...8 ...
Page 136: ...136 Performing initial charging after head cleaning ...
Page 152: ...152 The media is jammed Note ...
Page 157: ...List of specifications 157 ...
Page 158: ...XPJ16xxWRE A 01 ...


