Replacing the cleaning wiper 125
[4]
Cover the platen with the paper you can get dirty.
Important!
Ink may drip from the cleaning wiper.
We recommend covering the floor with paper as well.
[5]
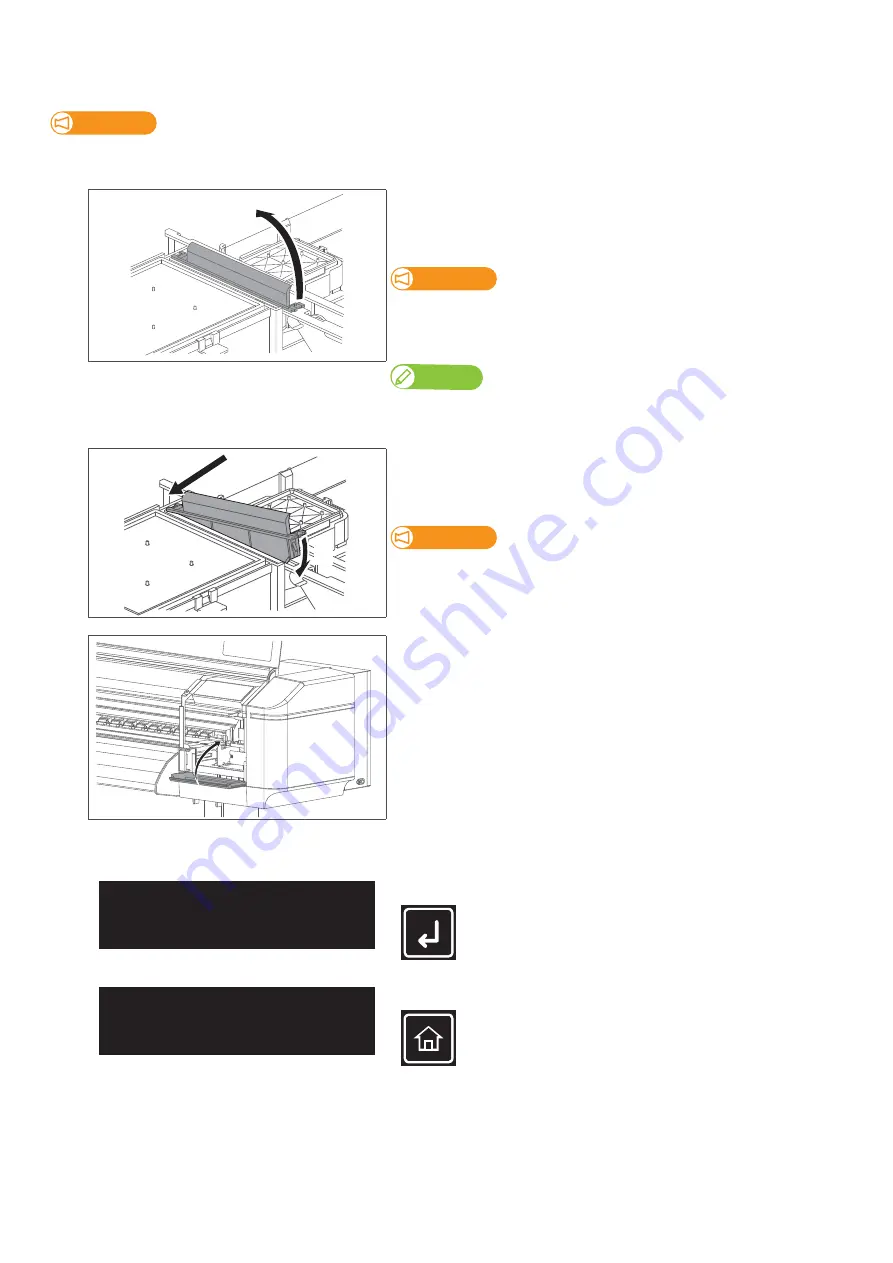
Remove the cleaning wiper.
• Lift the cleaning wiper hook and release the hook. Then, remove the
cleaning wiper.
Important!
When removing the cleaning wiper, be cautious of ink drops.
Note
Used cleaning wiper should be put in a plastic bag, etc, and dispose of it in compliance
with local ordinance and instructions of local authorities.
[6]
Follow the steps below to install new cleaning wiper.
• Slide the front side of the new cleaning wiper into its slot.
• Press the wiper hook down until it clicks into place.
Important!
Do NOT touch the cleaning wiper rubber with your bare hand.
If finger oil gets on the rubber, it will damage the print head.
[7]
Close the maintenance cover.
[8]
Close the front cover.
[9]
Tap [Enter].
[10]
Tap [Home] to end the cleaning process.
1
2
CR Maintenance
End
->
Enter
CR Maintenance
Start
->
Enter
Summary of Contents for XPJ-1682WR
Page 8: ...8 ...
Page 136: ...136 Performing initial charging after head cleaning ...
Page 152: ...152 The media is jammed Note ...
Page 157: ...List of specifications 157 ...
Page 158: ...XPJ16xxWRE A 01 ...


