Reduction margin
Your fax machine’s reduction margin is measured in millimeters (mm). We’ll define
it by explaining how it’s used:
When a fax message enters your machine’s electronic brain, the machine measures
the message’s length and compares it to (a) the length of your selected paper plus
(b) the reduction margin you set. If the length of the incoming message is shorter
than the sum of (a) and (b), your machine prints the message on just one sheet;
otherwise, it prints the message on more than one sheet.
Note: An Auto reduction setting and a reduction margin setting of 40mm will
print most incoming faxes as single pages. Try this combination first and
then, only if you have problems with it, select different settings.
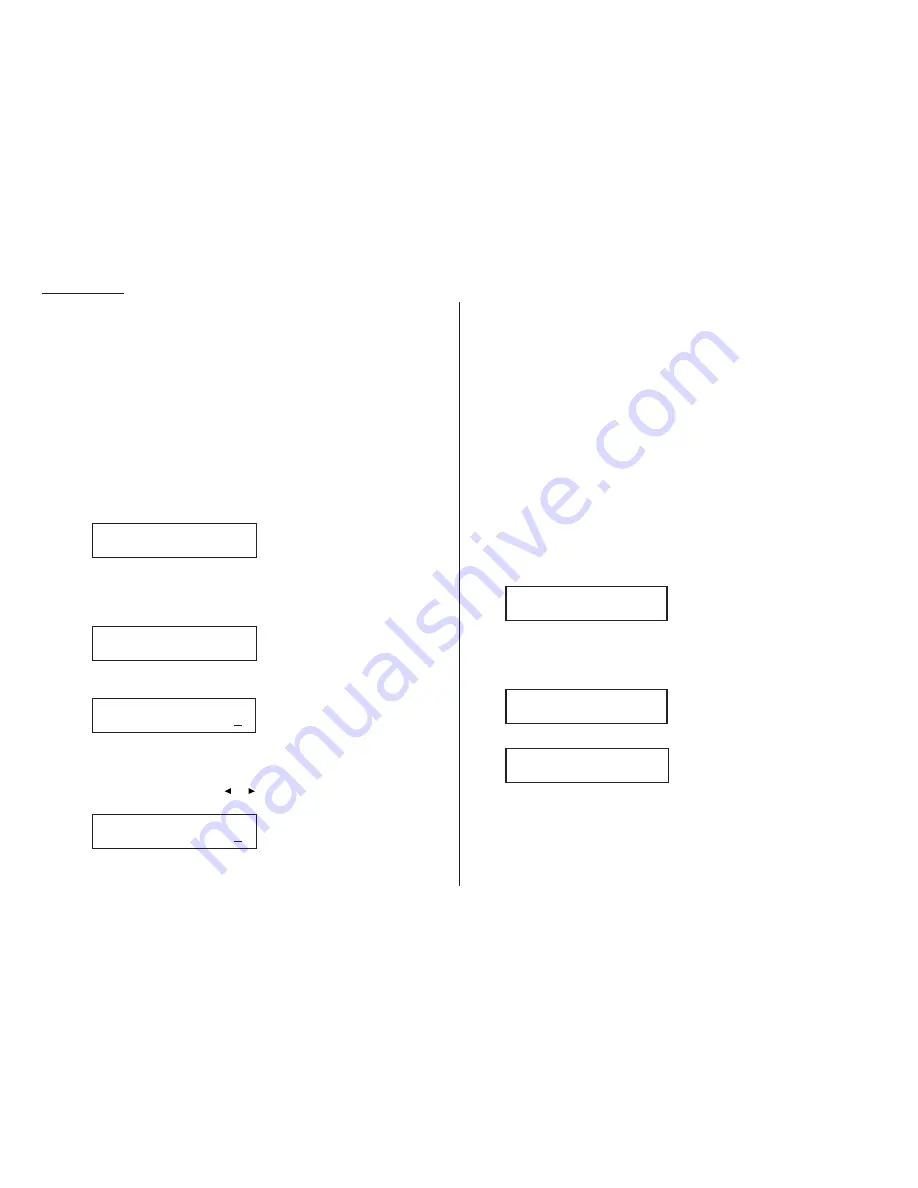
Adjusting the print settings
1
Press
PROGRAM
,
J
, 0, 2,
ENTER
. The
LCD
shows the currently set print reduc-
tion rate:
If the setting you see is acceptable, skip to step 3.
Otherwise, proceed to step 2.
2
To change the setting, press
PROGRAM
repeatedly until your chosen reduction
setting appears. In this example, we’ve chosen 91%.
3
Press
ENTER
to save the setting. The
LCD
shows the current setting for the
reduction margin:
If the setting you see is acceptable, skip to step 5.
Otherwise, proceed to step 4.
4
To change the setting, use the numeric keypad to enter the reduction margin
you want. If necessary, press
or
to move the cursor if you need. In this
example, we’ve chosen 38mm.
5
Press
ENTER
to save the setting.
Making settings for copying
You can set three parameters for copying:
• Copy sort/stack — Your fax machine can either sort or stack multiple copies of a
document. If it stacks them, it will make four copies of a two-page document as:
1, 1, 1, 1 — 2, 2, 2, 2. If it sorts them, it will make four copies of the same two-
page documents as: 1, 2 — 1, 2 — 1, 2 — 1, 2.
(If the sorting copy is “Off”, the fax machine will stack.)
• Copy reduction rate — Works the same way as the print reduction rate (see page
2.3 for more details).
• Reduction margin — Serves the same purpose as the reduction margin for print-
ing (see earlier information on this page).
You set both in the same operation, as with the printing settings.
Note: The same options, in terms of both reduction settings and reduction mar-
gins, are available for copy reduction as for print reduction. (If necessary,
review the preceding discussion, “Making settings for printing faxes,” begin-
ning on page 2.3.) The difference, here, is that you probably are better off
with a setting of 00 on the reduction margin.
1
Press
PROGRAM
,
J
, 0, 3,
ENTER
. The
LCD
shows the current setting for sorting
copy:
If the setting you see is acceptable, skip to step 3.
Otherwise, proceed to step 2.
2
To change the setting, press
PROGRAM
once or twice until your chosen setting
appears. In this example, we’ve chosen Off.
3
Press
ENTER
to save the setting. The
LCD
shows the current copy reduction rate:
If the setting you see is acceptable, skip to step 5.
Otherwise, proceed to step 4.
4
To change the setting, press
PROGRAM
repeatedly until your chosen reduction
setting appears. In this example, we’ve chosen 75%.
Copy Reduc Rate:100%
Program/Enter
Sorting Copy: Off
Program/Enter
Sorting Copy: On
Program/Enter
Prnt Reduc Rate: 91%
Margin(0-85mm): 38
Prnt Reduc Rate: 91%
Margin(0-85mm): 40
Prnt Reduc Rate: 91%
Program/Enter
Prnt Reduc Rate:Auto
Program/Enter
2.4
Beyond the basics
Summary of Contents for F-98
Page 1: ...Operating Instructions For Muratec s F 98 plain paper fax machines ...
Page 3: ...Welcome ...
Page 8: ...Getting started A quick and friendly trip through the basics of your Muratec fax machine ...
Page 28: ...Beyond the basics We ve covered the musts Now let s explore the goodies ...
Page 100: ...Just in case 3 21 This page intentionally blank ...
Page 101: ...Appendix and index ...


