55
Chapter 5 - RouteFinder Manager
Routing Settings
Routing is the process of moving a packet of data from source to destination. The RF500S acts as a
router to enable messages to pass from one computer to another and eventually reach the target
machine. Part of this process involves analyzing a
routing table to determine the best path. Use the
information below to create a routing table to connect your network to another network, or to connect
subnets within your network.
Note: A routing table is required to use the LAN -to- LAN routing function of the RF500S.
1.
From the main Manager dialog box, select Routing Settings.
2.
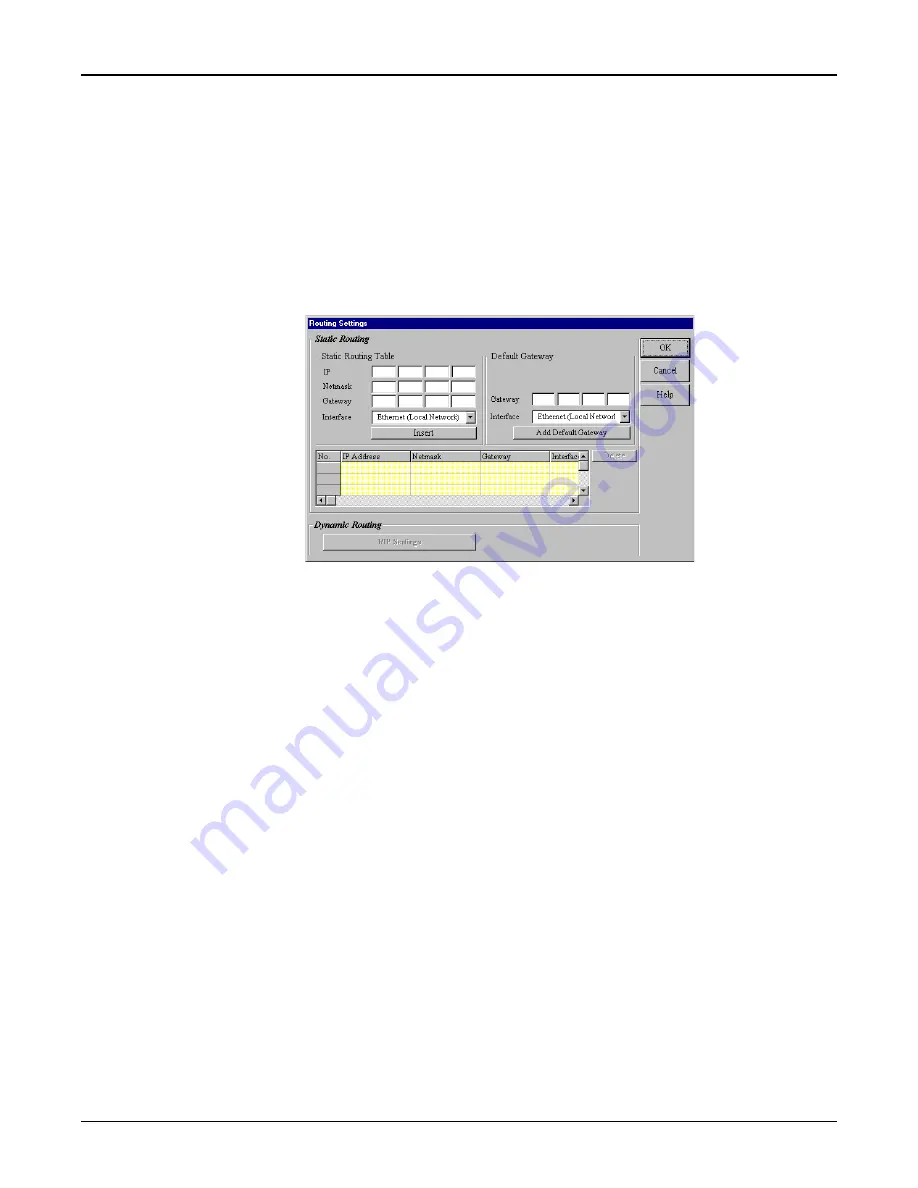
The Routing Settings dialog box displays.
Static Routing
For each different subnet on your LAN, enter:
IP:
Enter the (network/subnet) IP address to which you want to route.
Netmask:
Enter the subnet mask of your Network IP address.
Gateway:
Enter the IP address of the gateway device linking your network to the
other network/subnet. The IP address should be in the same subnet as
your RF500S. If you are using this device with the LAN -to- LAN
function, the gateway IP should be set as the IP address of the
RouteFinder.
Interface:
Select the port (LAN or WAN, etc.) that the routed packet should pass
through. Select
Local Network if you are using a separate router. If you
are using the RF500S with the LAN -to- LAN function, the Interface
should be set as the WAN port that connects you to the other subnet.
Click Insert to save the information to the routing table.
To delete this information, select it from the routing table and click
Delete.
Default Gateway:
Default gateway is an IP address that all packets are routed to, when
the device is unable to find a route match (the destination IP address of
the packet in the routing table).
Click Add Default Gateway to save the IP address of the default
gateway.
Interface:
Select the port (LAN or WAN, etc.) interface where the gateway is
located.
Summary of Contents for RoteFinder RF500S
Page 1: ...Model RF500S DSL Cable Router with Built in 4 port 10 100 Switch User Guide ...
Page 6: ...Chapter 1 Introduction ...
Page 13: ...Chapter 2 Hardware Installation ...
Page 16: ...Chapter 3 Software Installation and Configuration ...
Page 31: ...Chapter 4 Telnet ...
Page 38: ...Chapter 5 RouteFinder Manager ...
Page 67: ...Chapter 6 RouteFinder Monitor ...
Page 79: ...Chapter 7 LAN Client Settings ...
Page 108: ...Chapter 8 LAN to LAN Settings ...
Page 112: ...Chapter 9 Troubleshooting ...
Page 116: ...Chapter 10 Service Warranty and Technical Support ...
Page 123: ...Appendix ...
Page 128: ...Glossary ...


