


30
Usage Pr
eparation
9
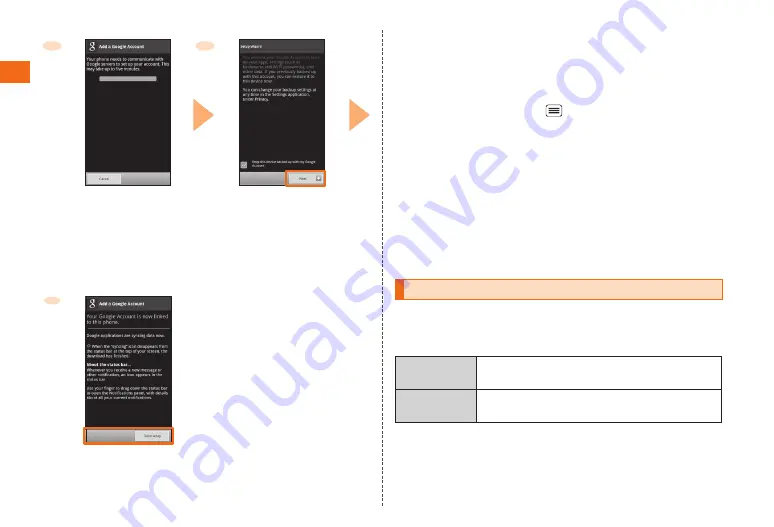
Start Google account
creation
10
Confirm backup and
restoration settings
→
Next
※
Unselect the checkbox if you
are not using backups.
When the phone is newly set up, there is no Google Account, only Add
account is available.
Add account
→
Google and then follow the on screen instructions to
create your Google account before synchronization.
To synchronize your Gmail, Gmail Contacts, Calendar, etc. with the
device, on the Home screen, tap
→
Settings
→
Accounts
→
Select
your newly created Google Account and configure the synchronization
settings under Data & synchronization once you have completed the
initial setup.
When completing Google account setup, you will proceed to the
Motorola Service contract confirmation. Check Motrola terms of use, after
agreeing on the terms you will be proceed to next step. If you do have a
MotoCast ID, select Restore now and Next. You will be asked to login to
your Motocast ID and you will be able to restore the information from your
previous device. If you do not have a MotoCast ID select Do not restore
and Next.
Set up your au one-ID
Setting up your au one-ID will allow you to purchase applications on
the au one Market with our "au Easy Payment" system and will give you
access to other useful au services.
au one-ID
※
The au phone number or ID to be registered as
your au one-ID (user ID).
au one-ID
password
The password required to use your au one-ID.
※
Your au one-ID must be unique.
Finish setup
11


