Chapter 2: Network Setup
Authentication Server Configuration
. . . . . . . . . . . . . . . . . . . . . . . . . . . . . . . . . . . . . . . . . . . . .
.
.
Juniper Steel-Belted RADIUS
This section describes how to configure Juniper Steel Belted Radius server in support of
EAP-TTLS Secure Mesh. Any Radius server package can be used as long as it supports
EAP-TTLS authentication.
The pre-requisites for the procedure in this section are:
•
Windows 2003 server installation complete.
•
Installation of our Certificate Authority (CA).
•
Creation of a server certificate.
•
Steel Belted Radius Enterprise Edition (available from Juniper.net). Download /
purchase SBR installer and proceed to install the program by double clicking the
installer. We download an evaluation copy of this example. Contact Juniper
Networks to purchase a licensed copy.
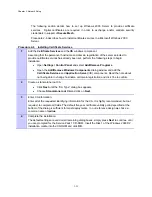
After the installation SBR is complete we need to add our trusted root and server certificate to our Steel
Belted Radius server.
Exporting Certificates
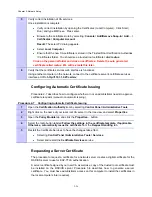
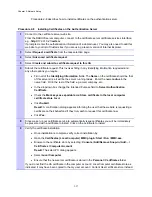
Procedure 2-9 describes how to export existing certificates and install them for use with
Steel-Belted RADIUS.
Procedure 2-9
Exporting Certificates
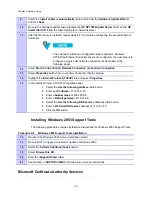
With the installation of our certificate authority in the previous section and the creation of a server
certificate we need to add these to Steel Belted Radius.
1
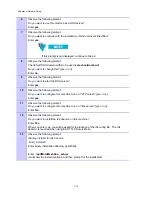
Find the server certificate installed on the authentication server.
•
Click Start | Run | and type MMC.exe. Press enter.
•
Browse to the certificate store by selecting:
Console / Add/Remove Snap-in / Add… /
Certificates / Computer Account
.
Result
: The select PC dialog appears.
•
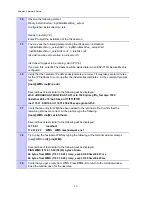
Select
Local Computer
.
•
Open
the
Personal / Certificates
folder in its tree view.
•
A server certificate was created when we created our Certificate Authority. In our
reference design this certificate will be named
radius
.
2-28
Summary of Contents for 2.1
Page 2: ...This page intentionally left blank ii ...
Page 4: ...This page intentionally left blank iv ...
Page 10: ...This page intentionally left blank x ...
Page 12: ...This page intentionally left blank xii ...
Page 14: ...This page intentionally left blank xiv ...
Page 59: ...Chapter 3 MOTOMESH Duo Hardware This page intentionally left blank 3 12 ...
Page 86: ...Chapter 5 Customer Information This page intentionally left blank 5 7 ...
Page 123: ......
Page 131: ...Appendix A Figure 9 39 General Settings Tab in the Web User Interface 9 30 ...


