10
The Interface Solution Experts
SPA
2
Programmable Current/Voltage
Limit Alarm Trips
SPA
2
Configuration:
Front Panel Pushbuttons
The SPA
2
(HLPRG) operating parameters may be set
using front panel pushbuttons and/or Moore
Industries’ PC Configuration Software. This section
describes configuration via the front panel
pushbuttons.
There are three pushbuttons on the unit’s front
panel;
UP, DOWN and SELECT. Together with the
prompting messages displayed on the LCD, these
are used to access menus, and to view and change
the settings.
Use
SELECT as your “Enter” button, to make your
selections.
Use the
UP and DOWN buttons to navigate within
the menus.
Note:
All parameters, except the Custom Curve feature,
can be configured using the front panel pushbuttons.
The Custom Curve table can only be configured
using the PC Configuration Software Program.
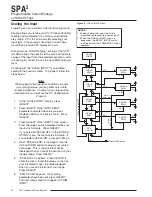
Main Menu/View Settings
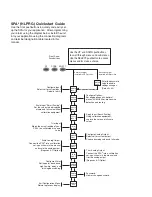
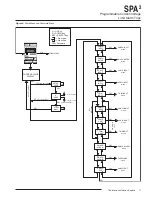
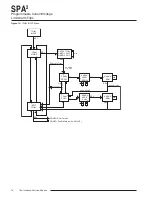
Figure 4 gives an overview of the Main menu; the
View menu is shown in Figure 5.
Upon power-up, the SPA
2
defaults to a display of the
measured value. Pressing the
DOWN button ac-
cesses a series of displays that show, in succession,
the settings currently stored in unit memory.
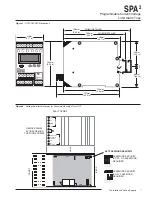
Depending upon whether or not the Security Jumper
has been installed (Figure 2), pressing
SELECT will
access either the first screen in the main configuration
menu, “CONFG INPUT”, or the password code query
screen, “ENTER PASS”.
Once the Main Menu has been accessed, the
DOWN
button is used to move through all of the sub-menus in
a loop. Pressing the
SELECT button accesses the
first screen of the sub-menu shown on the LCD.
Password
This menu is bypassed if the Password Security
Jumper is not installed. If the jumper is installed, the
menu comes up when
SELECT is pressed from the
display of the process variable input. To access the
security jumpers, you must remove the top cover
(refer to Figure 2). The menu is shown as part of
Figure 4. Refer to the
Password Configuration section
of this manual for a more detailed description of the
password feature.
1.
If the jumper is installed, pressing
SELECT
from the display of the process variable input
will bring up the “ENTER PASS” screen.
2.
Press
SELECT again to enter the “PASS”
screen. Use the
UP and DOWN buttons to
enter “55”, the default screen for this point in
the menu.
3.
If a password has been set (four characters,
maximum), use the
UP or DOWN buttons to
display the correct password.
When the correct password number is
displayed, press
SELECT.
Note:
If the correct password is not known, the unit
settings can be viewed, but not changed.
4.
If you have entered the correct password, the
input configuration menu, “CONFG INPUT”, will
be accessed. If not, the display will show a
“VIEW ONLY” message.
5.
From “VIEW ONLY”, press
SELECT to go back
to the process variable input. Use the
UP and
DOWN buttons to view the settings in the
various menus. The “VIEW ONLY” mode locks
out any attempt to make changes to the
settings.
Note:
The menu to set or change the password stored in
SPA
2
memory is presented in the Password
Configuration section of the manual.


