


23
Pairing with your smartphone
Note:
This feature is not available on all models.
Depending on your model, your Cyclo device can be connected with iPhone or
Android phones.
Note:
The compatible phone types include: iPhone 4 or above and Android 2.3 to
Android 4.4.
Note:
For Android phone users, the CycloSmart application is required for your Cyclo
device to communicate with your Android phone. The application is available on Google
Play.
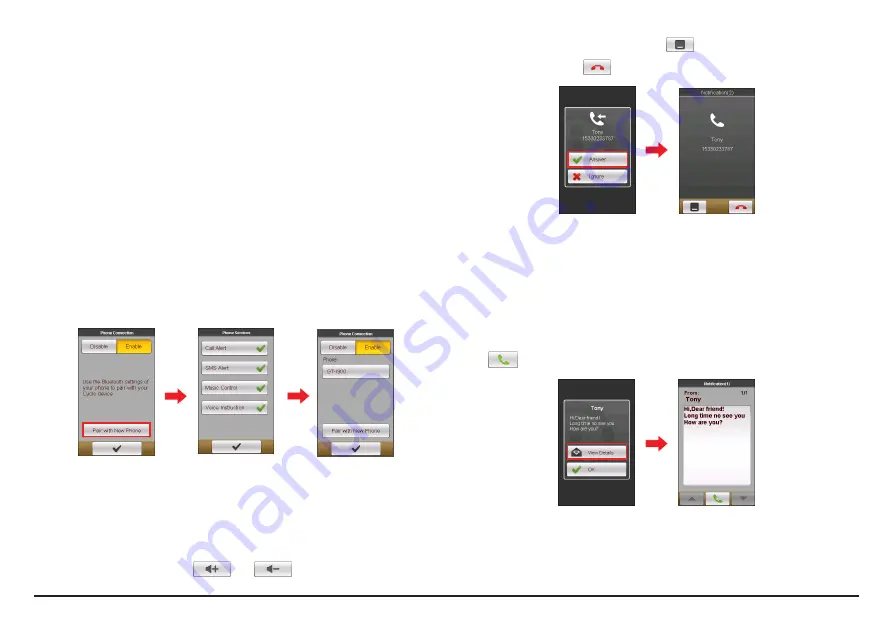
1.
Enable the Bluetooth function on your Cyclo device from
Main menu >
Settings > Phone
and tap
Pair with New Phone
.
2.
You can do one of the following on your smartphone for your Cyclo device
to communicate with your phone.
•
For iPhone, turn on the Bluetooth function in the iPhone settings and
select the Cyclo device from a list of Bluetooth devices.
•
For Android phones, open CycloSmart and tap
Start Pairing
.
Receiving incoming calls
By default, you will be notified with a notification and a sound when there is an
incoming call. The caller’s information will display on the screen if it is saved in
your phonebook.
•
Tap
Answer
to receive or
Ignore
to reject the call.
•
To adjust the volume, tap
and
(for Android phones only).
•
To return to the previous screen, tap
to minimize the screen.
•
To end the call, tap
.
Receiving text messages
Note:
For iPhone users, you need to turn on the “Show notifications”in the Bluetooth
Settings in order to receive the text messages on your Cyclo device.
By default, you will be notified with a notification and a sound when there is a
text message. The sender’s name will display on the screen if it is saved in your
phonebook.
•
To view the message, tap
View Details
. To call the message sender, tap
.
•
To return to the previous screen, tap
OK
.


