Miller ArcReach Owner'S Manual Download Page 7

OM-281136 Page 1

SECTION 1 

 SAFETY PRECAUTIONS 

 READ BEFORE USING

ihom _2019-09

Protect yourself and others from injury —


read, follow, and save these important safety precautions and operating instructions.

1-1. Symbol Usage

DANGER! 

 Indicates a hazardous situation which, if

not avoided, will result in death or serious injury. The

possible hazards are shown in the adjoining symbols

or explained in the text.
Indicates a hazardous situation which, if not avoided,

could result in death or serious injury. The possible

hazards are shown in the adjoining symbols or ex-

plained in the text.

NOTICE


 Indicates statements not related to personal injury.

.

Indicates special instructions.

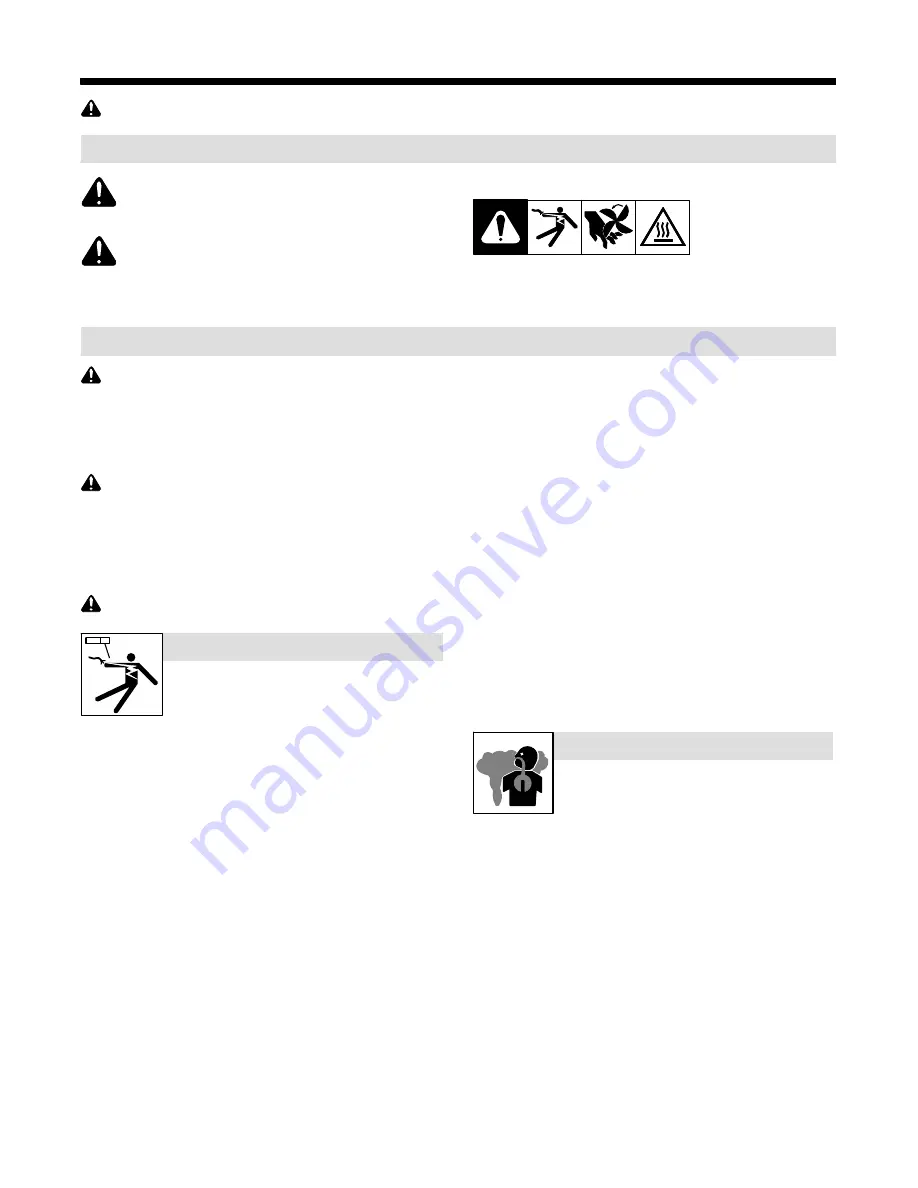
This group of symbols means Warning! Watch Out! ELECTRIC

SHOCK, MOVING PARTS, and HOT PARTS hazards. Consult sym-

bols and related instructions below for necessary actions to avoid the

hazards.

1-2. Induction Heating Hazards

The symbols shown below are used throughout this manual

to call attention to and identify possible hazards. When you

see the symbol, watch out, and follow the related instructions

to avoid the hazard. The safety information given below is

only a summary of the more complete safety information

found in the Safety Standards listed in Section 1-5. Read and

follow all Safety Standards.

Only qualified persons should install, operate, maintain, and

repair this equipment. A qualified person is defined as one

who, by possession of a recognized degree, certificate, or

professional standing, or who by extensive knowledge, train-

ing and experience, has successfully demonstrated ability to

solve or resolve problems relating to the subject matter, the

work, or the project and has received safety training to recog-

nize and avoid the hazards involved.

During operation, keep everybody, especially children, away.

ELECTRIC SHOCK can kill.

Touching live electrical parts can cause fatal shocks

or  severe burns. The power circuit and output bus

bars or connections are electrically live whenever

the output is on. The input power circuit and machine

internal circuits are also live when power is on. Incorrectly installed or

improperly grounded equipment is a hazard.

D

Do not touch live electrical parts.

D

Enclose any connecting bus bars and coolant fittings to prevent

unintentional contact.

D

Wear dry, hole-free insulating gloves and body protection.

D

Insulate yourself from work and ground using dry insulating mats or

covers big enough to prevent any physical contact with the work or

ground.

D

Additional safety precautions are required when any of the following

electrically hazardous conditions are present: in damp locations or

while wearing wet clothing; on metal structures such as floors, grat-

ings, or scaffolds; when in cramped positions such as sitting,

kneeling, or lying; or when there is a high risk of unavoidable or acci-

dental contact with the workpiece or ground. For these conditions,

see ANSI Z49.1  listed in Safety Standards. And, do not work alone!

D

Disconnect input power before installing or servicing this equip-

ment. Lockout/tagout input power according to OSHA 29 CFR

1910.147 (see Safety Standards).

D

Use only nonconductive coolant hoses with a minimum length of 18

inches (457 mm) to provide isolation.

D

Properly install, ground, and operate this equipment according to its

Owner’s Manual and national, state, and local codes.

D

Always verify the supply ground 

 check and be sure that input pow-

er cord ground wire is properly connected to ground terminal in

disconnect box or that cord plug is connected to a properly grounded

receptacle outlet.

D

When making input connections, attach proper grounding

conductor first 

 double-check connections.

D

Keep cords dry, free of oil and grease, and protected from hot metal

and sparks.

D

Frequently inspect input power cord and ground conductor for dam-

age or bare wiring – replace immediately if damaged – bare wiring

can kill.

D

Turn off all equipment when not in use.

D

Do not use worn, damaged, undersized, or repaired cables.

D

Do not drape cables over your body.

D

Do not touch power circuit if you are in contact with the work, ground,

or another power circuit from a different machine.

D

Use only well-maintained equipment. Repair or replace damaged

parts at once. Maintain unit according to manual.

D

Wear a safety harness if working above floor level.

D

Keep all panels and covers securely in place.

D

Use GFCI protection when operating auxiliary equipment in damp or

wet locations.

SIGNIFICANT DC VOLTAGE exists in inverter power

sources AFTER removal of input power.

D

Turn off unit, disconnect input power, and discharge input capacitors

according to instructions in Manual before touching any parts.

Induction Heating of certain materials, adhesives,

and fluxes can produce fumes and gases. Breathing

these fumes and gases can be hazardous to your

health.

FUMES AND GASES can be hazardous.

D

Keep your head out of the fumes. Do not breathe the fumes.

D

Ventilate the work area and/or use local forced ventilation at the arc

to remove welding fumes and gases. The recommended way to de-

termine adequate ventilation is to sample for the composition and

quantity of fumes and gases to which personnel are exposed.

D

If ventilation is poor, wear an approved air-supplied respirator.

D

Read and understand the Safety Data Sheets (SDSs) and the man-

ufacturer’s instructions for adhesives, coatings, cleaners,

consumables, coolants, degreasers, fluxes, and metals.

D

Work in a confined space only if it is well ventilated, or while wearing an

air-supplied respirator. Always have a trained watchperson nearby.

Fumes and gases from heating can displace air and lower the oxygen

level causing injury or death. Be sure the breathing air is safe.

D

Do not heat in locations near degreasing, cleaning, or spraying oper-

ations. The heat can react with vapors to form highly toxic and

irritating gases.

D

Do not overheat coated metals, such as galvanized, lead, or

cadmium plated steel, unless the coating is removed from the

heated area, the area is well ventilated, and while wearing an air-

supplied respirator. The coatings and any metals containing these

elements can give off toxic fumes if overheated.  See coating SDS

for temperature information.

Summary of Contents for ArcReach

Page 1: ...rocesses Description Induction Heating Accessory OM 281136A 2019 10 File Induction Heating For product information Owner s Manual translations and more visit www MillerWelds com R With Data Recorder I...

Page 2: ...roducts continue the tradition They re just as committed to providing equipment and service that meets the high standards of quality and value established in 1929 This Owner s Manual is designed to he...

Page 3: ...sions And Weights 10 A ArcReach Heater 10 B ArcReach Heater Extension Cable With ArcReach Heater Series Adapter 11 C Air Cooled Heating Cables 11 D Air Cooled Preheat Cable Covers 11 E Air Cooled Quic...

Page 4: ...ture Screen 34 7 3 Initial Setup 35 A Setting Up Time Zone 35 B System Settings 36 C Selecting Control Thermocouples 37 7 4 Preheating Without A Loaded Program 38 7 5 Bakeout Without A Loaded Bakeout...

Page 5: ...d for workplace assessment YES NO Thermal health effects need to be considered for workplace assessment YES NO Data is based on maximum power source capability valid unless firmware hardware is change...

Page 6: ......

Page 7: ...talling or servicing this equip ment Lockout tagout input power according to OSHA 29 CFR 1910 147 see Safety Standards D Use only nonconductive coolant hoses with a minimum length of 18 inches 457 mm...

Page 8: ...ure forks are long enough to extend beyond opposite side of unit D Follow the guidelines in the Applications Manual for the Revised NIOSH Lifting Equation Publication No 94 110 when manually lifting h...

Page 9: ...o is 312 353 2220 web site www osha gov National Electrical Code NFPA Standard 70 from National Fire Protec tion Association Quincy MA 02169 phone 1 800 344 3555 website www nfpa org and www sparky or...

Page 10: ...ires dans les condi tions suivantes risques lectriques dans un environnement humide ou si l on porte des v tements mouill s sur des structures m talliques telles que sols grilles ou chafaudages en pos...

Page 11: ...nts d induc tion durant l op ration moins que l quipement soit con u cet effet comme indiqu dans le manuel d utilisateur D Tenir les bijoux et autres objets personnels en m tal loign s de la t te de l...

Page 12: ...Occupational Safety and Health Standards for General Industry Title 29 Code of Federal Regulations CFR Part 1910 Subpart Q and Part 1926 Subpart J aupr s du U S Government Printing Office Superintend...

Page 13: ...such as rings watches or parts Safe74 2012 07 Do not wear metal jewelry and other metal personal items such as rings and watches during operation Safe75 2017 04 Induction heating sparks can cause fir...

Page 14: ...processes Safe84 2012 07 Do not remove or paint over cover the label Safe20 2017 04 Do not discard product where applicable with general waste Reuse or recycle Waste Electrical and Electronic Equipme...

Page 15: ...nals Safe86 2012 06 Become trained and read the instructions before working on the machine or heating Safe85 2012 06 3 2 Miscellaneous Symbols And Definitions Some symbols are found only on CE product...

Page 16: ...s and terms and conditions pertaining to third party software can be found at https www millerwelds com eula and are incorporated by reference herein 4 3 Specifications Parameter Rated Output 86 F 30...

Page 17: ...empt RSS s Operation is subject to the following two conditions 1 This device may not cause interference 2 This device must accept any interference including interference that may cause undesired oper...

Page 18: ...a layer of preheat insulation Preheat insulation is recommended for part temperatures above 3025 F 1505 C due to variances in thermocouple locations Part No Description 195376 Insulation Preheat 0 50...

Page 19: ...y Movement Location and Airflow 18 in 460 mm 18 in 460 mm 1 2 2 1 in 25 4mm Do not move or operate unit where it could tip Ref oc_dynasty 2015 04 5 2 Selecting Weld Cable Sizes The ArcReach Heater req...

Page 20: ...polarity Weld cables must be routed together to ensure proper communication between the ArcReach Heater and the power source Do not use a structure as part of the power communication path Turn on wel...

Page 21: ...able with Series Adapter 5 Panel Connector Locking Tabs Align pins of cable connector plug and ArcReach Heater panel connector Connect ArcReach Heater extension cable to ArcReach Heater Lock tabs of p...

Page 22: ...known resistance is temporarily placed across the insulation path to trig ger the fault and prove that the insulation test circuit works This test is performed at power up and every time the run butt...

Page 23: ...ncluded connector A customer supplied power supply is required 5 7 Installing Preheat Insulation 1 2 3 Install preheat insulation before installing air cooled cable or air cooled quick wrap if tempera...

Page 24: ...e secured in place with a non con ductive strap or tape such as fiberglass reinforced tape Do not use metal straps or wire Installing Heating Cables A Locate the center of the heating cable B Route th...

Page 25: ...les in place Place insulation between cables and edge of part to prevent overheating the edge and damaging the cables C Series Adapter Installation Turn off heater output Use proper tools and or wear...

Page 26: ...25 3 2 30 9 30 9 30 9 1 5 12 7 30 9 30 9 30 9 2 5 1 30 9 30 9 30 9 2 5 6 4 30 9 30 9 30 9 3 7 6 30 9 30 9 30 9 3 5 8 9 30 9 30 9 30 9 4 10 2 30 9 30 9 30 9 5 12 7 30 9 30 9 30 9 6 15 2 30 9 30 9 30 9...

Page 27: ...he purpose of locat ing the cable leads cables are measured from cable end to cable end 2 Excess Leads Off Insulation Excess leads off of the insulation should be routed together or twist ed to preven...

Page 28: ...y additional thermocouple temp sensors on the workpiece to monitor temperature in accordance with the procedure QC require ments and or code requirements 6 ArcReach Heater Extension Cable 7 Thermocoup...

Page 29: ...under the heating wrap or cable S Before sliding the coils away from the joint press Stop on the ArcReach Heater to de energize the output S When the cables are slid away from the joint to maintain t...

Page 30: ...ep heating tool leads between ArcReach Heater extension cable and workpiece together to increase heating performance and minimize unintentional heating of nearby objects Position the quick wrap close...

Page 31: ...5 12 Installing Air Cooled Quick Wrap Continued 1 Air Cooled Quick Wrap 2 Housing Connectors 3 Housing Connector Latching Handle 4 Cinch Clip Latch 5 Cinch Clip 2 5 1 Ref 282308 A 1 4 Right Side Left...

Page 32: ...ket to protect from abrasion and spatter 1 Workpiece 2 Air Cooled Quick Wrap Place air cooled quick wrap on pipe to be heated 3 Housing Connectors 4 Latching Handle Align connector housings and fully...

Page 33: ...ater Extension Cable Nameplate 2 Single Tool w Horizontal Connections A single air cooled cable or air cooled quick wrap connects from A to B on the upper box 3 ArcReach Heater Series Adapter Nameplat...

Page 34: ...Adaptor 2 1 The quick wrap heating tool can be used one at a time or in pairs A single quick wrap is often used directly over a joint or on the end of a pipe Two quick wraps can be used to cover a wi...

Page 35: ...Heating Tool Lead 1A 6 Heating Tool Lead 2A Orient leads of heating devices as shown to keep cur rent flow in leads of nearby heating devices aiding The operating parameters in the quick wrap are affe...

Page 36: ...p Sensor 5 Weld Joint Place thermocouple temp sensor in contact with the metal being heated by the heating tool Place any additional thermocouple temp sensors on the workpiece to monitor temperature i...

Page 37: ...e Driven Welding Power Source Route thermocouple TC cables separate from heating cables leads to prevent interaction Works up to 200 ft 61 m away Do not disconnect cables during heating process Press...

Page 38: ...re LED for F When LED is illuminated the display will show a temperature value in F 8 Temperature LED for C When LED is illuminated the display will show a temperature value in C 9 Maximum Temperature...

Page 39: ...d a blue square is displayed TC Temperatures These boxes show the temperatures of all connected thermocouples The bar under each TC shows if it is CONTROL An unconnected TC will show NO SIGNAL if it i...

Page 40: ...set the time zone follow these steps 1 Press Menu 2 Highlight Time and Date by pressing Up Down Arrows 3 Press Select 4 The time and date screen is displayed 5 Press Up Down Arrows to highlight desir...

Page 41: ...be changed in the system settings screen 1 Press Menu 2 Highlight System Settings by pressing Up Down Arrows 3 Press Select 4 The system settings screen is displayed 5 Press Up Down Arrows to highlig...

Page 42: ...All connected TCs show a reading but only Control TCs affect the heating process 3 Press Temperatures to return to the Temperatures screen Changes are stored automatically At least one TC must be set...

Page 43: ...keout No Preconfigured Loaded Program w Parameters Screen 1 When on the temperatures screen press Bakeout to view the Bakeout menu 2 Press Up Down Arrows to select parameter to change 3 Press Decrease...

Page 44: ...t Temperature Screen Figure 7 7 Bakeout Heating No Preconfigured Loaded Program Screen B Bakeout Sequence Screen 1 2 3 4 Heating Screen Ramping Screen Soaking Screen Bakeout Complete Screen Figure 7 8...

Page 45: ...OM 281136 Page 39 Figure 7 9 Stop Recording Message Even though a preloaded program may not have been used the heat profile is still recorded and the data can be saved to a USB drive See Section 7 7...

Page 46: ...layed in the Details pane If the program contains bakeout information the Show Bakeout button is available Press Show Bakout to show bakeout information 3 Press Load Selected to load the highlighted p...

Page 47: ...if recording should be stopped Select Stop Recording to end the recording or Continue Recording to keep recording C Bakeout Loaded Program Figure 7 12 Bakeout Loaded Program 1 When on the Temperatures...

Page 48: ...wn Arrows to highlight Save Temperature Data and press Select Figure 7 14 Save Temperature Data Screen 3 Follow these steps to select each file to save To select individual files A Use the Up Down Arr...

Page 49: ...ess heat When one of the actual parameters reaches the heater limit value output is limited and the rest of the Actual parameters will be below the Heater Limit value System Limit In some situations u...

Page 50: ...some cases the amount of power going into a small amount of material may heat the part faster than the heat can transfer to the temperature sensor By the time the temperature sensor reads the target t...

Page 51: ...system using a USB drive To update the system a USB with a valid system software update file must be plugged in The version number of the current system is shown at the top of the screen If the USB d...

Page 52: ...ault History screen To view details of a specific fault select it by pressing Up Down Arrows then press Show Detail This will display detailed information about the selected fault including guidance t...

Page 53: ...nical information that may be useful for troubleshooting technical support and service Nothing on this screen can be edited 7 13 About Screen Figure 7 22 About Screen The About screen displays informa...

Page 54: ...isted below https www millerwelds com support software arcreach heater software S From the download page click on Download ArcReach Heater Data Application Figure 7 23 Launch Application Screen Micros...

Page 55: ...prompts to install the application S Press Finish to close the install program window Figure 7 25 Install Wizard Screen S The ArcReach Heater data program will open automatically after install Figure...

Page 56: ...ameters if configured for the joint to be heated This setup file is transferred to the ArcReach Heater using a 32GB max USB memory stick Temperature Chart This feature allows a user to view temperatur...

Page 57: ...on the Required check box next to the field Technician The Technician field can be used to enter the name of the person performing the heating This field is not required to create a setup file The use...

Page 58: ...igure 7 29 ArcReach Heater Joint Setup Screen Joint Identifier Information The Joint identifier 1 2 3 fields are used to enter information regarding the joint to be heated The names of these fields ar...

Page 59: ...field names for new joint setup files will not be changed unless they are updated in the setup screen S The fields can be modified and the modified file can be saved f Press Save File to save the file...

Page 60: ...ension s used to heat the joint S Tool Type The tool type air cooled cable or quick wrap used to heat the joint S Temperature Files The name of the file s that are included in this heating data file f...

Page 61: ...severe conditions Disconnect power before maintaining A ArcReach Heater n Check Z Change Clean Repair l Replace To be done by Factory Authorized Service Agent Daily nl Labels Every 3 Months n lCables...

Page 62: ...OM 281136 Page 56 SECTION 10 ELECTRICAL DIAGRAMS Figure 10 1 Circuit Diagram For ArcReach Heater 276180 A...

Page 63: ...Notes Securely connect work clamp to a clean area close to the weld joint Welding Tip...

Page 64: ...TM 188 304 Page 58 Invision 354MP Notes...

Page 65: ...auge 063 in 22 Gauge 031 in 24 Gauge 025 in 20 Gauge 037 in 18 Gauge 050 in 14 Gauge 078 in 1 8 in 125 in 3 16 in 188 in 1 4 in 25 in 5 16 in 313 in 3 8 in 375 in 1 2 in 5 in MATERIAL THICKNESS REFERE...

Page 66: ...semblies TIG Torches No Labor Tregaskiss Guns No Labor Water Cooling Systems Wireless Remote Foot Hand Controls and Receivers Work Stations Weld Tables No Labor 5 6 Months Parts Batteries 6 90 Days Pa...

Page 67: ...h your personal records Always provide Model Name and Serial Style Number Contact a DISTRIBUTOR or SERVICE AGENCY near you Welding Supplies and Consumables Options and Accessories Personal Safety Equi...

Reviews: