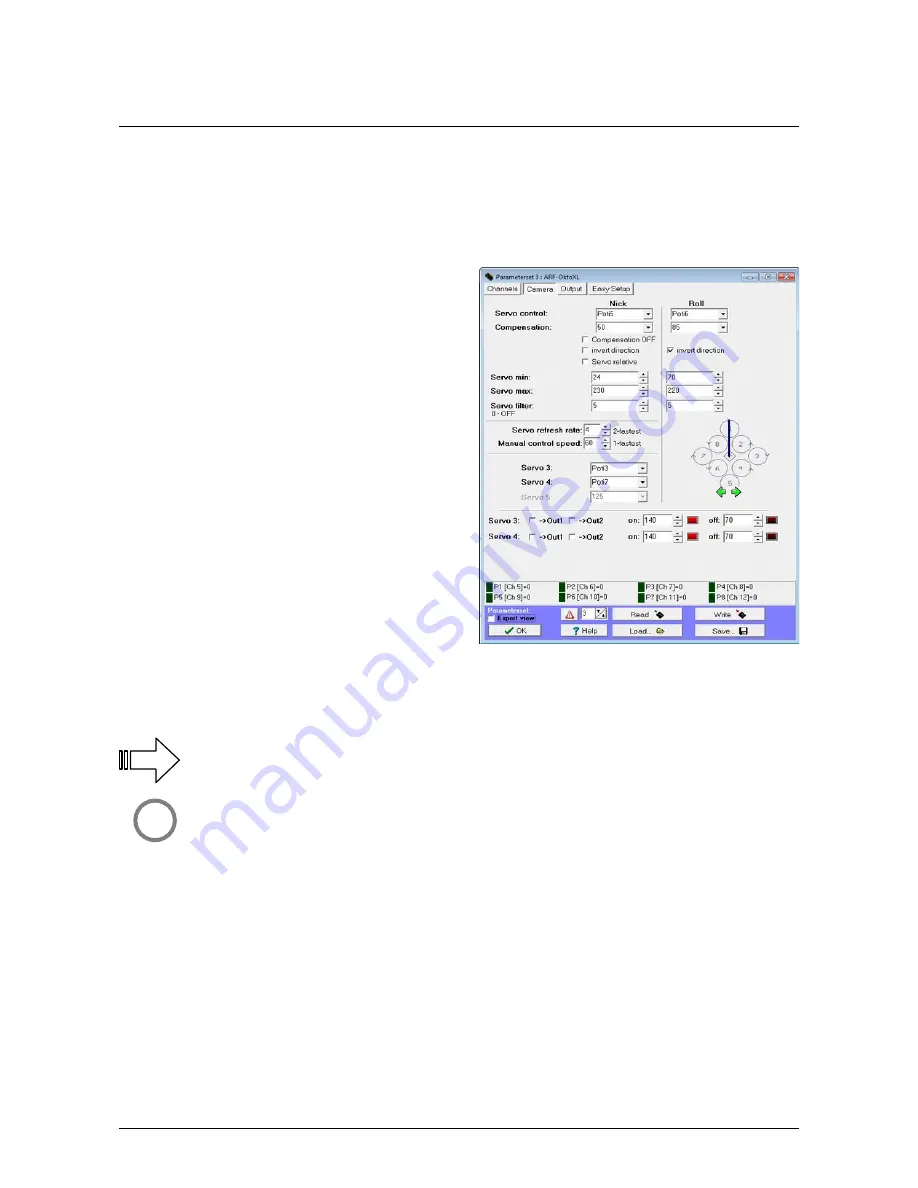
Step 7: Testing the camera mount
If an optional camera mount has already been installed, it should be tested now.
Otherwise please skip this step and continue with „Step 8“.
The Servos from a connected camera mount are automatically controlled from the FlightCtrl.
In this way the camera mount is always held in balance during the flight. Additionally the camera mount can be adjusted
via the transmitter.
Through a „Click“ on the tab „
Camera
“, you can switch into
the corresponding window.
Under „Servo Control“, „Nick“ and „Roll“ there will be „Poti5“
and „Poti6“ displayed for manual control of the camera
mount.
If the assigned potentiometer on the transmitter will be
moved now, there will be no reaction at this time.
The camera mount will start moving after the gyroscopes of
the MikroKopter are calibrated (Pg. 35).
After the calibration of the Gyros the
ARF-MikroKopter
will „beep“ and the servos of the camera mount will adjust .
Now the camera mount can be moved through Nick- and Roll direction via the two assigned potentiometer on the
transmitter.
If the
ARF-MikroKopter
moves, the camera mount automatically adjusts to that tilt.
If the camera mount is not moving you should check wether the Servo plug is fully inserted and also in the
correct polarity.
HiSystems GmbH Page 31
info
info
!
Summary of Contents for OktoXL
Page 1: ...ARF MikroKopter OktoXL OktoXL 6S12 Instruction manual...
Page 2: ......
Page 15: ...Final Assembly First Test Flight HiSystems GmbH Page 11...
Page 30: ...Settings Functions opt Accessories Maintenance Troubleshooting Page 26 HiSystems GmbH...
Page 50: ...Transmitter assignment Graupner MX 20 Assignment Page 46 HiSystems GmbH...
Page 51: ...Transmitter assignment Graupner MC 20 Assignment HiSystems GmbH Page 47...
Page 52: ...Transmitter assignment Graupner MC 32 Assignment Page 48 HiSystems GmbH...


