


34
●
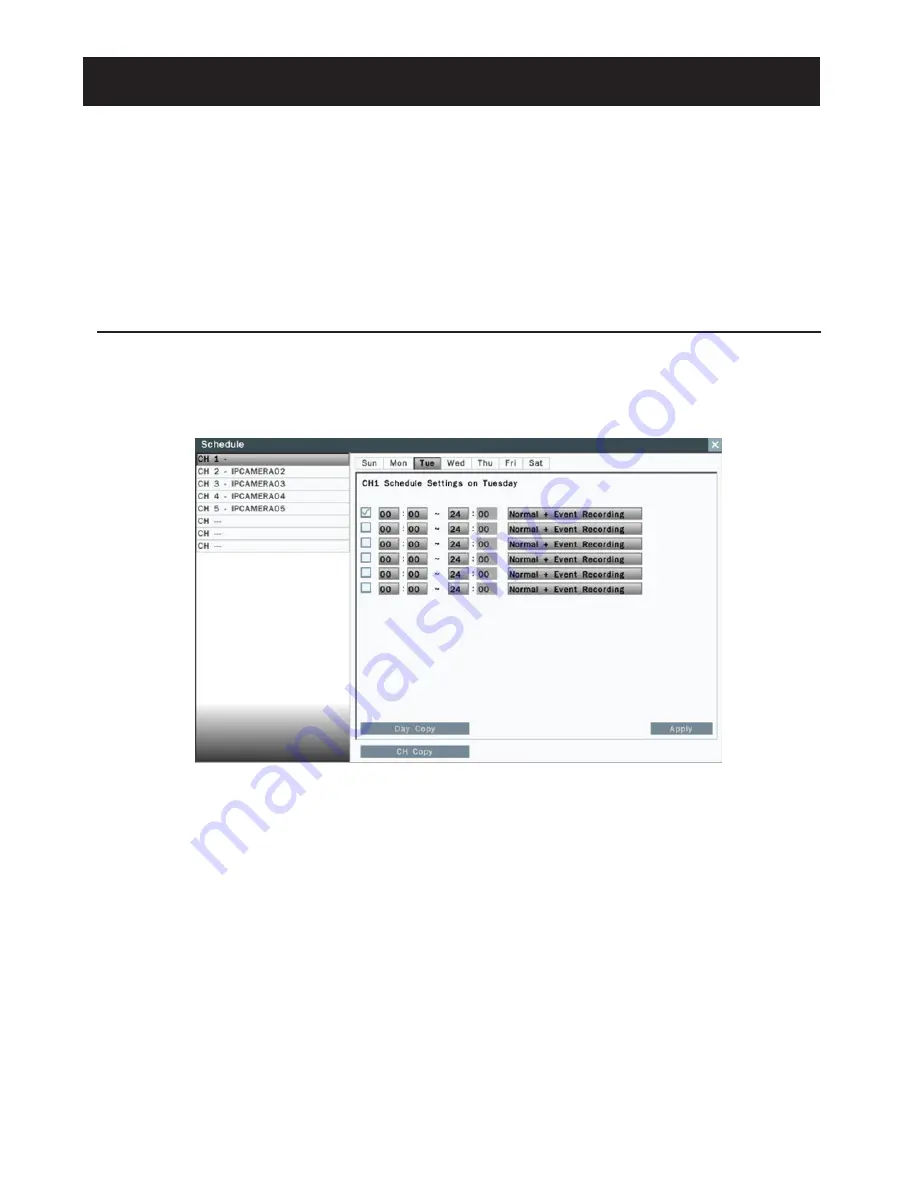
To setup schedule, select the
channel
from the left column, the recording option for the channel will be shown in the
right column.
●
Click on the day(Sun ~ Sat) user would like to set schedule, check in the column to enable the timelines and select the
recording behaviors. User can configure multiple timelines for each day.
●
Click
Day Copy
to select the day user would like to copy to.
●
Click
CH Copy
to allow user to copy the settings of the whole week from one channel to other channels.
●
Click
Apply
to save the changes.
4 Recording
NVR is set to continually record once the system startup. NVR supports the following recording mode.
●
Continuous recording: By default, all channels are enabled with continuous recording.
●
Event recording: NVR can be configured to record event only when motion or video loss or alarm is detected. When
motion of IP camera is detected, the motion icon (M) appears in the channel and NVR will start to record. When video
loss of IP camera occurs, the Video loss icon (V) appears in the channel and NVR will start to record. When external alarm
device is triggered, the alarm icon (A) appears in the channel and NVR will start to record.
4.1 Schedule Recording Settings
In the Camera-Schedule sub menu, user can define the recording schedule and recording behavior for each individual
channel in the below page.


