41
1.8.5 Write Blog & WebDisk File Link
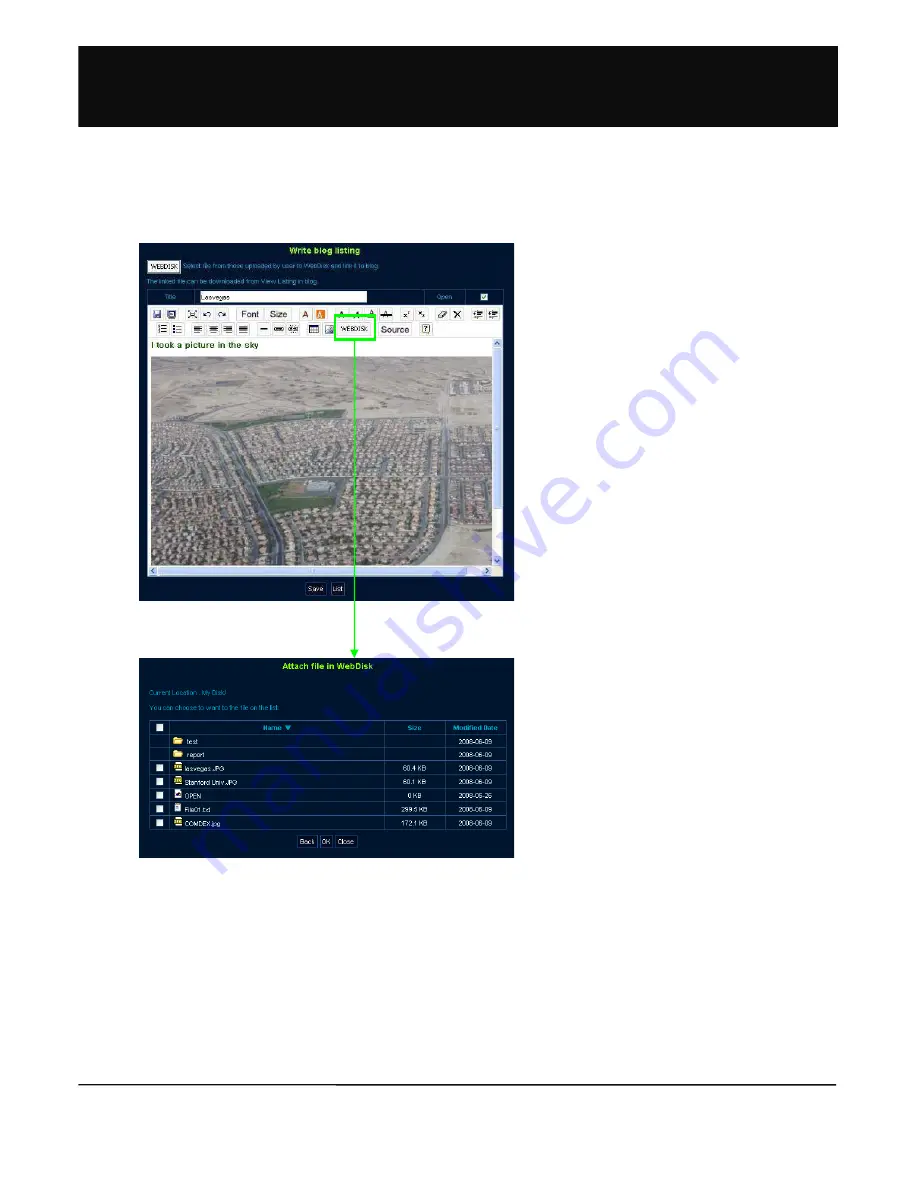
1. Click ‘WebDisk File Link' button at the top of
posting list page to open a page to write a new
listing.
2. Title and contents of posting can be entered. Also,
open status can be selected.
3. Click 'Webdisk' icon in web editor icon to link the
files in Webdisk.
4. Title can be entered with as many as 200
characters.
5. Contents of posting can be decorated with html
editor by using font size, color, alignment and
insert table, etc.
6. Click 'Save' button to list posting.
1.
‘Webdisk File link’
links file in Webdisk and
displays it in blog posting.
2. When clicked, window opens to display the list of
files in Webdisk.
3. File list shows file name, size and modified date.
When clicking column name, the files are aligned in
the corresponding column in a list.
4. When clicking directory, contents of the
corresponding directory are redistributed to the list.
5. When clicking 'back' button, you will move to the previous list page.
6. Select file and click 'OK' button.
7. When validity test is completed, the file is linked and distributed to web editor of the corresponding file.
8. When file link is completed, multimedia files (WMA, MPG, AVI and MP3, etc.) are played with Windows Media Player. Graphic
files (BMP, GIF, JPG, PCX and PSD, etc.) are displayed as of the image. For other files, the linked file names are displayed to
enable downloading of the files.
!%#>


