COPYRIGHT © 2004 MARTIN DOOR
22
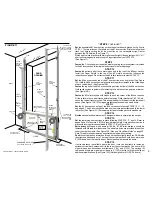
WOOD DOOR NOTES:
_
_
_
_
_
_
_
_
_
1.
2.
3.
4.
5.
6.
7.
8.
9.
10.
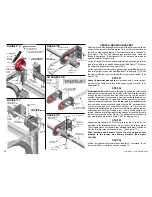
#1 ROLLER
BRACKET
HINGES FASTEN
FACE DOWN INTO
GROOVE ON
WOOD DOOR
PILOT DRILLED
1/8” HOLES
1/4” X 1” THREAD
FORMING SCREWS
TONGUE
WOOD DOOR SECTION
Screws are required
to lock-on bottom roller brackets.(See FIGURES 3A and 4B)
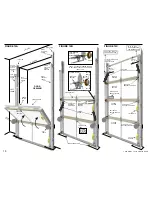
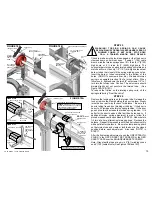
All low profile hinges
fasten “face down” into grooves provided. All #1, #2, #3 etc. end roller
brackets should be fastened with 4 thread forming screws.
Doors to 10’2”(3100)
wide, with 4”(102) cable drums, OK for 12”(305) clearance or 8”(205),
4
1/4
”(108), 2
(See drawings this page)
1/4
”(64), low clearance tracks.
Doors over 10’2”(3100)
wide, with 4”(102) cable drums, OK for 12”(305) clearance or 8”(205)
low clearance tracks.
A.
Doors to 10’2”(3100)
wide are furnished with 5 hinges per section joint (single end hinges
and roller brackets).
B.
Doors over 10’2”(3100)
to 15’2”(4620) wide are furnished with 9 hinges per section joint
(double end hinges and roller brackets).
C. Doors over 15’2”(4620)
to 18’2”(5540) wide are furnished with 11 hinges per section joint
(double end hinges and roller brackets).
A. Doors to 10’2”(3100)
wide do not have struts.
B.
Doors over 10’2”(3100)
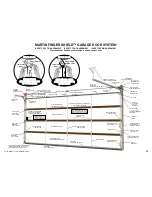
to 14’2”(4320) wide are furnished with three 3”(76) ”U” struts for 4
section high doors. One strut top of top section, one strut for bottom of bottom section and
one strut installed on lower half of hinges across center of door. Four struts are furnished for
5 section high doors etc. (See FIGURE 6)
C. Doors over 14’2”(4320)
wide are furnished with five 3”(76) ”U” struts for 4 section high
doors, fastened same as “B” above, plus extra struts are installed on lower half of hinges at
all section joints. Six struts are furnished for 5 section high doors etc. (See FIGURE 6)
Doors
have received water resistant treatment. We recommend painting or staining complete
door before installation. If door is installed first, paint or stain door in closed position only (
DO
NOT
paint inside finger shield joints unless painting was done before installation). A
professional painter can stain the various unmatched colors of the wood door to match, as well
as, stain the door to simulate most any other type wood. It is normal for wood to check, crack,
split, warp, swell and shrink. Wax inside joints etc, only after door has been painted or stained.
Expect light or dark colored fillers and glue residue, which should be finished by the painter.
Fasten
owners instruction packet to #3 door section with screws provided.
Bond
the Martin
logo firmly to the outside bottom corner of the door.
Warning:
The small air spaces visible on each side of the door are required for the Finger
Shield Joint design and must not be sealed. (See drawings this page.)
E
E
E
E
E
E
E
E
TM
TONGUE
FINGER SHIELD JOINT
TM
WOOD DOOR SECTION
WOOD DOOR SECTION
INSIDE
AIR
SPACE
HINGES FASTEN
FACE DOWN INTO
GROOVE ON
WOOD DOOR
HINGE PIVOT
TONGUE
FINGER
SHIELD
JOINT
TM
WOOD DOOR SECTION
WOOD DOOR SECTION
INSIDE
HINGES FASTEN
FACE DOWN INTO
GROOVE ON
WOOD DOOR
HINGE PIVOT
DOOR JAMB
DOOR JAMB


