Mackie DL806 and DL1608 Reference Guide
96
Step 2 — Name the show:
Each new show begins as “unnamed”. However, with multiple shows,
trying to find the exact “unnamed” show that you want could prove to be difficult, to say the least.
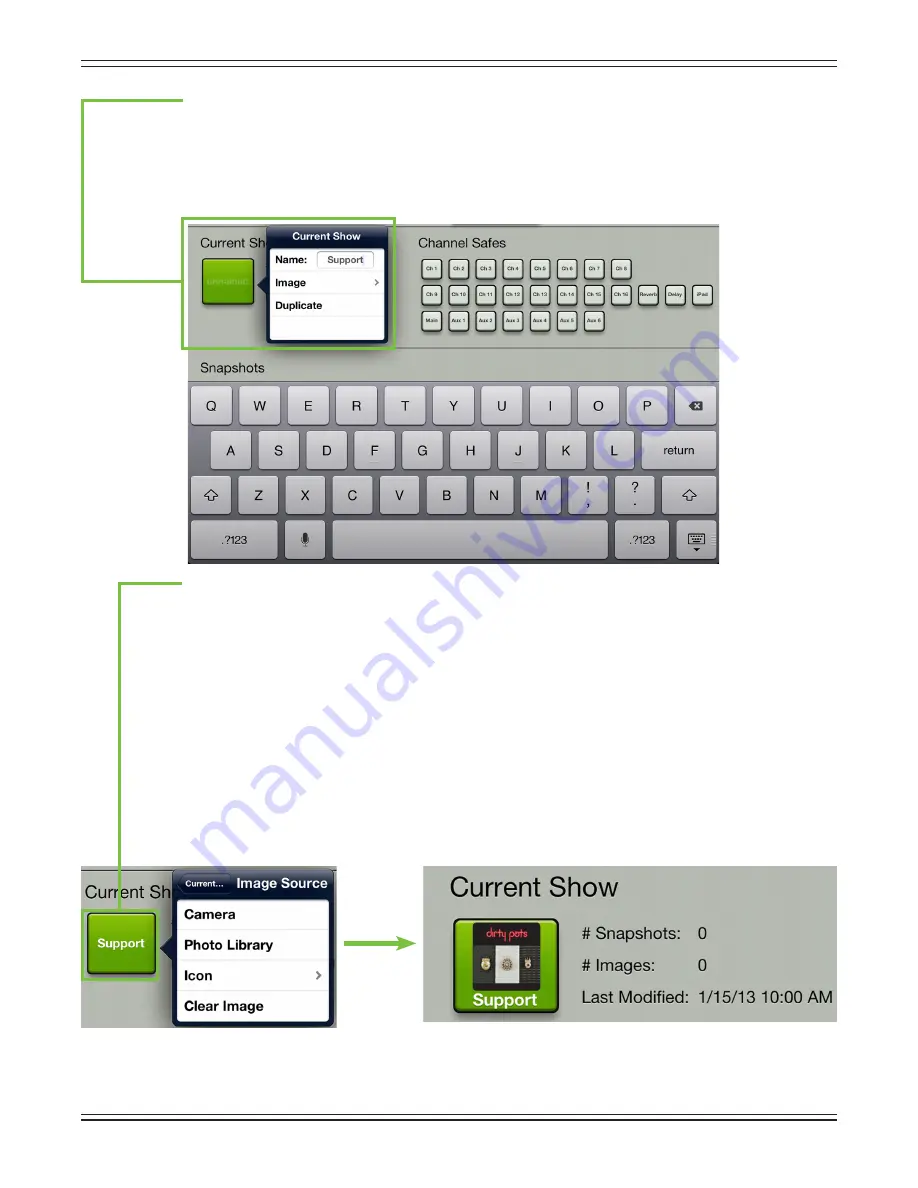
So let’s name it. Tap the green “unnamed” button to reveal a popover, as seen below.
Tap inside of the blank “Name:” box to reveal the onscreen keyboard, then name the currently selected
show as you so desire. Tap the “return” key when satisfied with the name. If the name is too long to
fit, the button scrolls, displaying the entire name.
Step 3 — Looks are everything:
Looks are everything...or so I’ve heard. Let’s say the mixer is on tour
where the support act and headliner may change on any given night. It’s not far from the realm of
possibilities and happens more often than folks might think. Therefore, it might be helpful to not just
name the show, but also select an image, so as not to open the wrong show...oops! Tap the show button
to reveal the popover again. This time, instead of naming the show, tap “Image” instead to reveal a new
popover, as seen below. You will be presented with three choices:
Camera
—
If you’re familiar with how the camera on the iPad works, then you’re in luck...this
one works the exact same way! The encircled camera icon in the middle of the gray bar snaps
the picture and the icon in the upper-right corner selects between the front and back camera
on the iPad. [Camera is unavailable on the first generation iPad].
Photo Library
—
Here you may select from all the photos that currently reside on your iPad.
Icon
—
Or select from a multitude of built-in icons at your disposal.
Clear Image
—
Believe it or not, tapping here will clear the image for the show.
As you can see in the example above, Dirty Pots are the support act, so we snagged their album cover
from the photo library. Notice that the show now says “Support” instead of “unnamed”. Also, each show
is date and time-stamped; it will display the number of snapshots and images used in each show, as well.


