D8B Manual • Chapter 3 • page 60
or on the panel) or to radio button (only one
allowable at a time).
If solo latch is not set (no check mark), multiple
solos may be manually latched by either:
1) Pressing and holding another solo switch, while
initiating more solos, or pressing multiple solos
at one time.
2) Pressing and holding [Shift], while initiating
more solos.
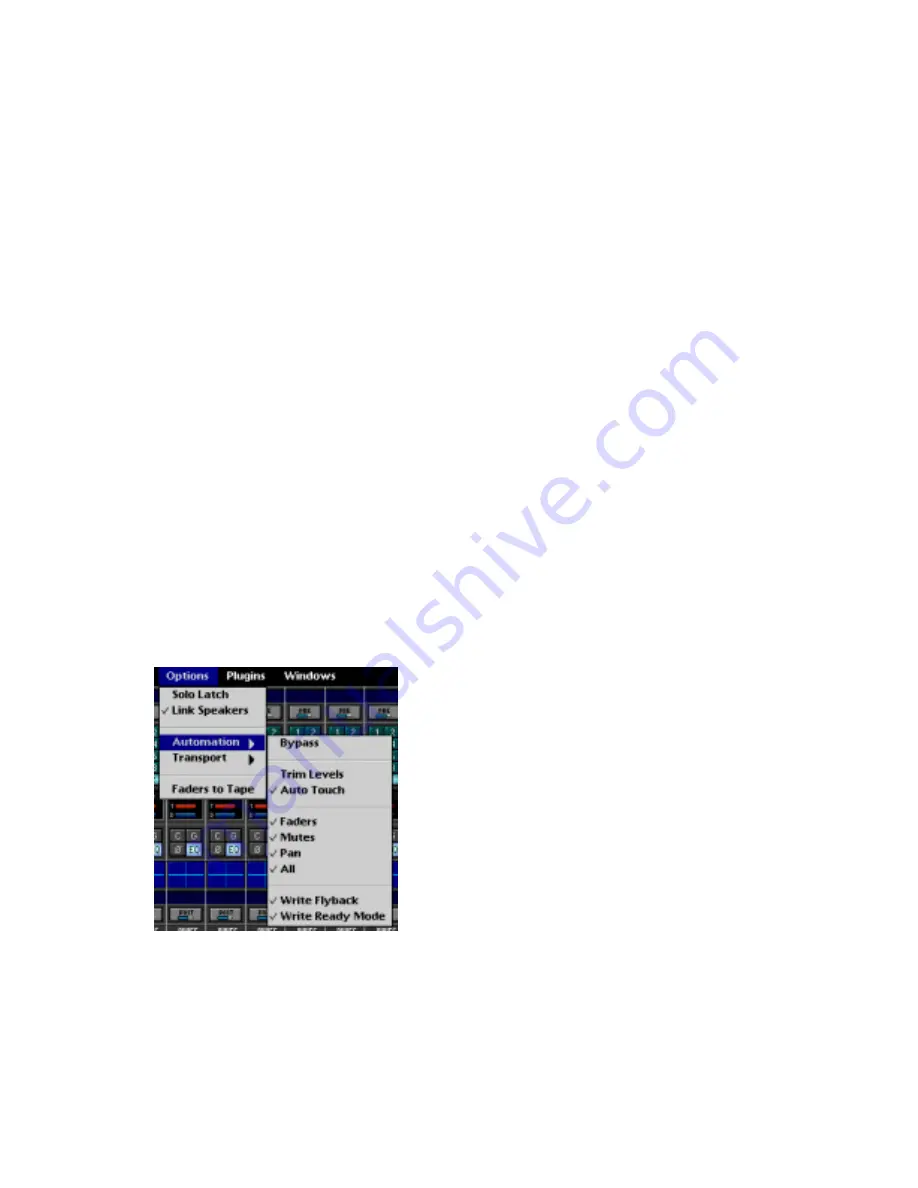
Link Speakers
• Links the Near Field and Main speaker levels
• Changing the speaker level when either speaker
set is selected changes the level on the other set.
• Hold Shift on the control surface or keyboard
while adjusting the speaker level to create an
offset between the speaker levels. This is a
convenient way to match monitor levels between
speaker systems while still linking the overall
volume changes.
• Hold Ctrl while adjusting Speaker Level to delete
the offset.
Faders to Tape
• Direct out levels (Level to Tape) from the tape out
follow the sourced channels’ faders. For example,
if channel 12 is assigned to direct out 24,
adjusting channel 12’s fader directly affects the
tape output level.
• Switch this off for independent Level to Tape
settings.
Automation Sub-menu
Bypass
• With this command selected (Bypass button lit in
the Automation section), automation data is
neither recorded or played back
• With this command deselected (no light), all
write-selected parameter adjustments are written
into automation data and referenced to time code.
Trim Levels
• This mode sets all faders to unity position and
assigns all parameter controls (except mutes) to
globally add or subtract from existing settings and
recorded moves.
• This is perfect for raising or lowering a complete
set of moves.
• For example, if the vocal track automation is
perfectly crafted and structured, yet the entire
track needs to come up a couple dB in the mix,
fear not. Select Trim Levels, start time code, enter
WRITE mode, and, with one move, increase vocal
track fader 2 dB, throughout the duration of the pass.
Note:
Trim Levels automation writes linked
parameters independently on linked channels.
Auto Touch
• Called AUTO TOUCH on the control surface.
• Readies all selected automation parameters to enter
write mode the instant the parameter is adjusted.
• As soon as a selected channel parameter is altered,
the channel strip enters write mode for the
adjusted parameter. However, adjustments of
parameters that haven’t be selected for automation
in the onboard AUTOMATION or Automation Menu
do not cause the channel to enter write mode.
Faders
• This readies the automation computer to record
all fader movements for any write-selected channel.
Mutes
• This action readies the automation computer to
record all mute activity.
Pan
• This readies the automation computer to record
all Pan movements for the write-selected channels.
• All surround pans are recorded as well as L/R
positioning. However, surround output, depth of
center, and LFE assignments are not written with
this selection.
All
• Sets the automation computer to record all
parameter changes for the write selected
channels, other than the individually selectable
FADERS, MUTES, and PAN.
Write Flyback
• This controls what happens to the parameter
levels upon punch-out of automation record.
• With Write Flyback selected, each parameter
recorded into automation returns to its previously
adjusted status at the end of a record pass. A
track that was off for an entire arrangement snaps
back to off, after the level is increased, when
punched out of record.
• When Write Flyback mode is not selected,
parameter adjustments in automation remain at
their last user-adjusted setting, even after the end
of the automation pass.
Summary of Contents for D8B 3.0
Page 8: ...D8B Manual Preface page 2 ...
Page 9: ...D8B Manual Chapter 1 page 3 Chapter 1 Getting Ready ...
Page 27: ...D8B Manual Chapter 2 page 21 Chapter 2 Where Is It ...
Page 47: ...D8B Manual Chapter 3 page 41 Chapter 3 What s On TV ...
Page 93: ...D8B Manual Chapter 4 page 87 Chapter 4 Applications ...


