


Chapter 3 IE Connection
Gateway:
192.168.226.1
HTTP:
80
Data
port:
9008
The first you used the network speed dome, you should connect the device with the above
default settings.
Step 1:
Manual setup the IP address of the PC, the network segment should be as same as the
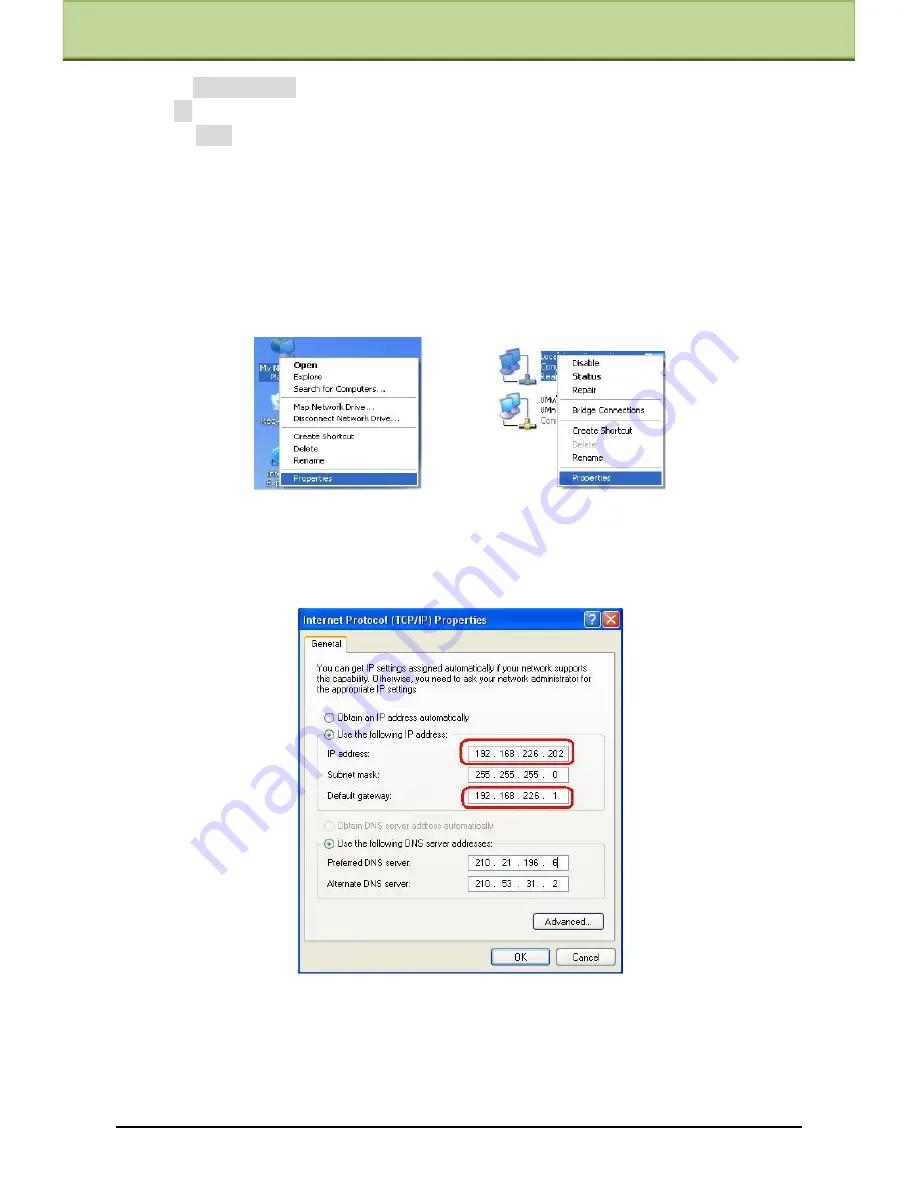
default settings of IP-CAM. Right click ―My Network Places‖ icon on the desktop and then
select ―Properties‖ as shown in the left figure. Right click ―Local Area Connection‖ at the
popup window, followed by selecting ―Property‖ as shown in the right figure.
Select ―Internet Protocol (TCP/IP)‖ in the ―General‖ tabs. Then click ―Properties‖ to
manual input network address information of the PC in the pop up window. Refer to the
following figure:
Step 2:
Open the IE Browser and input the default address of IP-CAM and confirm. Then the
IE browser will download Active X control automatically.
Step 3:
After downloading Active X control, the login dialog box will pop up as below:
Step 4:
Input user name and password in the login dialog box and click ―OK‖ button to enter
into the live interface. You can manage and setup the IP-CAM, such as change IP address etc.
IP-CAMERA User Manual -
8