Chapter 11 Monitoring
11-65
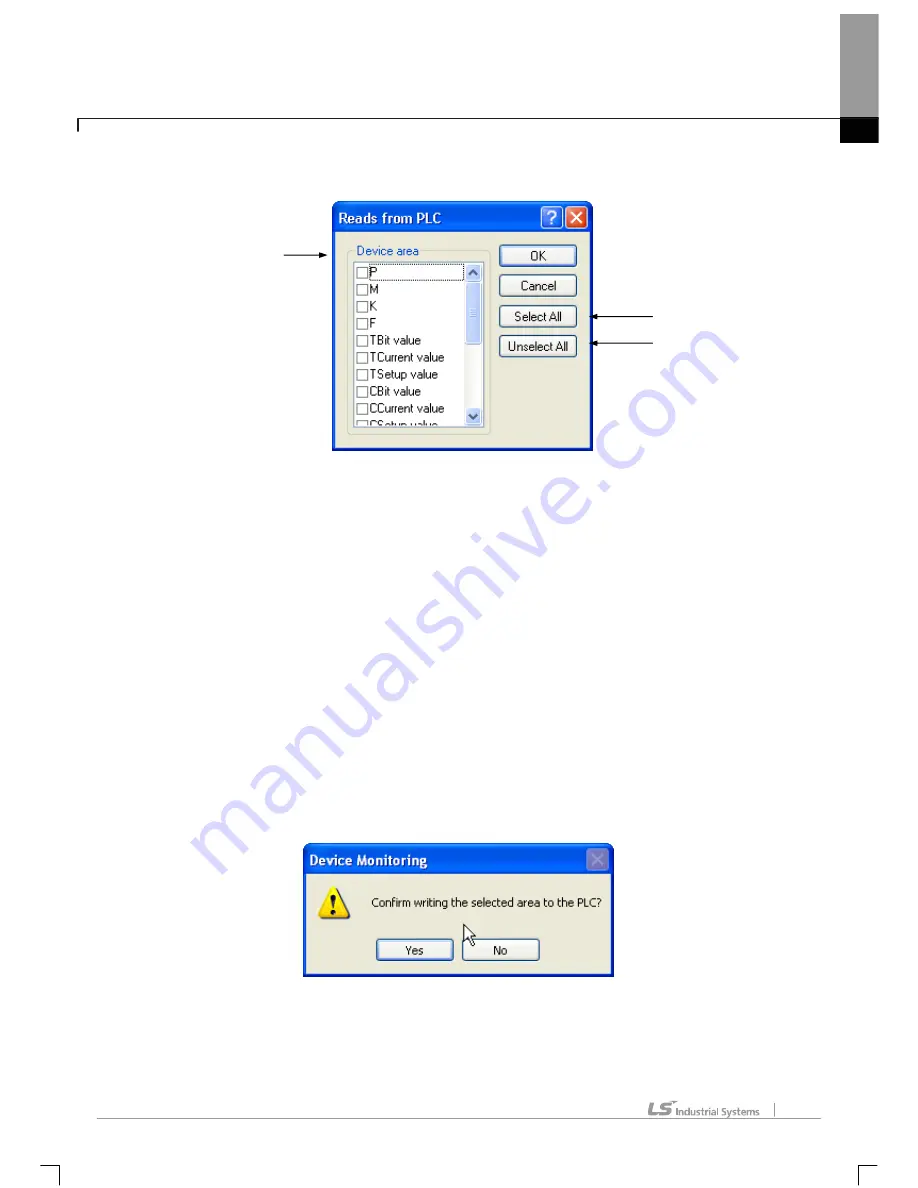
[Dialog Box]
[Description of Dialog Box]
a. Device Area: used to display the list of the devices to read from PLC.
b. Select All: used to select all the devices in the device area.
c. Unselect All: used to cancel all the devices selected in the device area.
11.5.11 Write Selected Area on PLC
It is used to write the device data in the selected area on PLC connected.
[Steps]
1. Select the area to write on PLC.
2. Select [PLC]-[Write Selected Area to PLC] on the menu.
3. A message will be called to ask if you want to write the selected area on PLC.
4. Write the selected area on PLC.
a
b
c
Summary of Contents for XG5000
Page 24: ...Chapter 1 Introduction 1 8 11 Wait a second for the installation to be complete...
Page 55: ...Chapter 2 Basic Application 2 19...
Page 62: ...Chapter 2 Basic Application 2 26...
Page 129: ...Chapter 4 Variable 4 15...
Page 131: ...Chapter 4 Variable 4 17...
Page 154: ...Chapter 4 Variable 4 40 Global variable item All Global variable item General Variable...
Page 155: ...Chapter 4 Variable 4 41 Global variable item special module related variable...
Page 166: ...Chapter 4 Variable 4 52...
Page 168: ...Chapter 4 Variable 4 54...
Page 172: ...Chapter 4 Variable 4 58 Global variable item All Global variable item General Variable...
Page 173: ...Chapter 4 Variable 4 59 Global variable item special module related variable...
Page 182: ...Chapter 4 Variable 4 68 Notes If no cell is selected Delete Line will not be executed...
Page 198: ...Chapter 4 Variable 4 84...
Page 200: ...Chapter 4 Variable 4 86...
Page 204: ...Chapter 4 Variable 4 90 2 Select Project Save Variable Names to File Dialog box a b d e c...
Page 257: ...Chapter 5 LD Edit 5 47...
Page 298: ...Chapter 6 SFC Edit 6 34 6 Utilize SFC split window With split window Without split window...
Page 317: ...Chapter 7 Programming Convenience 7 4...
Page 406: ...Chapter 10 Online 10 12 z Check if the status of PLC is normal...
Page 429: ...Chapter 10 Online 10 35 Dialog Box a b c d f i e h k g j l...
Page 531: ...Chapter 11 Monitoring 11 59...
Page 532: ...Chapter 11 Monitoring 11 60...
Page 543: ...Chapter 11 Monitoring 11 71...
Page 575: ...Chapter 11 Monitoring 11 103 Dialog Box a c d b e...
Page 600: ...Chapter 12 Debugging 12 8 1 Select Debug Step Into on the menu...
Page 602: ...Chapter 12 Debugging 12 10 Sequence 1 Select Debug Step Out on the menu...
Page 604: ...Chapter 12 Debugging 12 12...
Page 611: ...Chapter 12 Debugging 12 19...
Page 668: ...Chapter 17 ST Edition 17 5 2 Select ST as Language in theAdd Program window...
Page 689: ...Chapter 17 ST Edition 17 26 2 Press TAB 2 Outdent 1 Select area to make outdent...
Page 690: ...Chapter 17 ST Edition 17 27 2 Press Shift TAB...


