Chapter 1 Introduction
1-6
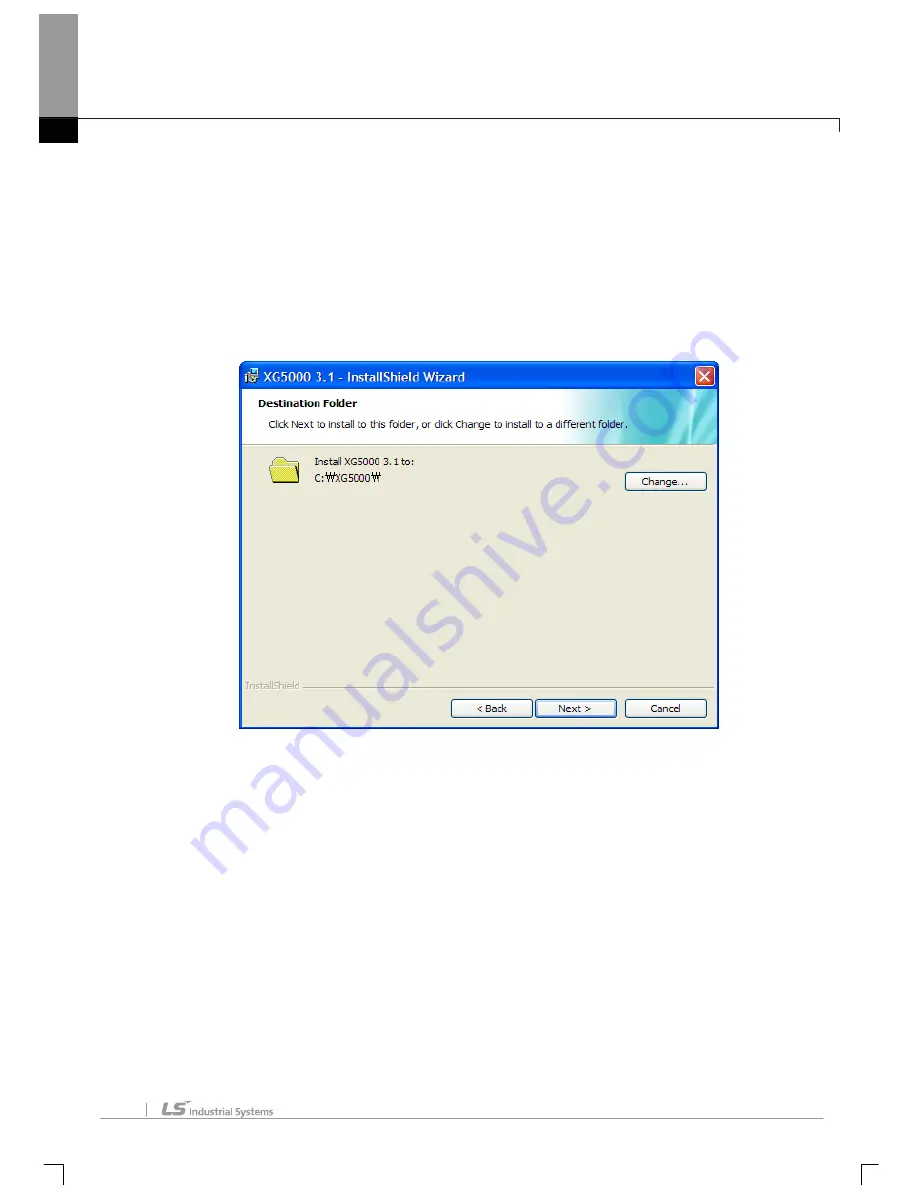
6. Select a folder to install XG5000 into. If you want to change the folder, click Browse… button and
make or select a new folder. XG5000 needs about 30M Bytes of installation space in hard disk,
which will ask you to select a disk with enough capacity. If the installation space is not enough, a
warning message will be displayed to make the following progress unavailable.
7. After a folder is selected, click [Next] button.
Summary of Contents for XG5000
Page 24: ...Chapter 1 Introduction 1 8 11 Wait a second for the installation to be complete...
Page 55: ...Chapter 2 Basic Application 2 19...
Page 62: ...Chapter 2 Basic Application 2 26...
Page 129: ...Chapter 4 Variable 4 15...
Page 131: ...Chapter 4 Variable 4 17...
Page 154: ...Chapter 4 Variable 4 40 Global variable item All Global variable item General Variable...
Page 155: ...Chapter 4 Variable 4 41 Global variable item special module related variable...
Page 166: ...Chapter 4 Variable 4 52...
Page 168: ...Chapter 4 Variable 4 54...
Page 172: ...Chapter 4 Variable 4 58 Global variable item All Global variable item General Variable...
Page 173: ...Chapter 4 Variable 4 59 Global variable item special module related variable...
Page 182: ...Chapter 4 Variable 4 68 Notes If no cell is selected Delete Line will not be executed...
Page 198: ...Chapter 4 Variable 4 84...
Page 200: ...Chapter 4 Variable 4 86...
Page 204: ...Chapter 4 Variable 4 90 2 Select Project Save Variable Names to File Dialog box a b d e c...
Page 257: ...Chapter 5 LD Edit 5 47...
Page 298: ...Chapter 6 SFC Edit 6 34 6 Utilize SFC split window With split window Without split window...
Page 317: ...Chapter 7 Programming Convenience 7 4...
Page 406: ...Chapter 10 Online 10 12 z Check if the status of PLC is normal...
Page 429: ...Chapter 10 Online 10 35 Dialog Box a b c d f i e h k g j l...
Page 531: ...Chapter 11 Monitoring 11 59...
Page 532: ...Chapter 11 Monitoring 11 60...
Page 543: ...Chapter 11 Monitoring 11 71...
Page 575: ...Chapter 11 Monitoring 11 103 Dialog Box a c d b e...
Page 600: ...Chapter 12 Debugging 12 8 1 Select Debug Step Into on the menu...
Page 602: ...Chapter 12 Debugging 12 10 Sequence 1 Select Debug Step Out on the menu...
Page 604: ...Chapter 12 Debugging 12 12...
Page 611: ...Chapter 12 Debugging 12 19...
Page 668: ...Chapter 17 ST Edition 17 5 2 Select ST as Language in theAdd Program window...
Page 689: ...Chapter 17 ST Edition 17 26 2 Press TAB 2 Outdent 1 Select area to make outdent...
Page 690: ...Chapter 17 ST Edition 17 27 2 Press Shift TAB...


